Advertisement
If you have a new account but are having problems posting or verifying your account, please email us on hello@boards.ie for help. Thanks :)
Hello all! Please ensure that you are posting a new thread or question in the appropriate forum. The Feedback forum is overwhelmed with questions that are having to be moved elsewhere. If you need help to verify your account contact hello@boards.ie
Please note that it is not permitted to have referral links posted in your signature. Keep these links contained in the appropriate forum. Thank you.

https://www.boards.ie/discussion/2055940817/signature-rules
Hi there,
There is an issue with role permissions that is being worked on at the moment.
If you are having trouble with access or permissions on regional forums please post here to get access: https://www.boards.ie/discussion/2058365403/you-do-not-have-permission-for-that#latest

DIY alloy wheel repair? Is it a good idea?

  • 08-05-2009 7:51pm
    #1
    Registered Users, Registered Users 2 Posts: 10,992 ✭✭✭✭


    So well today I took the plunge and bought all my required equipment so to speak.

    Its a B6 audi a4 with the 5 spoke Rims that came with the sport model so it wasnt too hard to sand etc but Im not entirely sure I did it right.

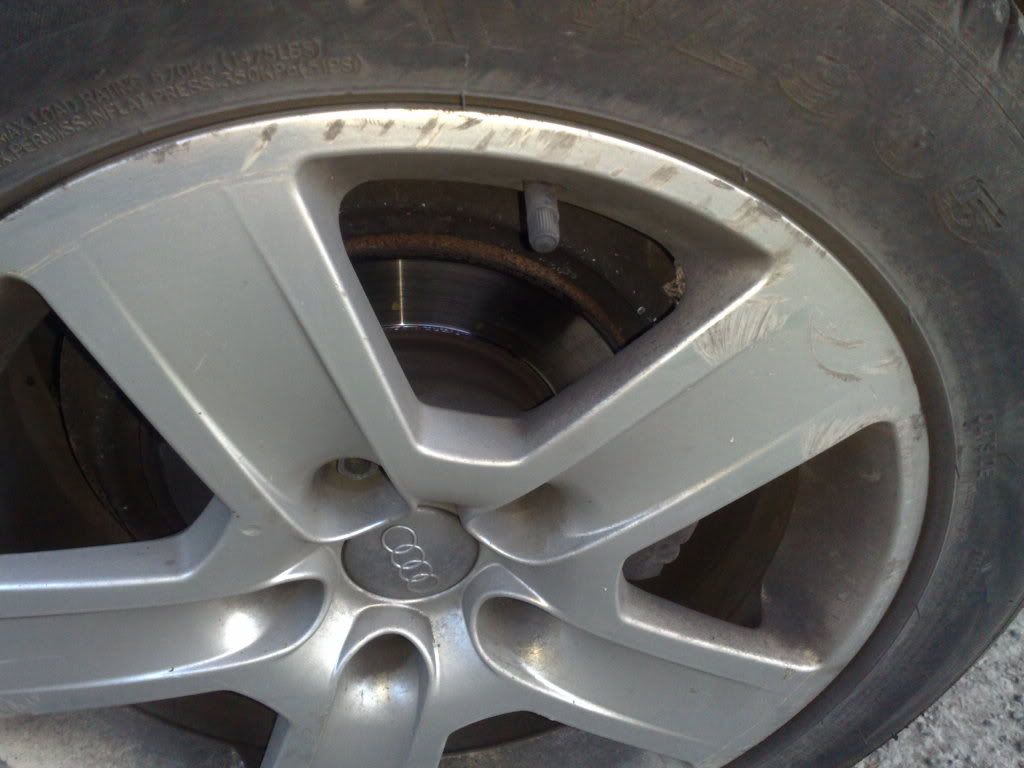
    This is my Dad's car, All 5 wheels are completely kerbed to bits even near the centre(Dont ask me how that happened lol) They are so badly stone chipped there is not one spoke without stone chips. The kerbing is about 3mm at the worst spot I'd say.

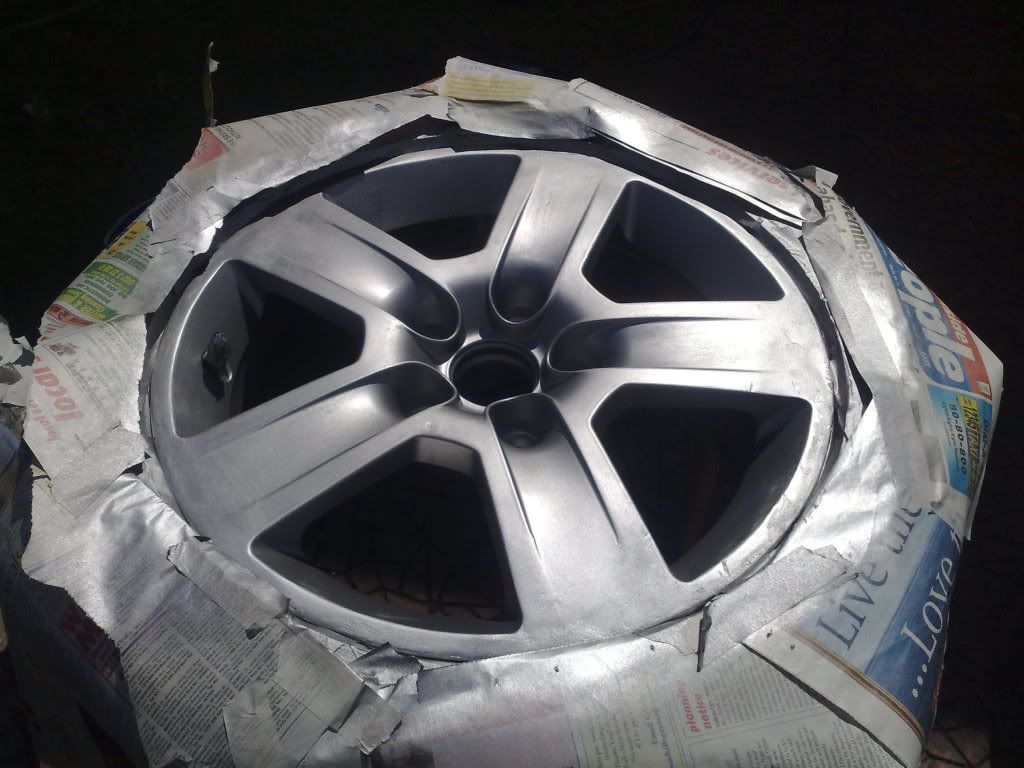
    First of all I masked off the tyres, gave it a good wash, got rid of all the brake dust. Stuffed the spokes with newspaper to stop it getting on the brakes.

    I started off by sanding down the kerbing and damage (Basically nearly the entire wheel), Then I filled the damage with some filler, then I sanded it down, sprayed a coat of Silver Wheel trim paint on and seen how badly I sanded it, It was extremely rough and bumpy so I sanded it down again with fine sandpaper for nearly an hour and gave it another coat of wheel spray paint. It was looking reasonable now, So I started patting down some dripping paint to keep it smooth and nice. I then sprayed on clear lacquer (after 15 mins or so from the final paint coat). I let that dry then well I took these photos.

    Im not really that happy with it, its a million times better than before anyways but just so I can do the next 4 wheels properly, Does anyone have any tips for me to do the other 4 wheels.

    (Im only 15 and its my first try so dont go too hard on me:D)


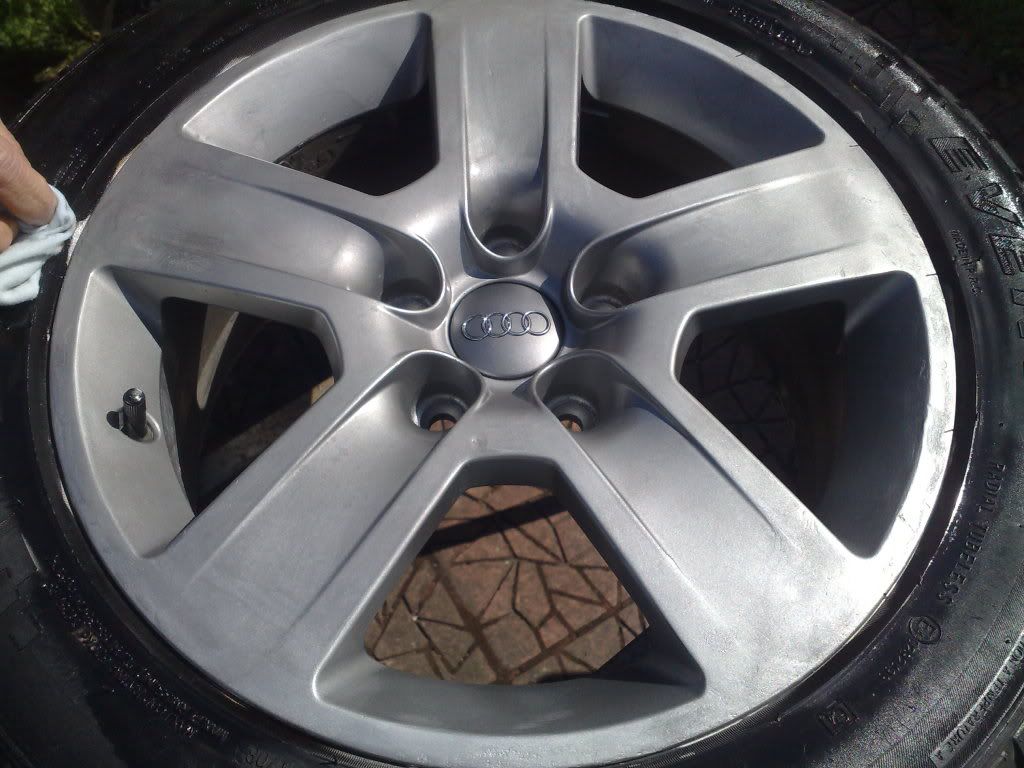
    08052009316.jpg

    That is the rear wheel and isnt really as bad as the front wheels but the front wheel was the same except there was kerbing all around nearly.


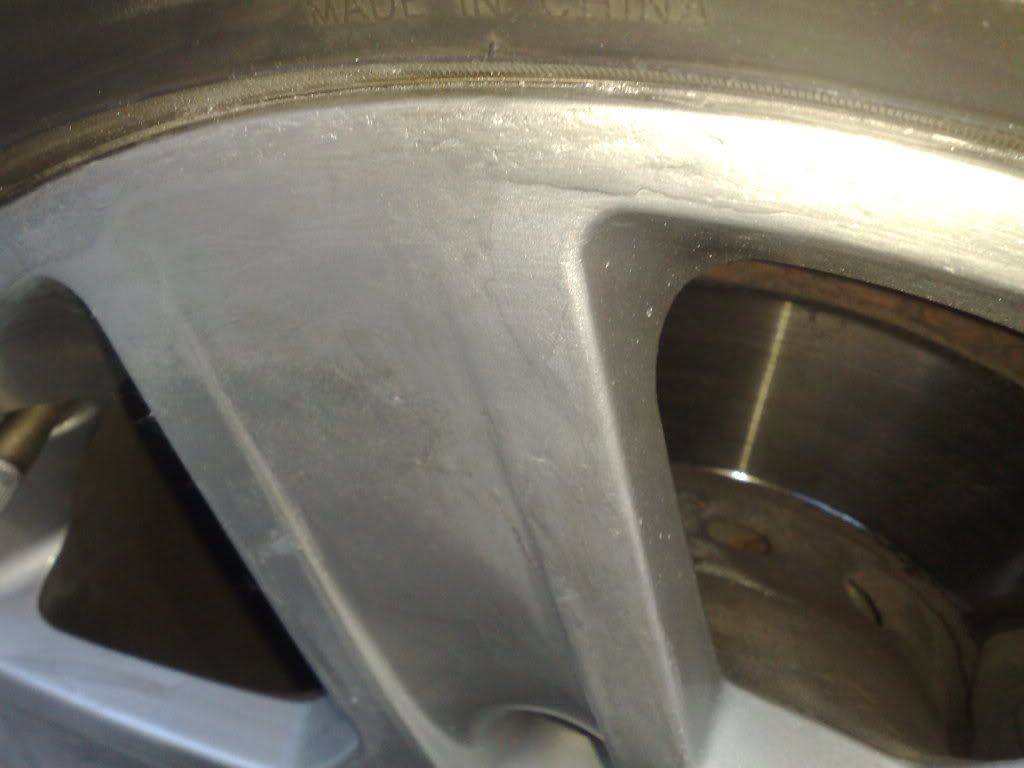
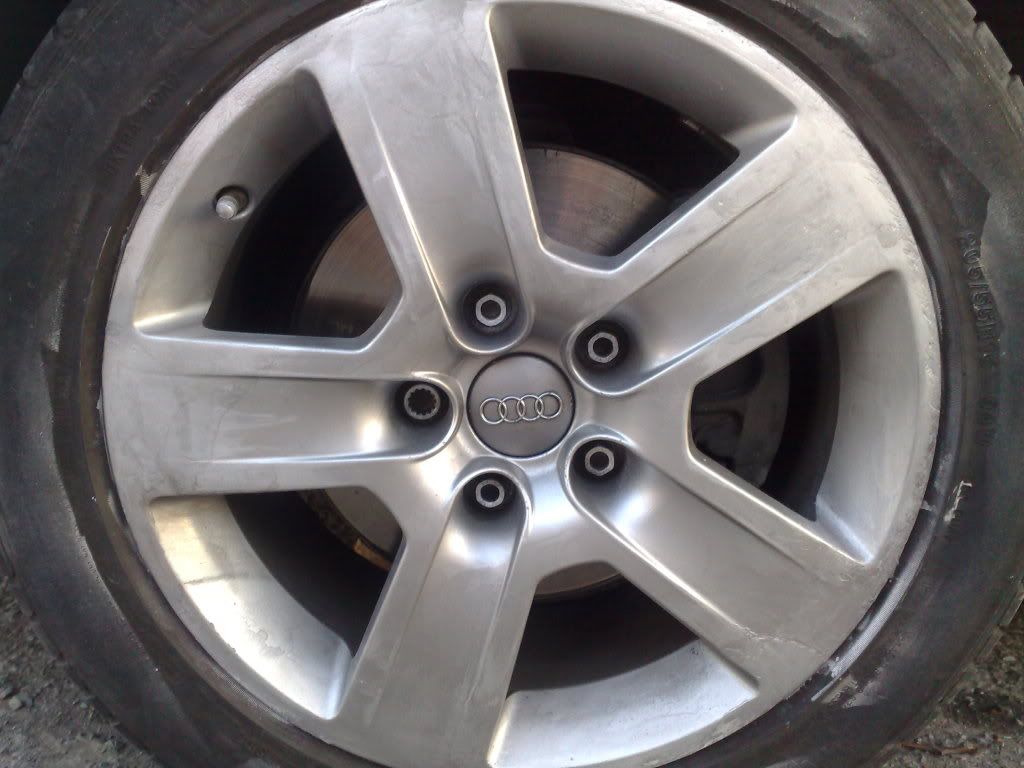
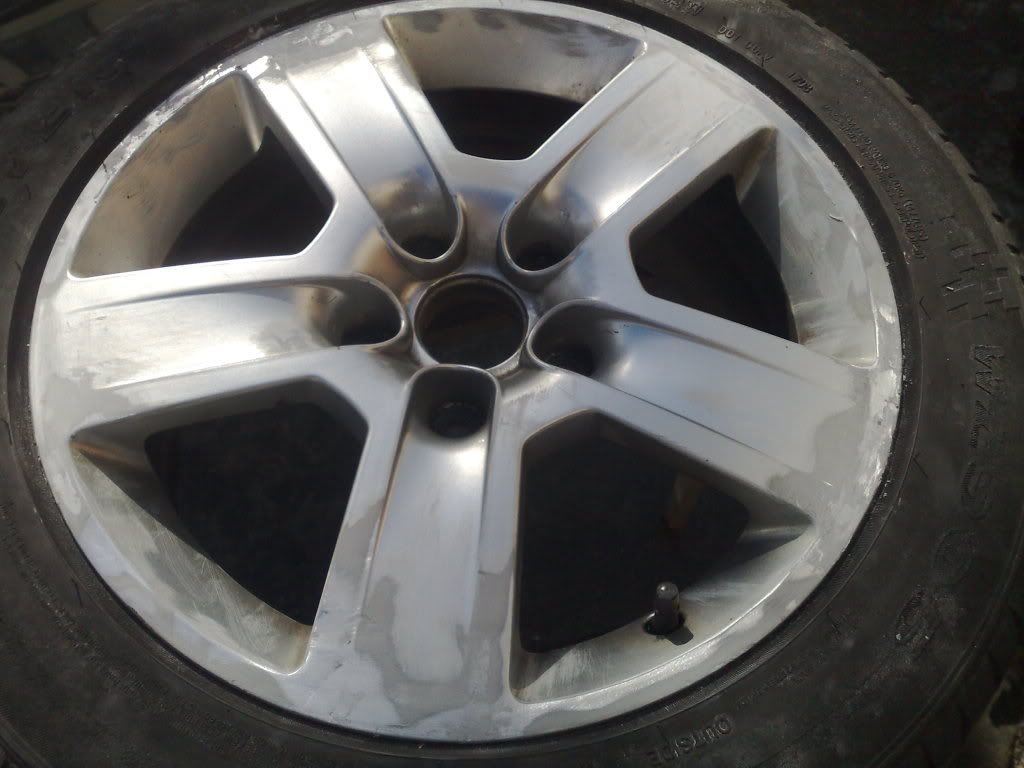
    Here are the two after pics

    08052009315.jpg
    08052009314.jpg

    Just want to say those black line marks on the bottom left of the wheel is brake dust which came out when i pulled out the newspaper that was in the spokes, it isnt there now


Comments

  • Registered Users, Registered Users 2 Posts: 10,992 ✭✭✭✭partyatmygaff


    Any comments, even if you've never done a alloy wheel refurb before just tell me what you think, those tire wells were cleaned after that picture with white spirit so thats alright.


  • Moderators, Society & Culture Moderators Posts: 40,339 Mod ✭✭✭✭Gumbo


    nice difference, they could do with a good sanding to remove the excess filler, then re-prime them and respray the whole wheel.

    will look brand new then.

    fair play for trying, was your dad happy with the results?


  • Closed Accounts Posts: 645 ✭✭✭kazul


    If you're really only 15 then well done on an inexperienced attempt. I admire the work ethic but unfortunately not the end product.

    Tip #1 Take the wheels off to work on them. That way you can get "the face of your hand" at them properly. If possible use a dry, well-ventilated, well lit work place without draughts.

    Tip #2 As you have already worked out, the key to a good finish is in the preparation. Check out some of the vids of Ed China working on cars on Wheeler Dealers, search on youtube.

    Tip #3 You have over-applied paint, it's better to do a few very light coats with some drying time in between so you don't get drips and patchiness.

    Tip #4 Don't let any A holes on here knock you or discourage you. If I were you I'd put the first attempt down to experience, whip off the rims, wet sand them, prime them and finish them.

    Good luck and welcome to the club :D


  • Registered Users, Registered Users 2 Posts: 10,992 ✭✭✭✭partyatmygaff


    My dad was pretty impressed, not by the final result which he thought was OK but he said it wasnt a bad effort, he told me to try and find out what I was doing wrong so yeah, thats why Im asking so.

    The thing is I actually did try to remove the wheels, The locking nuts just wouldnt loosen at all even when I started jumping on it(I gave up because I didnt want to risk breaking it). They are near impossible to remove.


    So anyways hoping I find a solution to remove the wheel this is what I need to do right...

    1. Prop up the wheel on a table or whatever and mask off the tire wells
    2. Wet sand the entire wheel and try and get a smooth finish
    3. Apply 3 light coats of wheel paint
    4. Clear Lacquer
    5. Wax it?


  • Moderators, Society & Culture Moderators Posts: 40,339 Mod ✭✭✭✭Gumbo


    My dad was pretty impressed, not by the final result which he thought was OK but he said it wasnt a bad effort, he told me to try and find out what I was doing wrong so yeah, thats why Im asking so.

    The thing is I actually did try to remove the wheels, The locking nuts just wouldnt loosen at all even when I started jumping on it(I gave up because I didnt want to risk breaking it). They are near impossible to remove.


    So anyways hoping I find a solution to remove the wheel this is what I need to do right...

    1. Prop up the wheel on a table or whatever and mask off the tire wells
    2. Wet sand the entire wheel and try and get a smooth finish
    3. Apply 3 light coats of wheel paint
    4. Clear Lacquer
    5. Wax it?

    im not too up to date on painting, but wouldnt you have to spray primar on the wheels before painting?


  • Advertisement
  • Closed Accounts Posts: 645 ✭✭✭kazul


    +1 on the primer, it's part of preparation.
    You could even prime-fine wet sand-prime again-tack cloth-clean-spray-(maybe blowtorch)-spray-let dry-spray-lacquer.

    Grab an oul' wheel (or a few) from a scrapyard and experiment :D


  • Registered Users, Registered Users 2 Posts: 3,613 ✭✭✭Lord Nikon


    Nice first attampt :)


  • Closed Accounts Posts: 13,822 ✭✭✭✭EPM


    Good on ya for giving it a go lad, they aint great but a lot better than they were:D


  • Registered Users, Registered Users 2 Posts: 10,992 ✭✭✭✭partyatmygaff


    I got 2 more wheels done today, the two worst wheels too.

    I changed my method today though.

    I actually was able to take off the wheel by making a makeshift breaker bar to loosen the bolts on the wheels which are rusted and stuck together.
    I first of all gave it a good wash and rinsed it and while it was still wet got a very coarse sanding file on a drill and flattened down the gouges in the rim which were 4mm deep or thereabouts. I then put filler all around after getting rid of the dust, gave it about 15 mins to harden, went back at it with fine sandpaper and got it smooth. Dusted it off, masked off the tire and set to work on painting, I gave it two light-ish coats with about 10 mins drying between the first and second coat, then I gave about 30 mins drying time and I sprayed on two light coats of lacquer and then I reattached the wheel.

    Took me 6 hours for both wheels , 2 hours worth of waiting.


    Heres a few pictures(Im still not 100% but I think its an improvement?)


    09052009317.jpg
    Heres the first coat of paint wheel no.1

    09052009318.jpg
    Second coat of lacquer here still not dry yet so looks a bit off colour

    09052009323.jpg
    Wheel no.2 filled and sanded smooth

    09052009324.jpg
    Paint Coat 1, touch dry

    09052009326.jpg
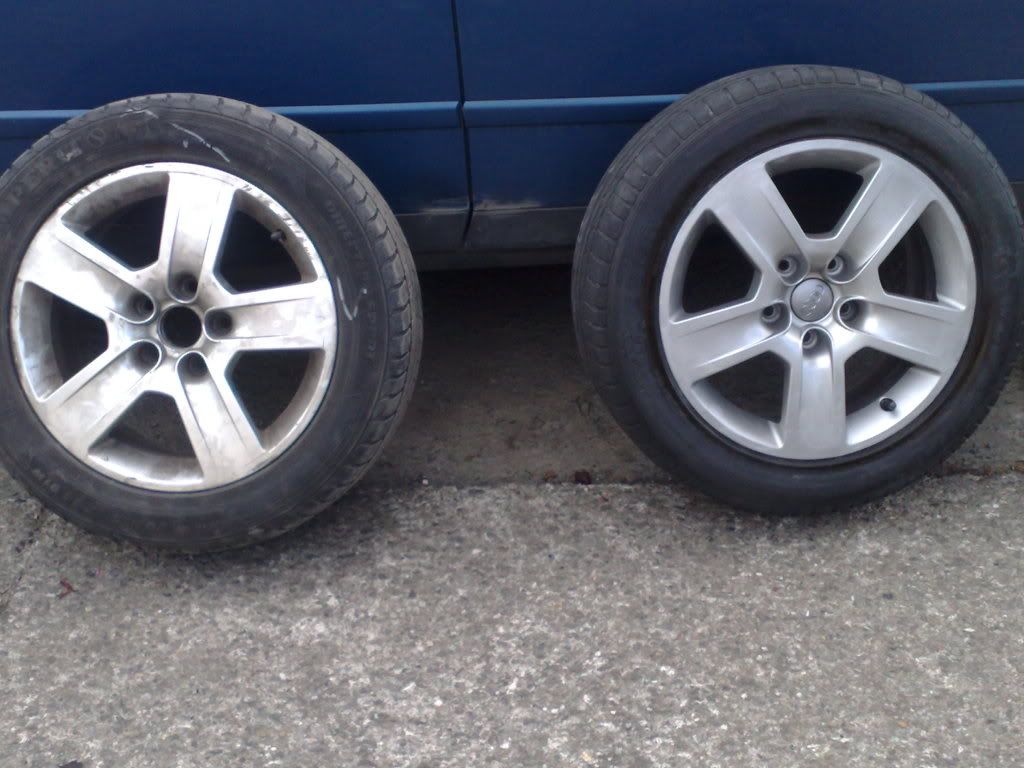
    Spare wheel on the left, newly done wheel on the right
    Both wheels look the same as the one on the right from the same distance btw


    The pictures make it look alot worse than it is, you could hardly notice a difference in real life but still.
    What do you all think? Would scratch filling primer of made the finishing better(Although those fine scratches are hardly visible without being right beside the wheel)?


  • Closed Accounts Posts: 1,502 ✭✭✭Zube


    Looks good.

    What kind of filler are you using?


  • Advertisement
  • Registered Users, Registered Users 2 Posts: 10,992 ✭✭✭✭partyatmygaff


  • Registered Users, Registered Users 2 Posts: 4,317 ✭✭✭lafors


    Not a bad effort at all, looks a hell of a lot better than before pictures.
    I was actually thinking of getting someone to do the ones on my wifes A3.
    They're 5 spoke 18's and shes mangled the left front & left rear (kerb side obviously). When I say mangled, only approx a 4in diameter from the centre isn't gouged. When I saw them I nearly cried.....seriously :eek:

    So partyatmygaff what equipment would I need/are you using?
    And what products?
    Prices?


  • Closed Accounts Posts: 174 ✭✭futura123


    i kerbed the 19 inch alloys on my car ....... im gettin a professional to do mine .... does anyone have any experience in whether or not they flake off again... they are not deep scratches but i think he said that he has to put a filler in it. im hopin it will be like new


  • Registered Users, Registered Users 2 Posts: 10,992 ✭✭✭✭partyatmygaff


    Its a pretty straightforward enough process if your good with detail, time consuming but simple enough.

    My dad's wheels are the same except the front right wheel is mangled to bits aswell :rolleyes:

    Hell I might aswell write a small mini tutorial of what I did.

    1. Loosen the nuts on the wheel, replace the wheel with the spare in the boot(Im guessing you dont need instructions for this step :pac:)

    2. Prop up the wheel on a table preferably a hollow metal table, i.e. with a gap in the centre, or a solid table but cover it with plastic or something.

    3. Get ALOT of water and start scrubbing it and clean it like crazy(And I mean clean enough to eat off of it). Use soap if you want. Then turn the wheel upside down and let the water drip out for a second and turn it around again and dry the wheel with a rag.

    4. Here is the difficult part and probably the most time consuming, If you dont do this part right your gonna be doing this wheel a LONG LONG time to get it right, With the wheel clean, start filing down the gouges and scratches using either wet or dry coarse sandpaper or if you have one use a drill or dremel tool with a filing block and file it down until the scratches are smooth (Do not completely remove the scratches just smoothen the edges). If the wheel is as bad as mine, just sand down the entire wheel.

    Using some body filler (you can use the cheapo one I used or a better quality easier to sand one) and a spatula spread thin layers over the scratches and gouges, make sure to fill each scratch and make 100% sure you use the spatula to make it as flat as possible.
    Wait about 20-25 mins for it to completely harden(Or whenever you can run your hand over it with a good bit of force without it coming off or flaking). Now heres the fun part, Get a fine grade of sandpaper (Or a sanding machine like an orbital sander) and start sanding down all that filler and all those stone chips until the wheel is a smooth grey. Make sure to around the lip of the wheel near the tire and get it rounded, Go over all the filler and make sure it feels and looks smooth(Do not think those tiny little gaps will go unnoticed when you paint or the paint will "fill it in", I did that the first time and it didn't work :pac:).

    5.
    With the wheel smoothed and looking a bit shabby you will probably start feeling a bit worried you've permantley f*cked your alloys up, I felt that too, With the rag you used earlier wipe off all the dust from the sanding and give the wheel a good wash again and dry VERY well afterwards.

    6. Now is another important step, Mask off the tire wells, Put the tape on the inside of the tire well without getting any tape on the wheel itself, Then just put on some newspaper all over the tire and tape it all down.

    7. Now, If you don't have primer it isn't "completely" necessary(I did not use any, but it didnt look too good at the end I have to say :o), Im assuming you do have primer just to cover all aspects, Spray on one thin coat of primer in quick left-to-right motions over the wheel(MAKE SURE THE CENTRAL AUDI CAP ISNT STILL IN THE WHEEL), Allow the primer to dry for say one hour.

    8. Now get your silver wheel paint and spray it on just as the primer, Do about 2 light coats over the entire wheel giving 4-5 minutes between coats, Dont be too far away from the wheel, 10 cm away is good. Get into all the spokes etc on each coat.

    9. After 30 minutes of drying(Dont try before 30 mins or the paint will start to "lift" and you will have to redo everything), Take your clear lacquer and give the wheel about 2 light coats the same way as the paint.

    10. Whenever its touch dry (Usually 5-10 mins) take all that tape and newspaper away, clean up any silver that might of gotten on your tires and voila, one semi-professional looking refurbed alloy wheel.
    :D

    I made it sound pretty long winded(So much for a mini tutorial :p)
    It should take 2-3 hours for each wheel depending on how bad it is and drying time.

    Here is the list of tools/things you need(Im using halfords as their easy to get to for me in blanch shopping centre)


    Silver Wheel Paint (I used Halfords own brand, was good quality and looks exactly the same as the original audi paint)
    http://www.halfords.com/webapp/wcs/stores/servlet/product_storeId_10001_catalogId_10151_productId_206487_langId_-1_categoryId_165495

    Clear Lacquer(Again I used halfords, was not too great imo but is adequate, you can use a better brand if you like)
    http://www.halfords.com/webapp/wcs/stores/servlet/product_storeId_10001_catalogId_10151_productId_210069_langId_-1_categoryId_165495

    Putty/Body filler
    You can use whatever you like here, I used Cataloy Knifing putty, Not the best of quality, it was kind of tough to sand but was reasonable
    http://www.halfords.com/webapp/wcs/stores/servlet/product_storeId_10001_catalogId_10151_productId_185835_langId_-1_categoryId_165625

    Now heres the other non-main items you need.
    Masking tape

    Fine and Coarse sandpaper, I'd recommend 80 and 400 grit(Its labelled on the box)
    OR
    If you have a sander or a drill with a sanding bit you can use that aswell but you have to finish it with fine sandpaper by hand

    Paint Thinner (for cleaning your hands, clothes etc because the silver paint wont come off with water)

    A table to use for all of this

    Alot of time and the guts to tell your wife that you will kill her if she kerbs the wheels again :p


    Post up pictures if you actually do this


  • Registered Users, Registered Users 2 Posts: 10,992 ✭✭✭✭partyatmygaff


    futura123 wrote: »
    i kerbed the 19 inch alloys on my car ....... im gettin a professional to do mine .... does anyone have any experience in whether or not they flake off again... they are not deep scratches but i think he said that he has to put a filler in it. im hopin it will be like new
    Im not entirely sure about filler when it comes to alloy wheels as I've only just done mine, If he uses good filler and sands it properly(Im guessing a pro would not have any problems doing this) it should be good unless ofcourse you kerb it again.


  • Banned (with Prison Access) Posts: 43 Mr. darragh


    great work
    hopefully the finsh will stay good for a long time
    they look great


  • Registered Users, Registered Users 2 Posts: 3,613 ✭✭✭Lord Nikon


    Much respect to you partyatmygaff, here's looking to a bright motoring future for you :)


  • Registered Users, Registered Users 2 Posts: 1,453 ✭✭✭spartacus93


    Well done sir, you're second final shot looks very good. Must give it a go on the fathers A4 somestage over the summer (try it out on his first :D). Thanks for the interesting posts


  • Registered Users, Registered Users 2 Posts: 13 morpheus01


    Brilliant stuff. Fair play to you man and thanks for the walkthrough. I'll post the pictures on this thread if my kid ever grows up to be like you, which I hope he does. You'll probably be appearing regularly in the Irish Pimp my Ride by then.

    Regarding the brake dust - I checked out some forums and; you can tell your dad you can get something called "dustless pads" or alternatively "brake dust shields" to prevent it for a bit less than 50 euro. Haven't tried either out yet but will post back if and when I do.

    futura123 - can you tell us where you get this done and how much it costs? Don't think the missus will let me spend the weekend doing it myself right now.


Advertisement