Advertisement
If you have a new account but are having problems posting or verifying your account, please email us on hello@boards.ie for help. Thanks :)
Hello all! Please ensure that you are posting a new thread or question in the appropriate forum. The Feedback forum is overwhelmed with questions that are having to be moved elsewhere. If you need help to verify your account contact hello@boards.ie

Micro adjustment.

Options
  • 26-12-2008 11:52am
    #1
    Registered Users Posts: 7,067 ✭✭✭


    I wouldn't have a clue how to use the new feature on my 5D II to micro adjust my lens, I also wouldn't have a clue to know if their was front or back focus issue problems...
    I just want a service on them to be on the safe side so to speak.
    If you're not into the pub then I will pay our mighty strong Euro currency.
    I'm based in town or could drive....


Comments

  • Moderators, Sports Moderators Posts: 10,257 Mod ✭✭✭✭Borderfox


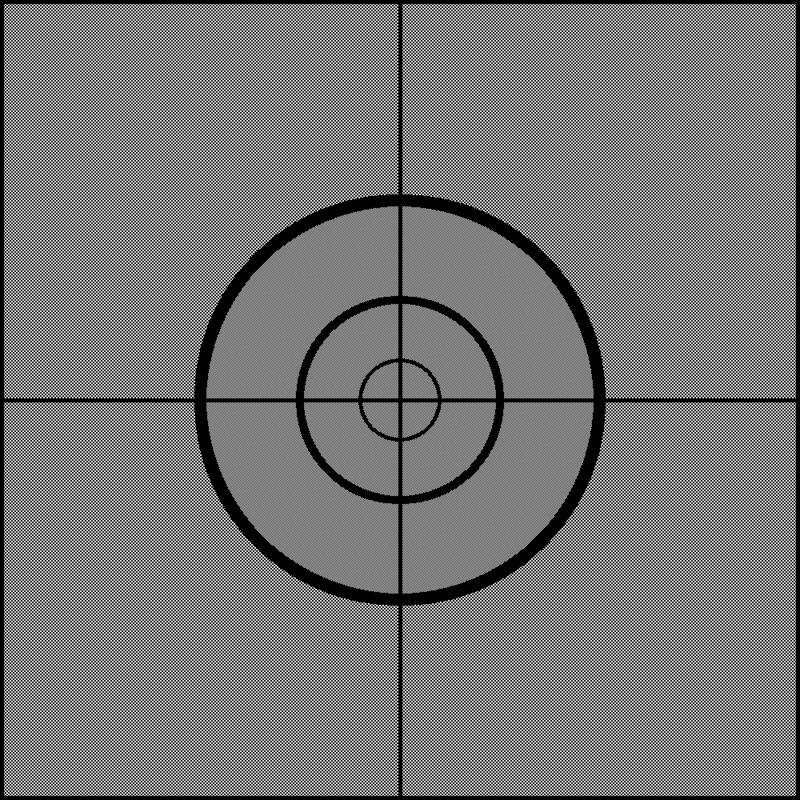
    I got a picture file off another website that you can use to check focus on the screen without taking any pictures, display this on your computer screen and then check focus using live view and manual focus

    MicroFocusAdjust1.gif


  • Moderators, Sports Moderators Posts: 10,257 Mod ✭✭✭✭Borderfox


  • Moderators, Sports Moderators Posts: 10,257 Mod ✭✭✭✭Borderfox


    I have never had to adjust any of my lenses using the micro adjust, its something to have a look at but not really neccessary imo


  • Registered Users Posts: 7,067 ✭✭✭AnimalRights


    Hi Keith...
    Can you like explain it in bullet form what I have to do ..
    Like this for example..
    Step 1.....
    Step 2.....

    etc
    It's the only way my brain works.
    :o


  • Moderators, Sports Moderators Posts: 10,257 Mod ✭✭✭✭Borderfox


    The principle is that you display this graphic (at full size) and focus on the screen, using liveview (zoomed if need be) and maximise the appearance of Moire interference patterns.

    These patterns come about from the interaction between the image pixels on your screen and the pixels of your sensor.

    Note - this won't work with a print of the image! You need a screen view

    You then switch off liveview and part press the shutter button to activate AF.

    Look carefully at the lens distance indicator as you do this ... if the lens and camera combination is spot on, then there will will be no movement of the lens focusing ring and the image will not change.

    I tried this firstly with my 24-70, set at 70mm (Canon suggest setting zooms at their longest setting)

    ... no movement of the lens ring at all. The lens is spot on.

    Next I moved the camera closer to the screen, making sure it was properly 'square on' to the centre of the pattern. I fitted my EF14mm 2.8L lens

    Note - Camera-to-subject distance should be no less than 50 times the focal length of the lens. For a 50mm lens, that would be at least 2.5 meters (25m for a 500mm)

    It's difficult to show graphics here, but the first image gives an idea of the rear display when manually focused with liveview, while the second shows the view after getting the camera to autofocus (where an adjustment is needed). I've exaggerated the difference slightly for showing here.

    1Ds mk3 af microadjustment samples

    It's actually only a few centimetres difference in focal distance, but the interference effect allows you to get critically sharp focus.

    The exact pattern you see when sharply focused, depends on your LCD screen and its pixels, since it's the interference between the screen version of the image (and its individual pixels) and the pixels of your sensor that result in the aliasing. It was different with each lens and at different distances. The effect should be very obvious to see.

    After a quick test, the following settings were altered

    * EF14mm 2.8L II - a setting of +8 (backward)
    * EF15mm 2.8 (fisheye) - no correction required
    * EF16-35 2.8L @35mm - a setting of +5 (backward)
    * EF24-70 2.8L @70mm - no correction required
    * EF70-200 2.8L @200mm - no correction required

    It's worth testing your lenses in different conditions and trying a few 'real world' photos as well. I'd not even noticed the error on the 14mm and a few quick test shots at f/2.8 show a just perceptible increase in sharpness.

    If you want to try this with a camera without liveview then just shoot a picture of the screen using AF and then two more with the focus ring manually moved +/- 5cm. Hopefully the AF version should show some fringing not visible in the other two shots. If all your lenses show a slight shift then it -might- be worth getting your camera serviced?


  • Advertisement
  • Registered Users Posts: 1,037 ✭✭✭quilmore


    I print this doc
    http://www.focustestchart.com/focus21.pdf

    leave it flat on the floor, set the camera looking down at it at aprox 45 degrees on a tripod with the lens at its maximum aperture and focus on the "focus here" line
    then look at the 100% of the picture taken and dial in accordingly
    it's a try and correct procedure
    same lens will have different dials on different cameras


Advertisement