Advertisement
If you have a new account but are having problems posting or verifying your account, please email us on hello@boards.ie for help. Thanks :)
Hello all! Please ensure that you are posting a new thread or question in the appropriate forum. The Feedback forum is overwhelmed with questions that are having to be moved elsewhere. If you need help to verify your account contact hello@boards.ie
Hi there,
There is an issue with role permissions that is being worked on at the moment.
If you are having trouble with access or permissions on regional forums please post here to get access: https://www.boards.ie/discussion/2058365403/you-do-not-have-permission-for-that#latest

Cloning?

  • 30-04-2007 10:03am
    #1
    Registered Users, Registered Users 2 Posts: 3,319 ✭✭✭


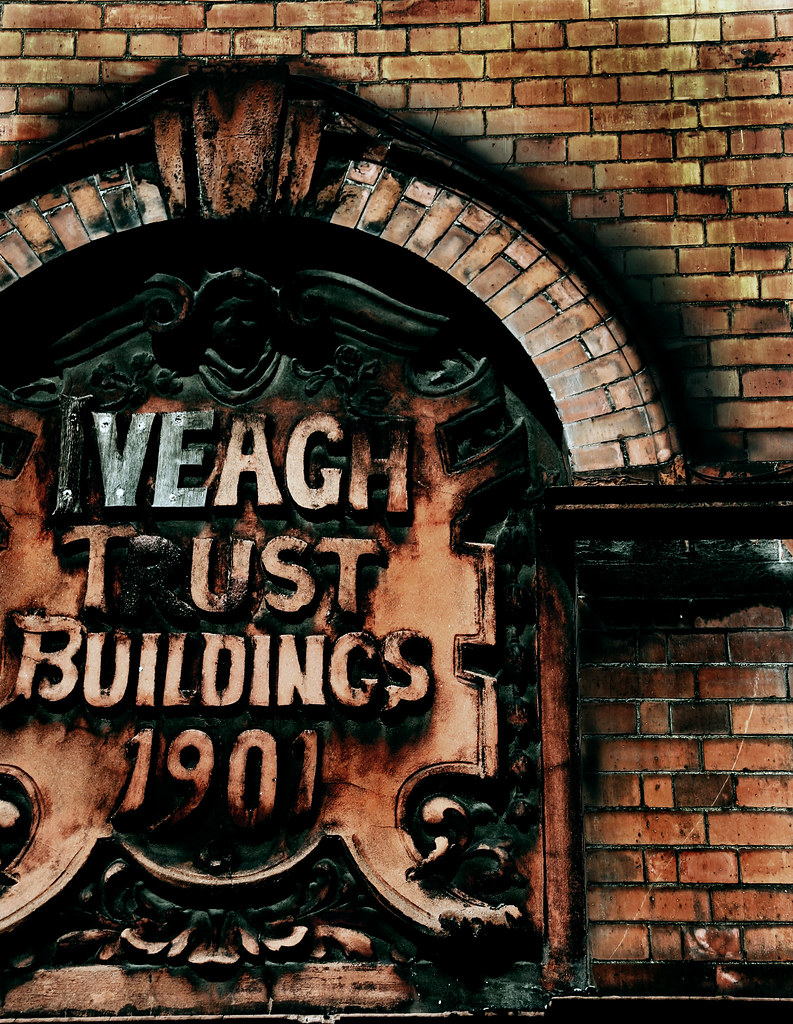
    Hi all. Is it possible to clone or otherwise remove the annoying cable from this shot?

    478183326_2e1cc04eeb_b.jpg


Comments

  • Registered Users, Registered Users 2 Posts: 13,381 ✭✭✭✭Paulw


    A very slow, careful tedious job of cloning out the cable would work. It just takes time.

    I might give it a try later, and see how I get on.


  • Closed Accounts Posts: 4,763 ✭✭✭Fenster


    Brickwork is actually really easy to clone over as it's all one big pattern. Around the arch is a little tricksy - I could remove it, but I think the juxtaposition is fine as-is.

    I also bleached it and burned in the shadows around the arch to make the cables less obvious:

    478380491_b401025178_o.jpg


  • Registered Users, Registered Users 2 Posts: 3,319 ✭✭✭sineadw


    Ah now you see that looks much better! Any chance you'd talk through that when you have a chance Mark? I can't seem to get to grips with cloning. Is it the clone stamp tool? Normal presets?


  • Closed Accounts Posts: 4,763 ✭✭✭Fenster


    Just create a new layer and set the clone tool to "current layer and below" and start cloning. Bleaching took a good bit more work. I've toned down my action to produce less contrast, added another soft light layer on top of that to darken the image, and a deep blue colour filter to shift the colours.

    After that I dodged midtones and burnt shadows to edge the bricks and lettering like they are and lastly ran it through Lightroom to tweak the colours


  • Registered Users, Registered Users 2 Posts: 3,319 ✭✭✭sineadw


    Not quite, but getting there :D Thanks Mark! That was a great help.

    478444400_3fea791621_b.jpg


  • Advertisement
  • Closed Accounts Posts: 4,763 ✭✭✭Fenster


    I think you overdid the burning a little, but it's nice start Sinead.


  • Registered Users, Registered Users 2 Posts: 17,371 ✭✭✭✭Zillah


    Heal brush for the win. Its magic.


  • Registered Users, Registered Users 2 Posts: 3,319 ✭✭✭sineadw


    Just looking at the healing brush now.. Hmm! Off to find tutorials... Yep Mark - I had the image open at 16% or something. Looking at it full size I can see the over-burning. Gotta remember that one :)


  • Registered Users, Registered Users 2 Posts: 13,381 ✭✭✭✭Paulw


    I actually have loads of video tutorials. I had a year's subscription to Digital Photo magazine, and have all the video tutorials.

    If anyone wants to borrow, let me know.


  • Registered Users, Registered Users 2 Posts: 2,966 ✭✭✭elven


    The only time I manage to use the healing brush is if I'm working on an area with no pattern or a random one. If you go near an edge with it, it gets all mixed up with what's supposed to be dark or light and I get a lot of that funny feathery bleeding going on. Is there a trick to using it on edges that I'm missing?


  • Advertisement
Advertisement