Advertisement
If you have a new account but are having problems posting or verifying your account, please email us on hello@boards.ie for help. Thanks :)
Hello all! Please ensure that you are posting a new thread or question in the appropriate forum. The Feedback forum is overwhelmed with questions that are having to be moved elsewhere. If you need help to verify your account contact hello@boards.ie
Hi all! We have been experiencing an issue on site where threads have been missing the latest postings. The platform host Vanilla are working on this issue. A workaround that has been used by some is to navigate back from 1 to 10+ pages to re-sync the thread and this will then show the latest posts. Thanks, Mike.
Hi there,
There is an issue with role permissions that is being worked on at the moment.
If you are having trouble with access or permissions on regional forums please post here to get access: https://www.boards.ie/discussion/2058365403/you-do-not-have-permission-for-that#latest

chance of a lifetime "King's Ametyst"

1568101113

Comments

  • Registered Users, Registered Users 2 Posts: 680 ✭✭✭copper12


    Evening all
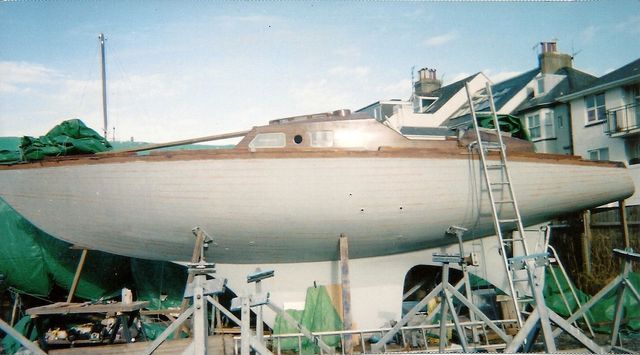
    What with the fine weather I am making the most of it and will continue working on the cockpit and the decking and leave the work that needs to be done on the inside for when the weather turns
    Since I would not be known for wasting anything I hung onto just about any good wood that has come off Ceo Na Marra and try and put it back into it’s original position or fins another use for it.
    I needed to find some mahogany to finish the cockpits’ the forward section would have needed a board that would measure at least 10” across since I didn’t have any I made use of one of the lath holders that had the shape of the hull and an old mantle pies between the both of them I managed to get the trim finished.
    As is normal for me I made use of some old mahogany for where the cleats lead off the winches the originals were made of ply, and promptly routed the wrong side of one so I routed both sides in order to make them some what presentable
    Here are a few pictures as they say a picture paints a thousand words


  • Registered Users, Registered Users 2 Posts: 680 ✭✭✭copper12


    a few more


  • Registered Users, Registered Users 2 Posts: 680 ✭✭✭copper12


    Evening all
    I have almost finished the cockpit t area
    I am reasonable pleased with the outcome some panels I might have to give a lick of paint
    I'l wait and see; so next job is to fit the cockpit portholes and window panels


  • Registered Users, Registered Users 2 Posts: 680 ✭✭✭copper12


    Evening all
    I have made a start on the side panel’s windows
    I managed to save five of the original glass pains’ however on inspection’ two had water ingress, between the laminate, so opted to replace them’ so I am left with tree of the original laminated glass panels’
    I have gone with bronze’ toughened laminated 6mm glass’ I increased there size by 5mm all-round.
    I felt the original rebate was to small’ this increase in size’ dose not effect the original screw holes;
    it is awkward work’ as there is a rebate on the outside’ and a bevel on the inside’ the router will do about half of each’ the rest by hand’ and lots of sandpaper ‘
    I will use tec7 to bed them in, and polish up the brass surrounds, I will have to give the rebate’s a couple of coats of varnish, to seal them first; well that’s the plan.


  • Registered Users, Registered Users 2 Posts: 680 ✭✭✭copper12


  • Moderators, Motoring & Transport Moderators, Sports Moderators Posts: 6,337 Mod ✭✭✭✭fergal.b


    Looking very smart :) The links work fine, almost time to get her wet,wet, wet.


    .


  • Registered Users, Registered Users 2 Posts: 680 ✭✭✭copper12


    Evening all
    I have fitted the port holes
    They turned out ok
    The chrome had come off them’ in a lot of places, so I tried to remove as much as I could; and will leave them as they are.
    the glass seal’ had to be refitted to one of them’ as the bronze screws had corroded’ and the flange had come off, so I had to drill out the old screws’ and re tap the treads’ and used old brass screws from electrical fittings’ the ones used to screw the socket to the wall’ they are usually brass screws’ remove the chrome’ cut to size’ sand off the dome’ and bobs your uncle.
    If the weather stays the way it is I will make a start on the galley area


  • Closed Accounts Posts: 5,108 ✭✭✭pedroeibar1


    They look great!


  • Registered Users, Registered Users 2 Posts: 495 ✭✭Hifive


    I always look forward to your updates, keep them coming.

    Your not the only one at it, I found one for sale on ebay.

    http://www.ebay.co.uk/itm/321801146312?_trksid=p2060353.m1438.l2648&ssPageName=STRK%3AMEBIDX%3AIT

    _57.jpg

    It says it was substantially rebuild a few years ago but stalled due to ill health. Lots of photos and info on the boats in the links. It seems they are a very well built boat.


  • Advertisement
  • Registered Users, Registered Users 2 Posts: 680 ✭✭✭copper12


    It looks to me to be a bargain :eek:
    It has given me a few ideas ;)
    I hope my wok reaches his standard ;)


  • Registered Users, Registered Users 2 Posts: 4,032 ✭✭✭spaceHopper


    copper12 wrote: »
    I hope my work reaches his standard ;)
    It exceeds it


  • Registered Users, Registered Users 2 Posts: 680 ✭✭✭copper12


    Evening all
    Well I have made a start on the galley area
    There were some timbers I had hung onto and they allowed me to have an idea as to how I would put it all back together with the photos I took when disassembling the galley
    Most of the timber was rotted and of no use
    Not everything went in the way it came out with some adjustments’ a cut here and there I am almost there.
    I started with the floor as this section needed to be put in first and built up
    This is where my skills a carpenter:(
    Any way a picture tells a thousand words


  • Registered Users, Registered Users 2 Posts: 680 ✭✭✭copper12


    a few more


  • Registered Users, Registered Users 2 Posts: 680 ✭✭✭copper12


    last lot


  • Registered Users, Registered Users 2 Posts: 680 ✭✭✭copper12


    Evening all
    I have almost finished the galley area; I fitted the sink and repaired one of the drawers.
    The starboard side is coming along nicely; there were a few miner adjustments that needed to be made’ to make it fit; and I fitted a few hardwood pieces, in the corners to strengthen the lot.
    A couple of coats of varnish and it should come up looking as good as they were originally
    I should be finished this in a few days hopefully


  • Advertisement
  • Registered Users, Registered Users 2 Posts: 680 ✭✭✭copper12


    Evening all
    Sine my last post I have been to three weddings and a cruse on the Shannon
    64 people 10 nationalities everywhere from the people’s republic of Cork to Azerbaijan; Angola’ and in between and 11 boats. I am still getting over it .:eek:
    I managed to get a bit done in between’ I have repaired a previous repair to the rudder handle; the handle is made up of teak’ and the repair was done with mahogany, so I replaced it with teak.
    I have also done some work on the mast; I managed to modify the mast step’ to suite the new mast
    And have fitted it the traditional way; bedded on a mix of sand and cement 1 to ½ mix
    I also fitted two portholes to the front of the forward cabin; I had not intended to put windows in’ but it was a bit of a blind spot’ so I went ahead and reinforced the forward piece of mahogany’ with 9mm marine ply on the inside’ in order to prevent splitting’ they turned out well.


  • Registered Users, Registered Users 2 Posts: 680 ✭✭✭copper12


    a few more


  • Registered Users, Registered Users 2 Posts: 4,032 ✭✭✭spaceHopper


    was wondering what happened to you it has been a while.


  • Moderators, Motoring & Transport Moderators, Sports Moderators Posts: 6,337 Mod ✭✭✭✭fergal.b


    The portholes look great, sort of give her a face :)

    Photo1466_zpsbrnec2pg.jpg


  • Registered Users, Registered Users 2 Posts: 680 ✭✭✭copper12


    Evening all
    Got a bit done in between the showers
    Fitted the mast step in sand and cement mix; dry, I will give it a few days to observe moisture, and cure before I caulk around the edge.
    I also fitted the chain plates; it took a while trying to find the right stainless bolts.
    The top bolt’ goes true the 1” mahogany’ then true 5” of pine’ the other three bolts secured true the mahogany’ I had to use a blow torch to get the right bevel’ but they turned out all right.
    The young fellow is back front down under’ so I am hoping he will tackle the steps’ for the forward hatch’ they will have to be assembled so I can take them apart’ if I need to repair the engine.


  • Advertisement
  • Registered Users, Registered Users 2 Posts: 680 ✭✭✭copper12


    Evening all
    I made a start on the forward hatch; I came across a set of good strong hinges’ it will be a while before they miss them if ever.:cool:
    And fitted the lifting rings locks.
    The young fellow’ made a start on the cabin steps, it’s a work in progress.


  • Registered Users, Registered Users 2 Posts: 680 ✭✭✭copper12


    Evening all
    I have been tipping away
    All the smaller jobs seem to take for ever.
    I had to move the water reservoir for the engine’ as there would be no access when the cockpit floor is fitted; so I moved it into the battery box’ directly above the engine’ there’s still enough room to divide the box’ and have room for a good sized battery.
    The young lad’ trial fitted the steps’ leading into the main cockpit it’s made up of oak stringers and mahogany; it dose exactly what it say’s on the tin; Removable’ and blocks the engine and the bilge hole’ there’s still a bit of work to do yet’ so far I am’ happy with the outcome.
    So I can now get on with wiring up the engine’ and the cable runs for everything else’ I also came across a wind turbine; 155€ to good to miss’ I have given it the once over and everything seem ok’ there’s not a lot that can go wrong with an Acrogen wind turbine; if its not working the only things that would seem to have be replaced’ would be a rectifier’ or an capacitor’ the bearings and propellers all seem ok’ I will let you know when I test it; a simple test’ a bit of wind, short out the leads, and if it slows down’ then everything should be Ok.
    I finished refurbishing the old bilge pump and there’s good suction when I pump the handle an turbo charge intake from a Mitsubishi canter’ sorted out the 90 degree bend’ I will have to make to reach the bilge’ I will fit the copper tray, when I have the engine sorted out.


  • Registered Users, Registered Users 2 Posts: 4,032 ✭✭✭spaceHopper


    AS you are reworking the engine and all the plumbing it might be a good idea to rig up the engine cooling system so that it can suck water from the bilges in an emergency. The operator of the Cheeki Rafike had suggested that the skipper as they were taking in water mid Atlantic however in the end they never got the chance and the boat at crew were lost.

    Even know which sea cock to close and what hose needs to be disconnect would be enough.


  • Registered Users, Registered Users 2 Posts: 680 ✭✭✭copper12


    Space hopper I should be able to rig that fairly easily; it makes since’ two extra inline valves’ should do the trick. I just have to make a big enough filter for where the pipe inters the bilge.
    You can see from the attached photo' where the hole for the bilge is located; almost right below the raw water pump, it’s where the yellow valve, is so it should not be to difficult to make up


  • Registered Users, Registered Users 2 Posts: 680 ✭✭✭copper12


    Space hopper
    I have made up a rig that will allow the raw water pump, to be used a bilge pump in an emergence.
    Close the sea cock, for the raw water main feed; and open the valve from the bilge’ the bilge holds about 25 to 30 litres before it reaches the floor of the cockpit, either side of the 4” hole there’s a 1” hole drilled to allow water to enter the reservoir; a normal bilge pump’ fitted here would not empty the reservoir so along with a normal bilge pump, I will fit a self priming pump; plumed into the reservoir. It will get fairly crowded in there’ as I also have to fit two more pipes’ one for an ordinary hand pump; and another for the reconditioned original pump; that empties onto the cockpit floor
    I have them so I may as well fit them.


  • Registered Users, Registered Users 2 Posts: 4,032 ✭✭✭spaceHopper


    Let's hope you never have to use it


  • Registered Users, Registered Users 2 Posts: 680 ✭✭✭copper12


    Evening all
    I have been kept busy

    I have made a start on wiring up the engine; and the wiring for the lights, house’ and running lights.
    So theirs wires everywhere, I have also started to fit a water lock to the exhaust’ I haven’t all the parts so I a job in progress; and at the moment; I am trying it fit the engine control cables’ I have spent almost a day at this and just about, have the gear change lever fitted’ Id solve one problem’ only to run into another. :confused:
    I started the electrical connections, with the best intensions’ having bought the marine grade crimps’ with enough shrink tube to rap a Mummy; I have to say most of it was useless, either the tube would not fit over the crimp, or it would not shrink over the wire, disaster; so I have invested in some liquid electrical tape; something I should have done from the start, and saved myself a few bob.
    Ah well you live and learn


  • Registered Users, Registered Users 2 Posts: 680 ✭✭✭copper12


    Evening all
    Well I have finished with the engine control cables.
    The gear control took the longest to get right; trying to get the angle’ for the cable to slide easily’ where it connects to the gear lever’ took a while to sort out’ eventually I got there.
    The accelerator cable, went a lot easier’ I was able to use the old clamp, where it attached to the throttle, and made up a piece for where it attached to the engine throttle’ things were a bit tight under the deck; everything seems to move smoothly now, except for the gear lever; the lever had a little kink in it’ so I had to remove it; and where did the 8mm steel ball bearing go,, only god knows; for the life of me I could not find it.
    Cleaned everything up’ searched everywhere’ it’s only a little space; where could it have gone.
    I should be able to come across one easily enough though; I also fitted the water lock’ next I have to make up the goose neck, and rebuild the seacock.
    I will make up the gooseneck with 1 ½ ABS pipe and fit an air admittance valve; I was going to get a steel one made up; but sense the water locks maximum operation temperature; is only 70c, and the ABS is twice that’ it should be ok, at least I have the room to replace it later if it dose not work.


  • Registered Users, Registered Users 2 Posts: 680 ✭✭✭copper12


    Evening all
    I have finished installing the wet exhaust system
    Fitted a water lock and an air admittance valve; looks tidy enough, I might have to add some supports to the hose going from the waterlock to the gooseneck.
    I have made a start on the foul water system.
    I had to fit the holding tank, on the starboard side, even though the cistern is located on the port side.
    I could not get a tank small enough; with enough holding capacity, to fit in the area next to the cistern, so I had to plum across two 1”½ pipes, to connect to the cistern; in this area I will be able to fit the toilet; with two air vents and a Y valve; that will enable me to operate the system; in such a way, that I can divert the waste to the holding tank, or the below water outlet, or empty the holding tank, with a waste pump when necessary.
    Anyway I will keep you informed


  • Registered Users, Registered Users 2 Posts: 680 ✭✭✭copper12


    Buy the way I ordered all the parts that I though I would need to install the system
    Turns out most of the connections I got wrong:( and are of no use to me at the moment;I might find a use for them in the future
    If I had two brains I would be twice as stupid :D


  • Advertisement
  • Registered Users, Registered Users 2 Posts: 680 ✭✭✭copper12


    Evening all
    I am finally one step ahead of the head :)
    It was one of the more awkward jobs so far; it was easer fitting the engine'
    Every fitting' was a different size, nothing was standard' or uniform in size.
    Finally I finished:P
    At least I left enough room to read the paper when I am taking a load off my mind :D


  • Registered Users, Registered Users 2 Posts: 680 ✭✭✭copper12


    Evening all
    I have started fitting some of the deck hardware.
    I also fitted the cockpit’ copper basin, with the reconditioned pump.
    Unfortunately’ no matter what I tried, I could not get it to fit; with pump.
    Reluctantly I had to remove the pump; and fit a flange, between the brass top’ and copper tank’ with two layers of amerflex in between.
    This left a hole in the oak boards; so I fitted a piece to make more surefooted .


  • Registered Users, Registered Users 2 Posts: 680 ✭✭✭copper12


    one more;)


  • Registered Users, Registered Users 2 Posts: 680 ✭✭✭copper12


    I just thought ’I would post a few photos


  • Registered Users, Registered Users 2 Posts: 680 ✭✭✭copper12


    another few


  • Registered Users, Registered Users 2 Posts: 680 ✭✭✭copper12


    Evening all
    What with the good weather; I’m trying to get as much done on the outside’ as I can, and leave the wiring and other jobs’ for when the weather changes.
    Here are a few pictures, they tell the storey’ better than me.


  • Registered Users, Registered Users 2 Posts: 680 ✭✭✭copper12


    a couple more


  • Registered Users, Registered Users 2 Posts: 680 ✭✭✭copper12


    https://www.youtube.com/watch?v=i-EzI4Co4W4

    I have been very busy lately
    Me internet has been down for the last couple of weeks
    I made up an LED fitting for the stern light super bright festoon bulb works a treat


  • Closed Accounts Posts: 5,108 ✭✭✭pedroeibar1


    Glad to see that you have the "Game of Thrones" successfully put behind you!:D


  • Advertisement
  • Registered Users, Registered Users 2 Posts: 680 ✭✭✭copper12


    Evening all
    I still tipping away’ getting bits and Pisces done’ here and there; I am hoping to make a start on the electrics in the next few days.
    In the meantime.
    I have started a RYA Day/Coastal Skipper Coerce.
    While I am surprised; by the amount of knowledge I have gained over the last couple of years.
    I am not surprised; by the amount’ I need to learn, however since I had to start somewhere.
    I felt this coerce will give me a base, from witch I can get a better understanding’ of what I need to learn, in order to sail somewhat safely.
    I am finding that this coerce will give me a good start
    :)


  • Registered Users, Registered Users 2 Posts: 1,363 ✭✭✭ezra_


    copper12 wrote: »
    Evening all
    I still tipping away’ getting bits and Pisces done’ here and there; I am hoping to make a start on the electrics in the next few days.
    In the meantime.
    I have started a RYA Day/Coastal Skipper Coerce.
    While I am surprised; by the amount of knowledge I have gained over the last couple of years.
    I am not surprised; by the amount’ I need to learn, however since I had to start somewhere.
    I felt this coerce will give me a base, from witch I can get a better understanding’ of what I need to learn, in order to sail somewhat safely.
    I am finding that this coerce will give me a good start
    :)

    Great to hear that you are wrapping it all up. I've really enjoyed this thread over the past year.

    I'm in hte same boat (ha ha), getting my little day sailor back into condition and also looking to start the day skipper course early next year.

    Please let us know how you find the course and what you think about it!


  • Registered Users, Registered Users 2 Posts: 680 ✭✭✭copper12


    Evening all
    Well the course is going well two weeks into it and I have all ready learn a lot.
    It’s an RYA based course’ and you download a training electronic plotter chart.
    Also included’ are exercise and course information booklet, RYA training charts, day skipper shore based course notes, and a training almanac; parallel rule, and marine dividers, all of which by the second week I have leant to use.
    Although it took me a couple of days just to find a bearing on the map; I could find on the electronic plotter; and find it with a course bearing; but for the life of me, I could not find it true the charts; it turned out I was reading the chart incorrectly; or interpreting what I was looking at the wrong way.
    There’s a huge amount of information in a chart much more that I thought.
    Anyway it took two days to find the first mark; and two minuets’ to find the second.
    The chart plotter is easy enough to follow’ and gives a lot of information, tutorials’ and training slides’ also there’s a lot of stuff on you tube.
    There’s also a lot of enfaces on weather charts’ and there interpretation; weather fronts’ and there effect on the winds that you would encounter.
    In the meantime’ I have started on the wiring, getting the right fittings, for the cables has been a disaster. either the fittings are two big, or the lug is to small, having spent a few bob on these; I have decided to make my own; at least I will have the right size, when I nee them.
    8, 10, 12, 15mm copper pipe will cover anything I need.


  • Registered Users, Registered Users 2 Posts: 680 ✭✭✭copper12


    Evening all
    Jasus there’s wires everywhere :eek:
    I finished installing the big stuff i.e. 25mmsq and 20mmsq cable
    I have run independent ground for the batteries and the house loads
    I had the cable I might as well use it
    Installed the blue sea add a battery kit; I will fit an extra led’ when I come across one’ and have fitted a double clip; at the solenoid’ that’s connected to the the starter motor’ I will take a wire off this, to the battery isolator; to isolate the batteries’ when starting the engine


  • Registered Users, Registered Users 2 Posts: 680 ✭✭✭copper12


    Evening all
    So far I have the engine wired up and tuning over from the key
    I drained the internal water system and filled it with antifreeze just in case.
    I also moved the water expansion tank again I had second thoughts when I installed the battery having a water tank next to the battery just didn’t seem right so I moved it to a position where I can easily access it and top it up if necessary.
    The cabin lights turned out well' all LED lights, so I won’t be using much power.
    The navigational training?
    Exercise for this week Seamanship’ Chart work’ Tides’ Meteorology, and half a dozen other things just as well it the middle of winter; otherwise I would not have the time to do half as much reading.:confused:


  • Registered Users, Registered Users 2 Posts: 680 ✭✭✭copper12


    Evening all
    So far I have the engine wired up and tuning over from the key
    I drained the internal water system and filled it with antifreeze just in case.
    I also moved the water expansion tank again I had second thoughts when I installed the battery having a water tank next to the battery just didn’t seem right so I moved it to a position where I can easily access it and top it up if necessary.
    The cabin lights turned out well' all LED lights, so I won’t be using much power.
    The navigational training?
    Exercise for this week Seamanship’ Chart work’ Tides’ Meteorology, and half a dozen other things just as well it's the middle of winter; otherwise I would not have the time to do half as much reading.:confused:


  • Advertisement
  • Registered Users, Registered Users 2 Posts: 680 ✭✭✭copper12


    Evening all
    Seeing that the sun was splitting the stones this morning and it was to hot to be cooked up in the boat:P
    I said I might as well give the steps a couple of coats of varnish


  • Registered Users, Registered Users 2 Posts: 680 ✭✭✭copper12


    Evening all
    Just one of the 20 or so questions for this weeks exercise

    Rozelle cove is a secondary port

    A) Which port is Rozelle Cove standard port?

    B) On the 29th of January what is the time and height; of HW in the standard port and in Rozelle Cove?

    C) Give the following times and heights for Rozelle Cove
    !) LW on the morning of 11th April
    !!) HW in the early evening of the 20th March

    A= Port Frazer

    B= Standard Port HW 11.52 Roselle Cove HW 11.14

    C=!) 11th of April; Port Frazer LW 0.5m Tm 06.06 Roselle cove LW 0.7m Tm 05.48
    !!) 20th March; Port Frazer HW 3.9m Tm 03.00 Roselle cove HW 3.9m Tm 02.32

    From the almanac
    Standard port port Frazer (arrow)

    Times heights (metres)
    High water low water MHWS MHWN MLWN MLWS
    0000 0600 0500 1100 4.2 3.4 1.1 0.4
    1200 1800 1700 2300

    Differences Rozelle cove

    -0038 -0018 -0036 -0014 +0.2 -0.2 +0.5 +0.2

    To say that this coerce has been a kick up the arce for me would be an understatement :eek:


  • Registered Users, Registered Users 2 Posts: 4,032 ✭✭✭spaceHopper


    Are these times in local time summer time or UTC


  • Closed Accounts Posts: 5,108 ✭✭✭pedroeibar1


    The easy answer is...... " I do not frequent such places described as "secondary ports". I have standards, y'know!"


  • Registered Users, Registered Users 2 Posts: 680 ✭✭✭copper12


    Evening all
    The training charts covers the land mass of three fictitious counties
    The time zone for the northern territories; universal time UT zone0.
    It also has daytime saving time DST
    The southern territories' has a peninsula, that has a -0100 time zone,
    to convert southern peninsula time' to UT -1H it also has DST
    :P


  • Advertisement
Advertisement