Advertisement
If you have a new account but are having problems posting or verifying your account, please email us on hello@boards.ie for help. Thanks :)
Hello all! Please ensure that you are posting a new thread or question in the appropriate forum. The Feedback forum is overwhelmed with questions that are having to be moved elsewhere. If you need help to verify your account contact hello@boards.ie
Hi all! We have been experiencing an issue on site where threads have been missing the latest postings. The platform host Vanilla are working on this issue. A workaround that has been used by some is to navigate back from 1 to 10+ pages to re-sync the thread and this will then show the latest posts. Thanks, Mike.
Hi there,
There is an issue with role permissions that is being worked on at the moment.
If you are having trouble with access or permissions on regional forums please post here to get access: https://www.boards.ie/discussion/2058365403/you-do-not-have-permission-for-that#latest

Any racing rigs/setups around?

2

Comments

  • Registered Users, Registered Users 2 Posts: 147 ✭✭katana1


    This is the Bucket seat I got ---seat is excellent ,the rails that are on it need a lick of paint as there off his old seat.I had to go to Bandon but they were big money everywhere for a clean one.Also no sellers were willing to wrap for courier and no one would sell me just the one .I was lucky to find this guy.


  • Registered Users Posts: 258 ✭✭Squidwert


    c0rn3y wrote: »
    Squidwert: you have built some rigs now I guess. You think that it will work with that design? Im still not sure about the seat area yet and need somewhere to mount my keyboard when I have the "wheel deck" mounted, a gear shift mount and a custom hand break (when ever I make one).

    It's a great looking rig thou what i would change is the wheel mount holes. the one's i marked with the 1 would not be needed they are probably better where the 2 is so you can move the wheel mount up and down aswell as at the angle. It looks good but you mite need a way of adjusting the angle of the pedals and you mite need to fit a foot plate. Its all trail and error anyways you can only see things that are wrong when you have done them. I would be very happy with what you are making. Keep up the good work and post some pis's ;)
    lol this one mite give you a few idea's (mite be a little bit over done)
    http://forums.bit-tech.net/showthread.php?t=167656

    rigk.jpg


  • Registered Users Posts: 286 ✭✭c0rn3y


    katana1: Hey I wouldn't say you have limited talent man, your welds are looking good and clean. The bit that you have done a close up on in the second picture that looks to be behind the seat area, what is that for? Just curious =)

    Squidwert: I really like the idea you had there on the "number 2", if I put holes down that way I could still adjust the angle. I was thinking that a quick release from a bike wheel would work instead of bolts. Would make it very easy and fast to remove the "wheel deck" when needed. I have been think A LOT about the pedal area and it seems to me that it would be better to have something like your CTS pedals where I adjust the pedals the way I want them and it does not effect the rig its self. And that rig on bit-tech is just insane to be honest. The details on his CNC stuff makes me want to marry him (don't tell my wife hehe).

    Now I just have to find Box Section somewhere close to Dublin 15. And somewhere I can get a seat rail for my Sparco seat =)


  • Registered Users, Registered Users 2 Posts: 147 ✭✭katana1


    Hi , The bit behind the seat area is wider than frame which is around 530mm --These angles brought it out another 100mm or so on each side for two reasons....The first was stability as I saw that online frames are usually a bit wider.
    The second is I want to put speakers behind and had to be wider than seat.I will use some of the 10mm square and try make a holder out of something.

    I suppose I went to the trouble of all the angles for to look a bit better than just a straight piece with end caps.
    The Idea of the quick release fron bike wheel is a very good one.I may even have a couple somewhere as I raced a years ago.


    As regards the box section -- put up an add in local shops etc, Ask the council lads.I used the 40mm as it was on the railing but if you type "Racing sim " into google images you'll see ones made of 25mm box that look real nice.Even if you get smaller lengths --Box is easy to join if you have a pice of angle iron and a couple of clamps.BTW I am "Borrowing " a couple of ideas from the drawings --if thats ok?
    Hope this helps and sorry for going' on a bit.:o


  • Registered Users Posts: 286 ✭✭c0rn3y


    katana1: Use anything from my drawings that you find is good to use, no need for asking at all hehe. Yeah good idea about putting up a ad in the local shop, think that is what I will do for sure. Maybe even put a wanted ad in adverts.ie.

    Ahh makes more sens now about the angles at the back there and it does add a bit for "flare" to the rig hehe, that is missing from my drawings. You use to race? Same here about 20 years ago (brr that made me feel old hehe).


  • Registered Users, Registered Users 2 Posts: 147 ✭✭katana1


    Re the racing --about 24 years ago for me.I'm an oldie lol.( but your as young as the missus lets you feel)
    I was just looking at what steel I have left myself and I wont have enough. Time for to go looking again as I need about 4 meters to finish.Or else re think the plan.
    That's if the rain ever stops.
    If I get any decent progress I will Put up a pic'.

    squidwert--Thanks for the drawing --I am struggling a bit with what I'm going to do about having the choice of angles with pedals and wheel.Thats a good idea.


  • Registered Users Posts: 258 ✭✭Squidwert


    For steel just go to an local industrial estate to find an engineering company they would have would have lots of steel in full lengths and off cuts.


  • Registered Users Posts: 286 ✭✭c0rn3y


    Good idea there Squidwert, I am going to check today =)

    Got my self a new job yesterday as well so now I should have a bit more money to spend on my racing stuff I hope hehe.


  • Moderators, Computer Games Moderators Posts: 14,715 Mod ✭✭✭✭Dcully


    This thread deserves to be made a sticky, consider it done.
    Its great to see new life around here :)

    Off Topic somewhat , My G25 shifter paddles are fcuked, they engage but get stuck and dont disengage so shifting through gears doesnt work, it just gets stuck in gear and i have to push them in the opposite direction after eash shift to manually disengage, this means for every 5 shifts up i have to push the same paddle forward 5 times too, soo annoying and totally unplayable, ive took it apart and tried everything but no joy.
    F1 sims are a no go for me now,ofcourse i can use the gear shifter but its nowhere near as effective as paddles.
    Its not an issue with slower cars as i normally play with whatever configuration the realife config is.


  • Advertisement
  • Registered Users Posts: 286 ✭✭c0rn3y


    My m8 had this happen and replaced the microswitches on his wheel. I think it was something like this that he used.


  • Registered Users Posts: 286 ✭✭c0rn3y


    Smaller updates on the sketchup rig.
    Getting a bit out of hand and somehow I think some of the parts will be hard
    to source but that is not stopping me from designing what I want hehe.

    I have redone the pedal area. Now I can have all kinds of settings for the
    pedals. I can angle them, lower & higher them and move them front and back.

    Feedback as always is very welcome. Maybe we can get together a community rig =)

    frame.jpg

    frame_floor.jpg

    frame_floor_pedals.jpg

    full.jpg

    pedals_back.jpg

    pedals_side.jpg


  • Registered Users, Registered Users 2 Posts: 147 ✭✭katana1


    c0rn3y wrote: »
    Good idea there Squidwert, I am going to check today =)

    Got my self a new job yesterday as well so now I should have a bit more money to spend on my racing stuff I hope hehe.


    Congratulations on the new job:).
    Thanks for new drawings --some more idead for me to "borrow".
    I asked at two small engineering places in my town for some box section around 25-50 mm and both basically told me where to go as they can use off cuts for brackets.
    They are both known for being tight bas****s anyway.
    So I will go out further and try other places.
    I'm sorry now that I didn't make from MDF as its cheap and easy to work with and also it would be done by now.
    I just wish for a few dry days lol.


  • Registered Users Posts: 286 ✭✭c0rn3y


    Thanks katana1, feels very good to start working with stuff that I like (web dev).

    Anyways I wanted to see what my design would look like using aluminium extrusion (profile) that you can find so many people using. I think that I will make my rig out of this stuff instead of steel. Some pics below. And as always ant ideas are more than welcome.

    frame.png

    frame_wheeldeck.png

    frame_pedals.png

    pedals1.png

    pedals2.png

    frame_wheeldeck_screens.png

    What do you people think, aluminium or steel?


  • Registered Users Posts: 258 ✭✭Squidwert


    Looks great. but the only thing with that 80/20 stuff that you'll be using is the price. even the brackets are quite pricey thou it would be very easy to adjust.

    I used these guys when i bought some a while back

    http://www.flomax.ie/category.asp?Category_Id=18


  • Registered Users, Registered Users 2 Posts: 147 ✭✭katana1


    Squidwert wrote: »
    Looks great. but the only thing with that 80/20 stuff that you'll be using is the price. even the brackets are quite pricey thou it would be very easy to adjust.

    I used these guys when i bought some a while back

    http://www.flomax.ie/category.asp?Category_Id=18[/QUOTE]

    I agree that aluminum is very expensive but --It looks better and my rig is going to be heavy when (if) its finished.
    I would go for aluminum if I had money.

    On another note and I don't want to hijack your topic.:o
    If anyone who has a G27 could give me the dimensions of the pedal plate and the length and depth of the wheel.Mine was ordered last Friday week but there was a problem with packaging and it was sent back to Komplet.I am hoping to get it early next week but if I had dimensions I could do a bit more work on rig.
    Thanks if you can help.:)


  • Advertisement
  • Registered Users Posts: 286 ✭✭c0rn3y


    Hey katana1, its not hijacking hehe. It is the hole point of this post. To talk about racing rigs and anything that has to do with them =)

    You can find all you need here about the measurements of the G25/G27 wheel and pedals.

    I was looking at different places to get the aluminium extrusion and it does seem to cost a lot. I asked a man that works for KJN Ireland and I was told 16€ per meter of 45x45 profile and 5€ for every bracket. Would mean around 200€ just for the brackets. I know I found a site a while back in Poland I think that sold it WAY cheaper, I just have to find that site again. Looking at the UK version of the KJN site I would be able to get everything for half the price compared to the quote I was given. Think I will ask why =)


  • Registered Users, Registered Users 2 Posts: 147 ✭✭katana1


    c0rn3y wrote: »
    Hey katana1, its not hijacking hehe. It is the hole point of this post. To talk about racing rigs and anything that has to do with them =)

    You can find all you need here about the measurements of the G25/G27 wheel and pedals.

    I was looking at different places to get the aluminium extrusion and it does seem to cost a lot. I asked a man that works for KJN Ireland and I was told 16€ per meter of 45x45 profile and 5€ for every bracket. Would mean around 200€ just for the brackets. I know I found a site a while back in Poland I think that sold it WAY cheaper, I just have to find that site again. Looking at the UK version of the KJN site I would be able to get everything for half the price compared to the quote I was given. Think I will ask why =)


    I take it you can weld. 30mm box is very cheap and is a good size to work with.
    I needed 6foot of it and Miko Metals in cork charged me E3.95 so I would say a length is cheap enough.
    Its mild steel.....I had a look around at aluminum and its big money everywhere.
    If you gave miko metals a cut list and made your own brackets for alum' box it might be within your budget.I think they deliver nationwide.
    Got the dimensions so I can do another bit at weekend (wife's birthday today:D).
    Thanks for the link.:)


  • Registered Users, Registered Users 2 Posts: 147 ✭✭katana1


    I am slowly getting there with my rig.I started the table part at the weekend (in my tiny shed):o.This is it so far.....Hopefully next ones will be it finished....If ever:rolleyes:....I was wrong to use galvanised box,even if it was free. It was a nightmare trying to get it off and kept blowing back from inside when I was trying to weld it.:mad:.I'm kicking myself that I didn't buy new steel....BTW my cameras date and time are all wrong.


  • Registered Users Posts: 286 ✭✭c0rn3y


    Hey katana1, MORE PICTURES!!!! hehe.

    I found some 20x20mm box section the other day and thinking I maybe should use that but it looks so small hehe =)


  • Registered Users, Registered Users 2 Posts: 28,789 ✭✭✭✭ScumLord


    That aluminium stuff isn't that as ridged, it also suffers from the problem of coming apart much easier, the softer aluminium doesn't hold the brackets as well.


  • Advertisement
  • Registered Users, Registered Users 2 Posts: 147 ✭✭katana1


    Well I'm 90% finished. I just have to finish bracket for gearshift.Also a few paint touch ups etc.Thanks for all the ideas guys. I know that it's homemade but I'm really looking forward to hooking it up next weekend.
    Well thanks to this thread and your ideas-- I finally made something.:)

    About the 20mm box. If you have a good lot of it you could do something like the frames on older ducati bikes --it would make it good and strong. If you are welding it make sure you brace it all over as 20mm box would go all over the place with heat.Stagger weld it is best..I learned the hard way when I tried to make my front gates :o


  • Registered Users Posts: 258 ✭✭Squidwert


    Awesome Great stuff :)


  • Registered Users Posts: 286 ✭✭c0rn3y


    That is looking really nice man. Good stuff!!

    Now all we need is a Lan Party to show off all the rigs hehe. Comon it would be cool, no idea how people would get the rigs there hehe.

    Good tips about the 20x20 box section. Thanks for that one =)


  • Registered Users, Registered Users 2 Posts: 147 ✭✭katana1


    Thanks lads. BTW --I took advice and rang a couple of engineering places --Got a bit of aluminum plate from one and a few pieces of stainless plate (cut into flat bar when I got home) but Got enough to finish.
    I worked at a bracket for the shifter tonight and at last I'm finished --just to connect everything up at weekend ...And try put my little shed back together.:)..
    Last photo and thanks again for all the help.


  • Registered Users, Registered Users 2 Posts: 382 ✭✭Brad768


    For the boys with PVC rigs, where did you get your piping and joints from. Also if you don't mind me asking, how much it will set me back?


  • Registered Users Posts: 286 ✭✭c0rn3y


    I have a PVC rig. I got all my pipes and fittings from a plumber in Swords. Cant remember the name but I will check for you. All the pipes, fittings and glue set me back about 100-120€ and then you have get a seat as well.

    I am planing to build a new rig and will be selling my pvc rig without the seat soonish if that would be anything you would like =)


  • Registered Users Posts: 66 ✭✭pben


    Hi

    Here's my wheel stand cost €28 worth of wood from B&Q, used on the Xbox360 with Forza


  • Registered Users, Registered Users 2 Posts: 147 ✭✭katana1


    pben wrote: »
    Hi

    Here's my wheel stand cost €28 worth of wood from B&Q, used on the Xbox360 with Forza
    Well done --It looks cool and really sturdy ,Thats some good woodworking.
    happy Racing .:)


  • Registered Users, Registered Users 2 Posts: 28,789 ✭✭✭✭ScumLord


    c0rn3y wrote: »
    I have a PVC rig. I got all my pipes and fittings from a plumber in Swords. Cant remember the name but I will check for you. All the pipes, fittings and glue set me back about 100-120€ and then you have get a seat as well.
    How much did the PVC pipe cost? I would have expected the pipes and other bits to be around €20 -€40.


  • Registered Users Posts: 286 ✭✭c0rn3y


    I was thinking the same that it would be cheap but its the t connectors that kill the price, there is so many of them. And I didnt really shop around anything.


  • Advertisement
  • Registered Users, Registered Users 2 Posts: 28,789 ✭✭✭✭ScumLord


    c0rn3y wrote: »
    I was thinking the same that it would be cheap but its the t connectors that kill the price, there is so many of them. And I didnt really shop around anything.
    I suppose, at €2-3 it accounts for half your cost. I'm sure you could get them cheaper from the right plumber supplier, you'd really need to have a plumber friend so he could get you them at the bulk price.


  • Registered Users Posts: 286 ✭✭c0rn3y


    I did have a hard time finding any plumber that had 2 inch PVC, in the end I had to buy 1,5 inch and it just is not as good. It is still really nice but it would have been just that little bit better with 2 inch PVC if you know what I mean =)


  • Registered Users Posts: 286 ✭✭c0rn3y


    Server: Kotten
    Password: rf2

    TS Server: 83.254.93.155

    All up and running now =)


  • Banned (with Prison Access) Posts: 350 ✭✭CRM Ireland


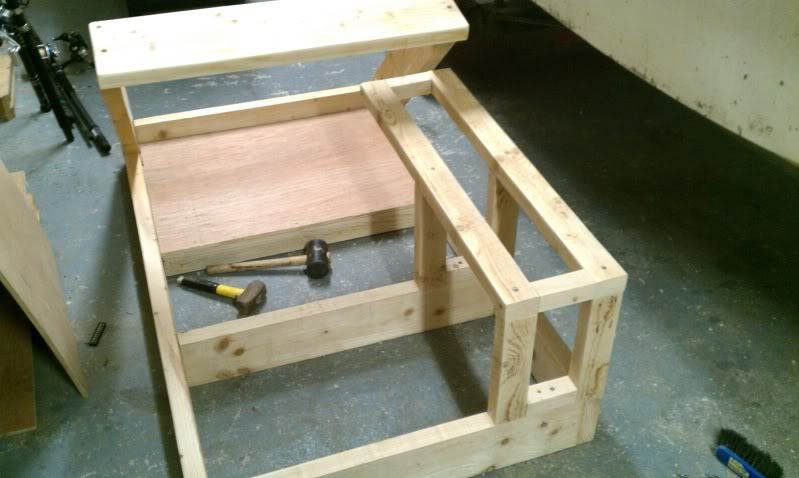
    I was on the GTPlanet forums too and I started building a wooden rig in the last few days. Ive still got a fair bit to do, but Im hindered by the fact I have not found a seat yet. Ive also looked at all the second hand sites and not found one at the price I would like. I will be patient for a little while longer, after that I will just get any seat as I really want to complete this and start racing!

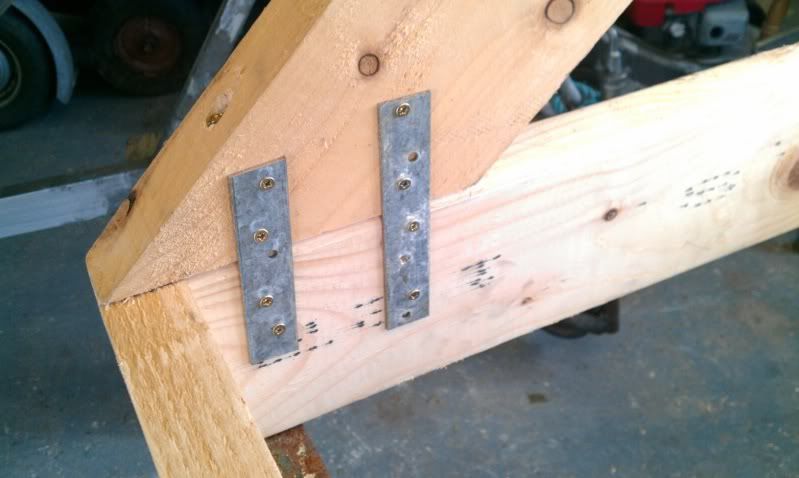
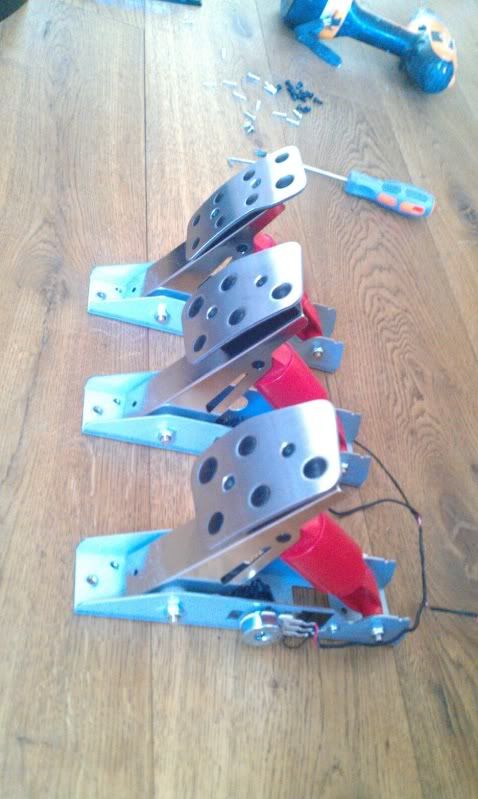
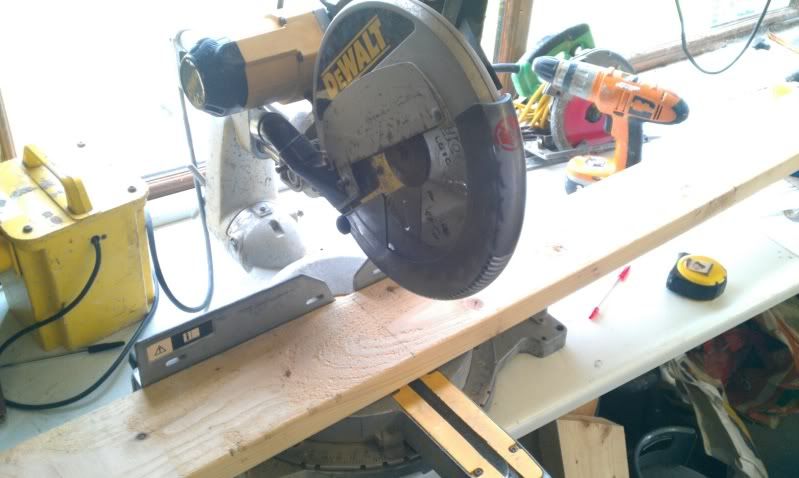
    tools.jpgmetalbracejoint.jpgpedalsfacingsrotated.jpgdewaltcuttingwood.jpg
    endofdaytwo.jpg

    I painted most of it tonight, but I didnt take any photos as it was late when I finished and it was still wet. I will get the seat and then get everything finished before I give it a second coat and that will be me having built the first thing ever in my life! I had no idea how to use the tools in my garage, I just rent the place from a builder who emigrated to Australia. Luckily YouTube can teach a lot!

    So far the entire build hasnt cost me 1c because all parts were in the garage, but Ive ran out of bolts/screws and I need to buy a chair. Its not going to cost me all that much though.


  • Registered Users, Registered Users 2 Posts: 147 ✭✭katana1


    Hi, I cannot find in profile --what part of country you are from. PM me with approx location and I will try and find a seat. When I was looking for myself ,I found a good few but a lot were too far from me.I got a decent one in Bandon Cork .
    BTW- some nice craftsmanship with the rig.


  • Registered Users Posts: 286 ✭✭c0rn3y


    @CRM Ireland: I am liking what you have done so far. That rigs reminds me a bit of Cillicokes steel frame rig. What kind of seat you looking for? Adverts.ie has many seats. There is loads of seats there for 20-40€ and some ok bucket seats for around 100€.

    Here is a couple:
    http://www.adverts.ie/car-parts-accessories/bucket-seat/1424229

    http://www.adverts.ie/car-parts-accessories/cobra-bucket-seats/1452172

    http://www.adverts.ie/car-parts-accessories/bucket-seat/1301141


  • Banned (with Prison Access) Posts: 350 ✭✭CRM Ireland


    I live in Clogherhead, just slightly further north than Drogheda, Co. Louth.

    @c0rn3y I actually saw every single one of those seats last night. I was up until nearly 5am looking at Adverts, DoneDeal, BuyandSell, Gumtree and Ebay.

    The grey FK seat has no rails. I really need to be able to slide the seat back and forth. Im 6'3 so if I set it in position for myself, no-one else would be able to reach the pedals!

    There were a few lovely seats I saw, and I even spoke to some of the sellers, but they were not willing to split. They were far too expensive to buy as a pair. I will keep looking though, Im positive I will find one this week.

    Thanks for the advice and compliments.


  • Banned (with Prison Access) Posts: 350 ✭✭CRM Ireland


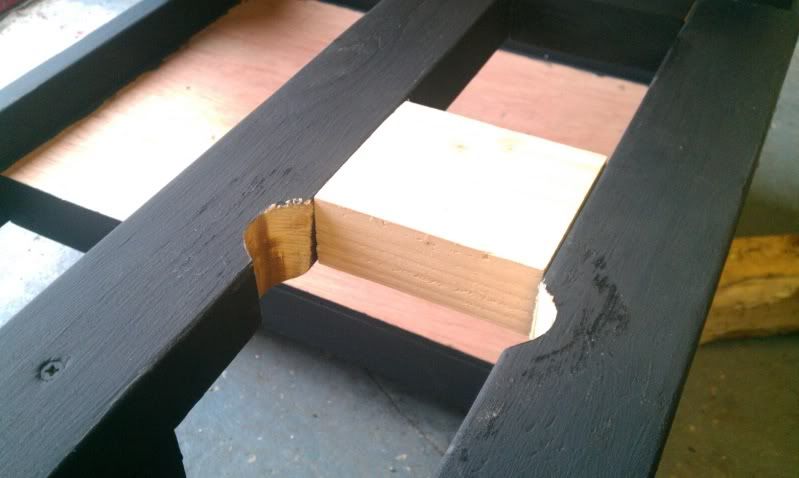
    Ive cut out a small section for the gear selector to fit in. I will paint and attach the other piece of wood to clamp the gear selector to. Its not actually screwed in here, its just wedged in a bit.

    This is the first coat of paint Ive applied and Im concerned its not tough enough. You can see the damage I done to the first coat when I used the jigsaw to cut out the grooves. Its darkened the paint quite a bit.

    gearselectorcutout.jpg


  • Registered Users Posts: 258 ✭✭Squidwert


    awesome stuff CRM Ireland keep posting pic's


  • Advertisement
  • Registered Users Posts: 286 ✭✭c0rn3y


    Still haven't got around to building a new rig. Think its down to the fact that I am not sure what I want. Done so many different designs in sketchup and I finally think that I have it. I want to make my own sequential gear shifter, H shifter, handbrake and pedals and have been saving for this a good while (Squidwert I am coming for those parts hehe). Anyways here are some of the first drafts of the new design (based a bit on cillicoke's rig), please say if there is anything that should be changed or so.. honesty is good =)

    1.jpg

    2.jpg

    3.jpg

    4.jpg

    5.jpg

    6.jpg


  • Banned (with Prison Access) Posts: 350 ✭✭CRM Ireland


    WOW!

    That is just awesome to look at. Youre making me want to extend mine a bit and fill in the box sections....

    Getting in and out would be a little tough, you would be tempted to put weight on the steering wheel to ease access and it probably wouldnt last very long if you did.

    Is that going to be made from metal? What will you use for the panels?

    I have a really important question which I asked last night on GTPlanet, but no-one has answered me yet and Im hoping to be able to get a seat today if possible.

    There is someone near here selling BMW E36 Mtec seats, the only thing is that all of the adjustments, including backwards and forwards, are electronic. How would I go about connecting that up to a 240V supply? Is this going to involve some expensive kind of voltage changer. Im useless at electronics, so if you know the answer, please explain as if to a child!


  • Registered Users Posts: 286 ✭✭c0rn3y


    @CRM Ireland: Frame will be made out of metal and the side panels will be made out of MDF I think.

    I'm not sure what voltage that kind of chair takes but I bet it's 12v because that is what the battery can give, the amps is a different question. Can't see it pulling more than 2-3amps. You should be able to use a old power supply from a computer, just guessing but around 250-400w should do just fine. Not sure about any of this, its just guess work. But should work just fine =)


  • Banned (with Prison Access) Posts: 350 ✭✭CRM Ireland


    So does a PSU from a pc downstep the voltage to 12v? I didnt know that.... :)


  • Registered Users Posts: 286 ✭✭c0rn3y


    Yeah your internal hardware e.g. hard-drives and cd/dvd-rom drives run on 12v.


  • Banned (with Prison Access) Posts: 350 ✭✭CRM Ireland


    c0rn3y wrote: »
    @CRM Ireland: Frame will be made out of metal and the side panels will be made out of MDF I think.

    I'm not sure what voltage that kind of chair takes but I bet it's 12v because that is what the battery can give, the amps is a different question. Can't see it pulling more than 2-3amps. You should be able to use a old power supply from a computer, just guessing but around 250-400w should do just fine. Not sure about any of this, its just guess work. But should work just fine =)

    Ive spent hours all day trying to find out about this. Apparently the BMW seats have a 30A fuse! So I would need to find a PSU that provided 360W on the 12V rail.

    I suppose this isnt all that hard to do, I was imagining it would be a hell of a lot more complicated than that. The most annoying factor is having to spend more money. If Im honest, its only really going to be me using this, so Im unlikely to be needing to adjust it very much. It all comes down to when I get a reply about the seats if I go electric, or hold out for manual ones.

    My impatience is getting the better of me, Im back to work tomorrow and Ive done almost no work on the rig in the last 2 days.


  • Advertisement
  • Banned (with Prison Access) Posts: 350 ✭✭CRM Ireland


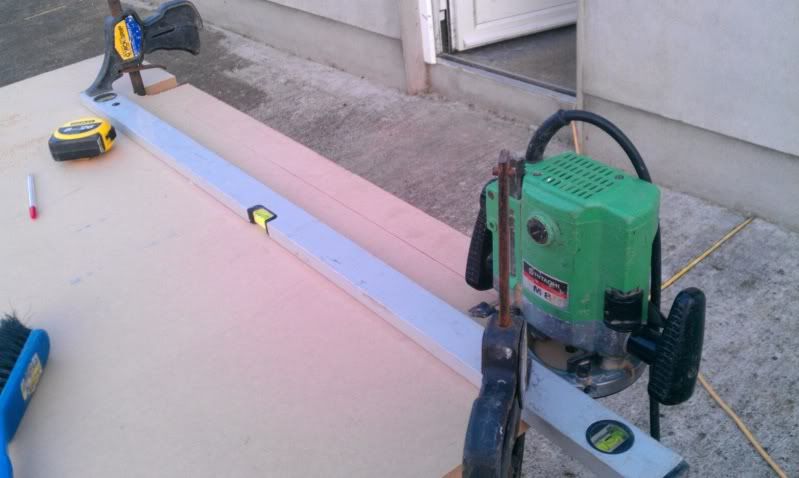
    A small update for tonight. I found a tool, went online and typed in the model and discovered it was a router. A few videos on youtube later and out I went to try it out.

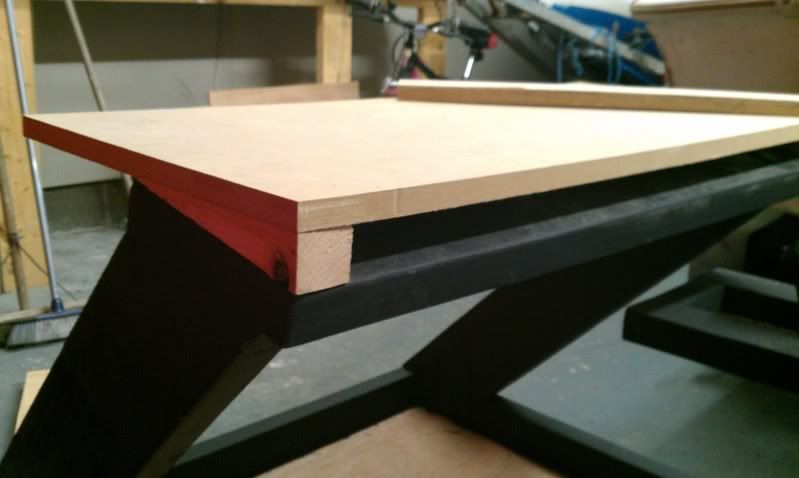
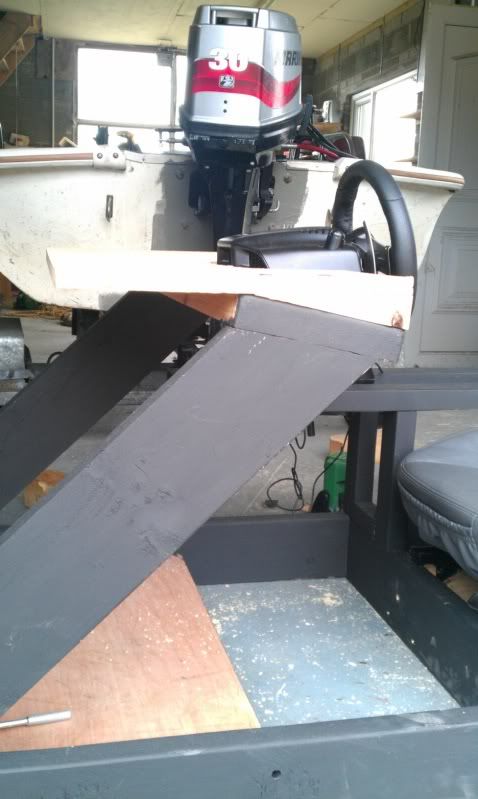
    Ive added a top to rig for the monitor to sit on, just behind the wheel. I will have to cut out the shape of the steering wheel as its not being attached to the MDF I just cut, its being attached to the angled piece which is already painted black and secured in place.

    I also cut a long piece of MDF which will box in the wheel deck and the monitor deck, in essence it will be like a very thin dashboard. This will allow me to cut a few holes in it to attach some switches I have and I can use that to operate wipers, ignition and all that kind of thing.

    Not heard back from the guy with the photos of the seat yet. Im back at work tomorrow, Im travelling from Drogheda up to Castleblainey, so I might just pass a scrap yard on the way which has a decent seat I can use.

    HItachiM8Router.jpg
    Monitordesk.jpg


  • Banned (with Prison Access) Posts: 350 ✭✭CRM Ireland


    I went to a scrap yard in Ardee and found a seat. The choice was terrible, most cars were in a total state and anything that looked like it might have decent seats had been raided long ago! Also as a lot of the cars had wonky windows, or windows that were not shut properly, a lot of the seats had been ruined.

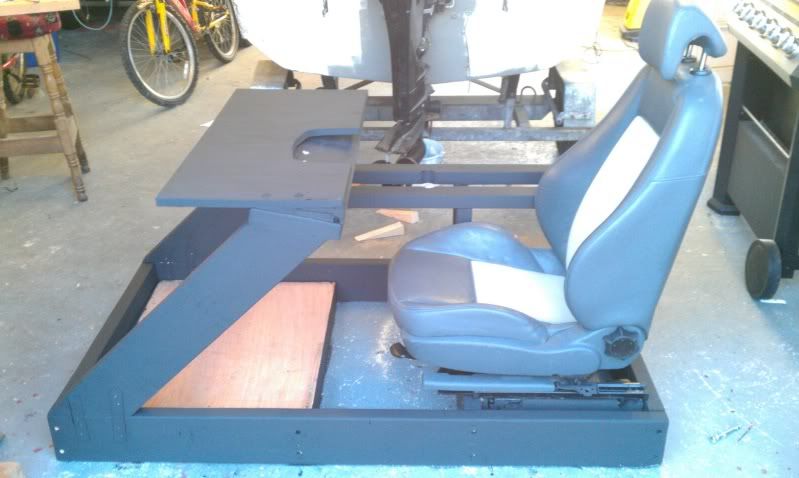
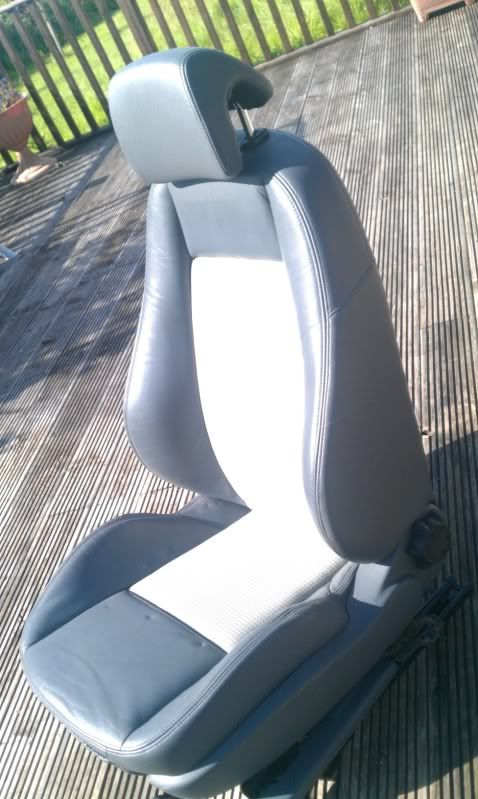
    Anyway I did end up getting a SAAB 9-3 half leather seat which is fully manually operated. Its grey leather and a sort of white/cream material part. Its pretty grubby and is going to take a fair bit of cleaning up. There is a fair bit of mildew on the leather, but that should come off easily enough. I paid 50euros for it. I tried to get it for less, but he wouldnt budge at all, even when I feigned walking away :(

    I have to collect it tomorrow as he was just about to close when I had chosen the seat. When I get there tomorrow he will have taken the car out from where it is with a fork lift and then removed the seat for me including the rails. Considering the locking mechanism in the passenger door isnt working, its probably going to take him a fair bit of time, so maybe 50E aint so bad after all!

    I will post up some pics tomorrow when I get it.

    Anyone got any advice on the best way to deep clean the seat? I dont have a steam cleaner or anything like that. I also dont want to spend a fortune buying products which promise the earth, but are in fact pathetic.


  • Registered Users, Registered Users 2 Posts: 1,495 ✭✭✭M00lers


    I grabbed some Autoglym Interior shampoo from Halfords for about 8 euros when cleaning my own seat and I have to say it's good stuff, seat came out really well and it smells luverly!!:rolleyes:


  • Banned (with Prison Access) Posts: 350 ✭✭CRM Ireland


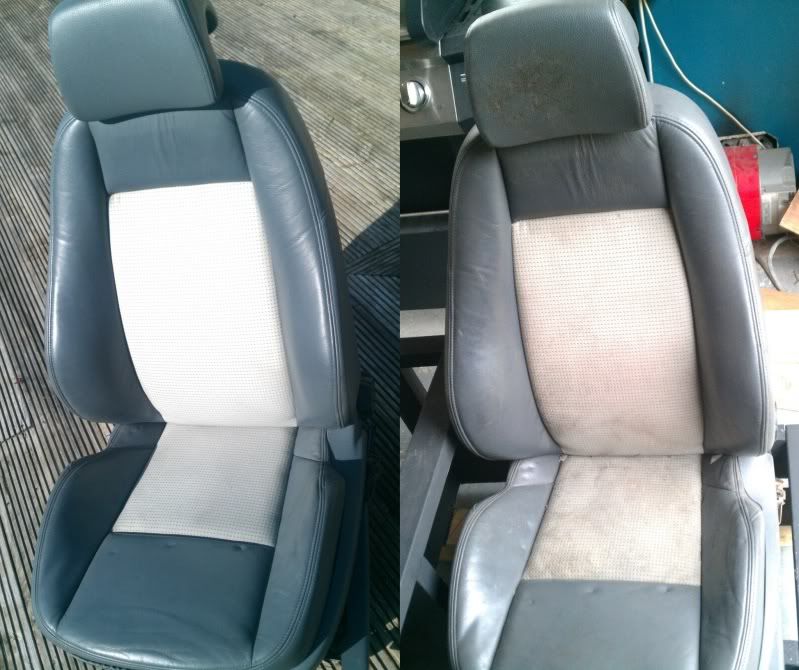
    I collected the seat today and you can see its quite a state. After looking at the price of buying/renting a wet vacuum cleaner, I decided to get it valeted. It cost me 20EUR and there is a huge difference.

    The seat is ridiculously comfy, Im delighted with it! The little pocket at the front is a bonus!

    Its still drying at the moment in my garden, but I took a pic anyway.

    seatdryingaftercleaning.jpg

    Here is a photo comparing it before and after cleaning. 20EUR well spent? I think so!

    seatcomparison.jpg


  • Banned (with Prison Access) Posts: 350 ✭✭CRM Ireland


    Got a few of the intricate bits done today. I also gave it a second coat of paint. My hands are currently still covered in the stuff despite my best efforts to clean my hands!

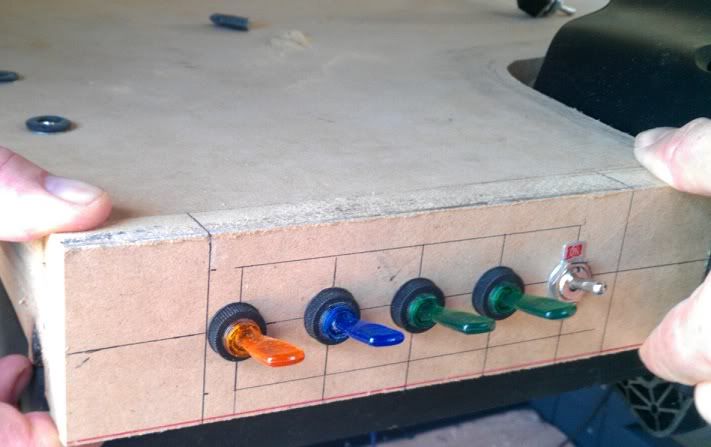
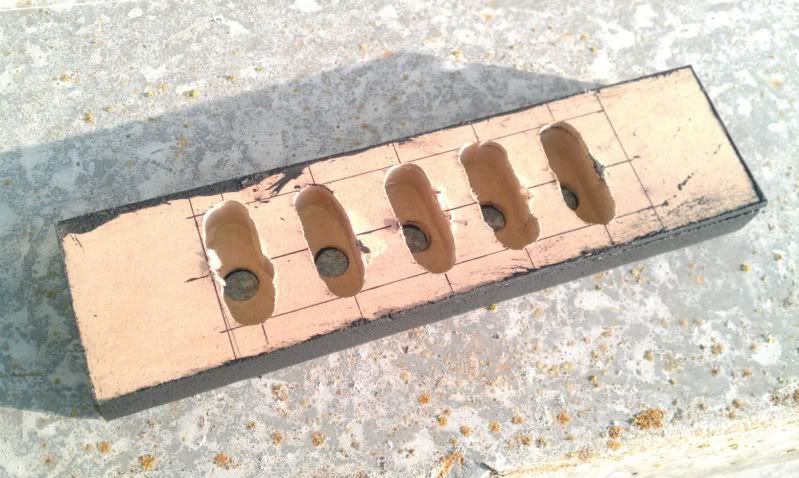
    Ive made the pieces for the dashboard and used a drill and the router to cut it down at the back for the switches. I dont have enough switches for the amount of holes Ive made, but I thought I may as well get the work done while all the tools were out as I will get more switches soon. I have to order 300R resistors anyway, so until then, the switches will not be wired up. They are just decorational at the moment.

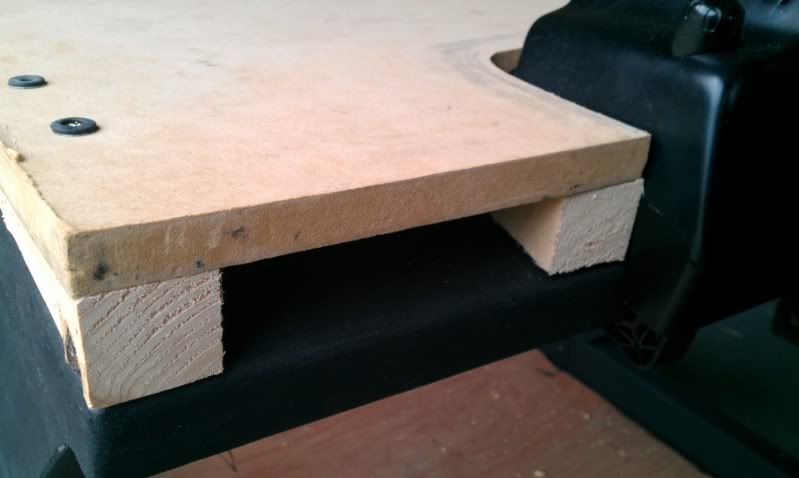
    I also drilled all the mounting points for the wheel etc, so it will be hard mounted. I also attached the monitor deck and painted it. I cut-out the wheel shape from the monitor deck and you can see that the cooling vents on the back of the wheel are perfectly clear, so there wont be any over-heating issues to resolve. This was more by luck than forward planning.

    The dashboard which has the switches attached to it was screwed on upside down, so you can see its not fitting properly. I will turn that the right way around tomorrow. Im so annoyed with myself for doing that because I was struggling to screw it together in alignment and now I can see why. It makes the entire thing look awful. So it will be flush tomorrow for a fact!

    Here is the monitor deck on.
    sideonoftopdeckattached.jpg
    I had to put some wedges in to secure it all. The wedges next to the wheel have been chopped down a bit to allow fopr switch cabling in the future.
    topdeckscrewedon.jpg
    Here its all been painted.
    sideonwithmonitorstandpainted.jpg
    Trying out the switches after drilling some holes.
    switchesfixedtodashboard.jpg
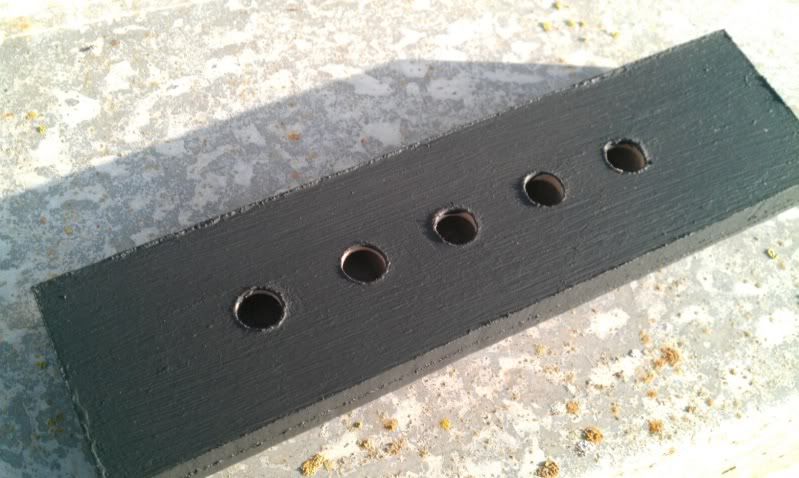
    Ive now painted the small part of the dashboard and you can see where Ive used the router to allow the switches to be screwed into place. I know its not all that neat, but its out of sight so isnt all the important.
    routeddashboard.jpg
    This is the front of it.
    routeddashboardfront.jpg
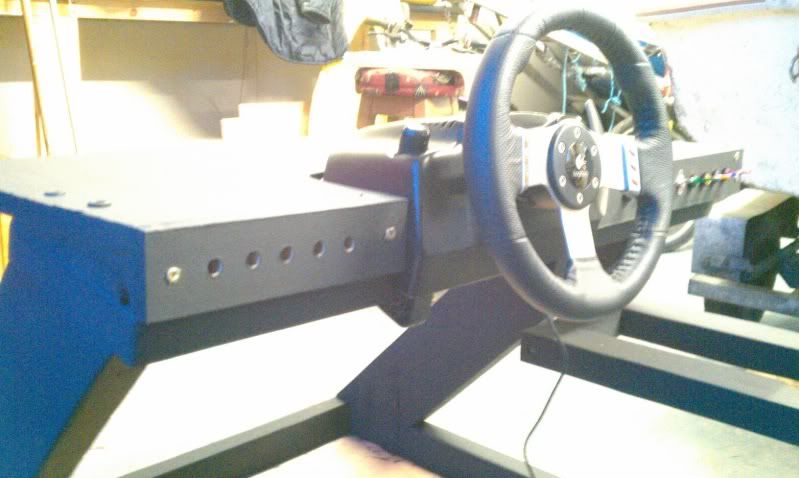
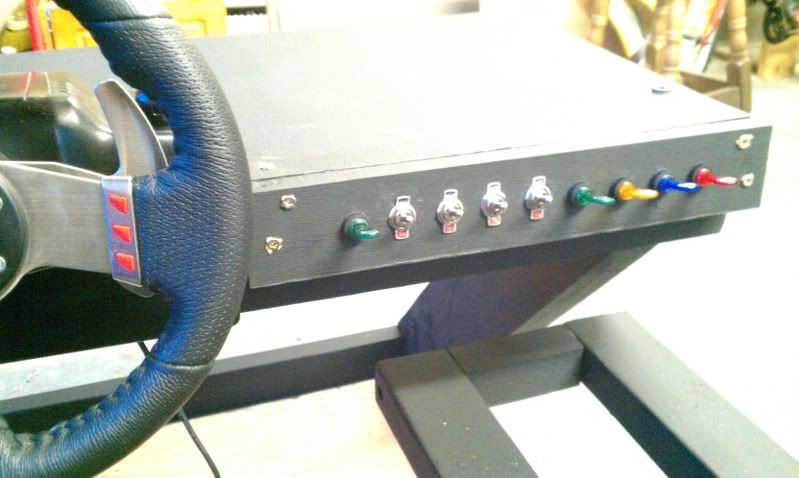
    Ive put all the switches onto the other side. Dashboards now attached, still to paint the screws to hide them.
    dashboardattached.jpg
    You can see what I meant about it being attached upside down. Schoolboy error.
    dashboardswitches.jpg

    So its starting to take shape. The dashboard, apart from not being lined up properly on the right hand side, is looking a lot better than I thought it would. Its nice and simple. I much prefer this to a chunky buttonbox which doesnt look integrated with the cockpit.


  • Advertisement
Advertisement