Advertisement
If you have a new account but are having problems posting or verifying your account, please email us on hello@boards.ie for help. Thanks :)
Hello all! Please ensure that you are posting a new thread or question in the appropriate forum. The Feedback forum is overwhelmed with questions that are having to be moved elsewhere. If you need help to verify your account contact hello@boards.ie
Please note that it is not permitted to have referral links posted in your signature. Keep these links contained in the appropriate forum. Thank you.

https://www.boards.ie/discussion/2055940817/signature-rules
Hi all! We have been experiencing an issue on site where threads have been missing the latest postings. The platform host Vanilla are working on this issue. A workaround that has been used by some is to navigate back from 1 to 10+ pages to re-sync the thread and this will then show the latest posts. Thanks, Mike.
Hi there,
There is an issue with role permissions that is being worked on at the moment.
If you are having trouble with access or permissions on regional forums please post here to get access: https://www.boards.ie/discussion/2058365403/you-do-not-have-permission-for-that#latest

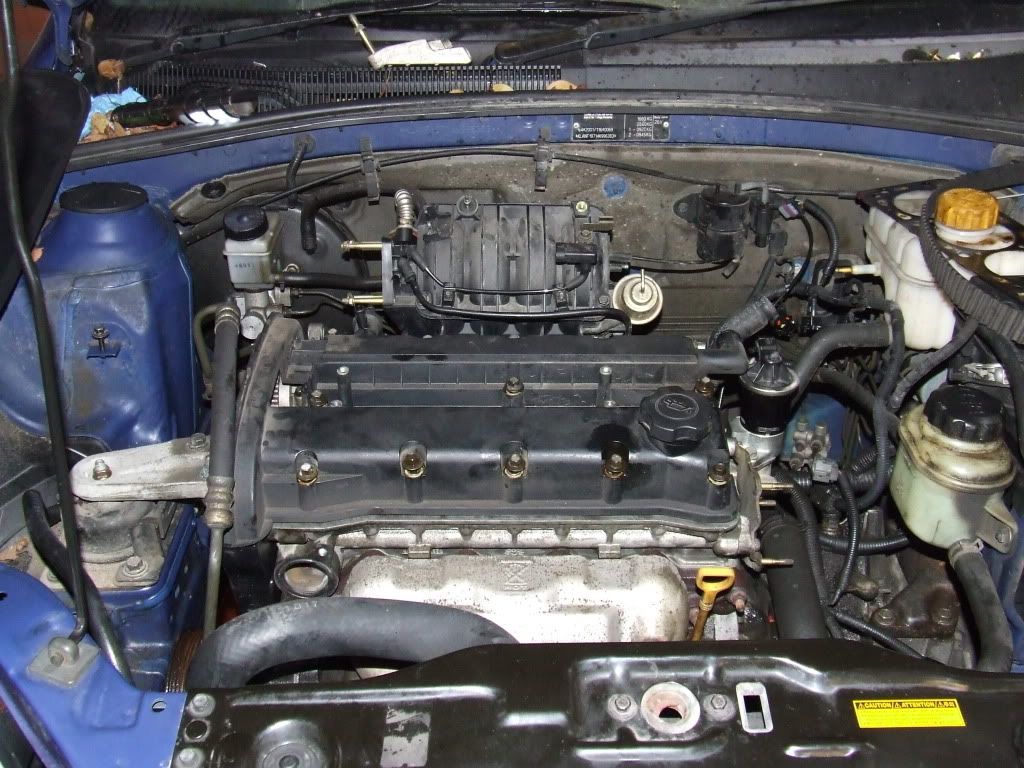
Repair after timing belt failure....pic heavy.

  • 12-03-2012 11:45pm
    #1
    Closed Accounts Posts: 8,223 ✭✭✭


    I posted in another thread that I got a Chevy Nubira for €100 which had suffered a timing belt failure. A couple of people mentioned that they might like a thread on the repair so here it is.:)


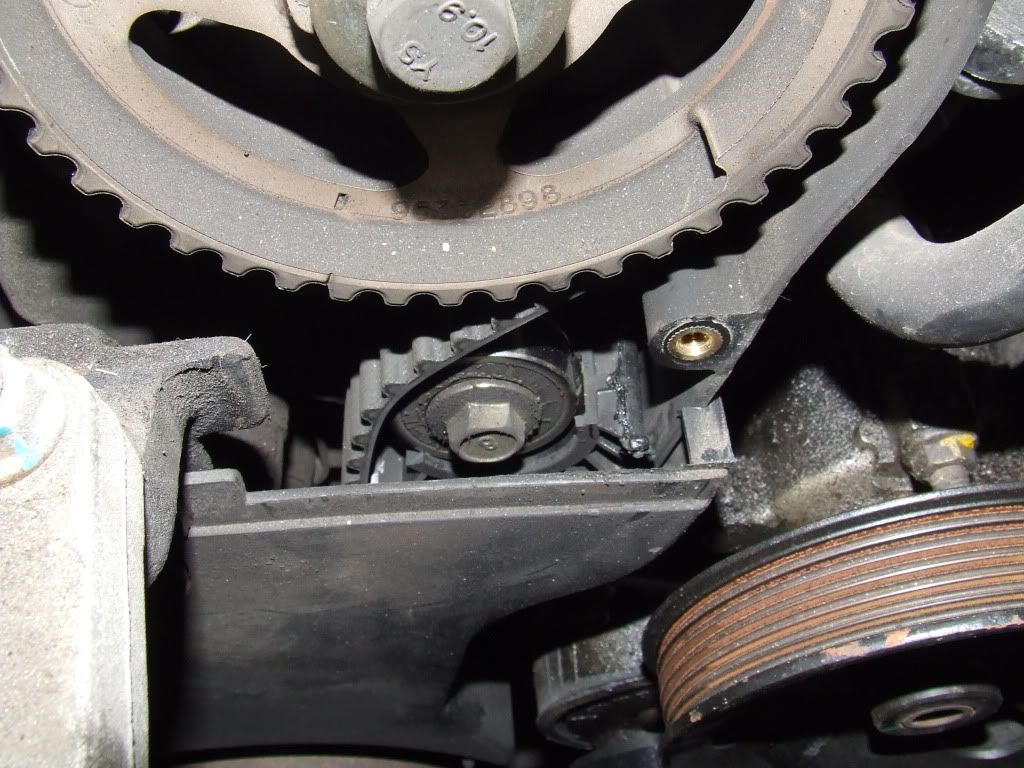
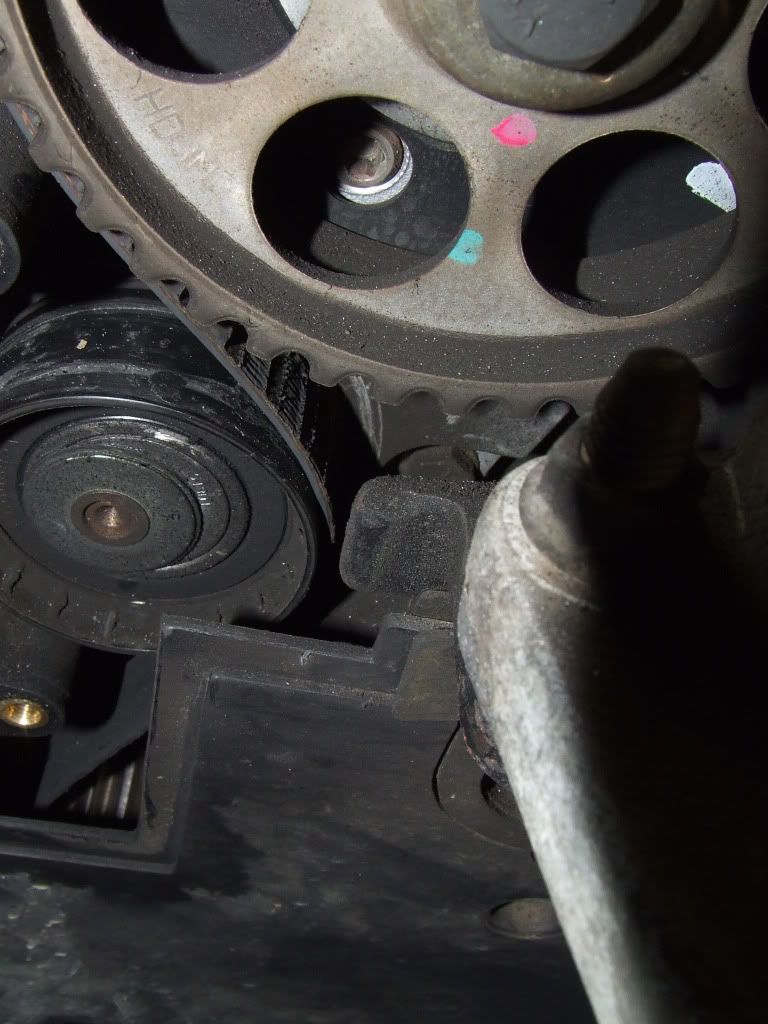
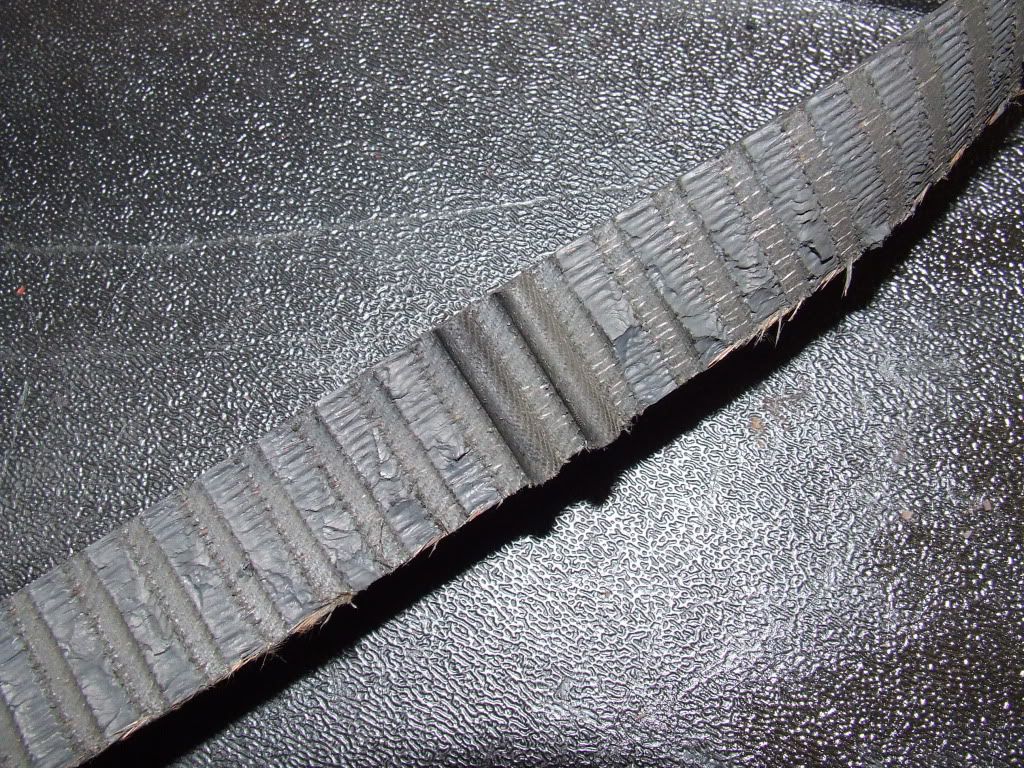
    First, some pics of the timing belt issue. Identical to another posters thread recently on their Nubira, the teeth on the belt failed due to being left well beyond its replacement interval. In this case, the guide pully also failed.

    Failed guide pully:

    DSCF3313.jpg

    Teeth stripped on the belt:

    DSCF3314.jpg

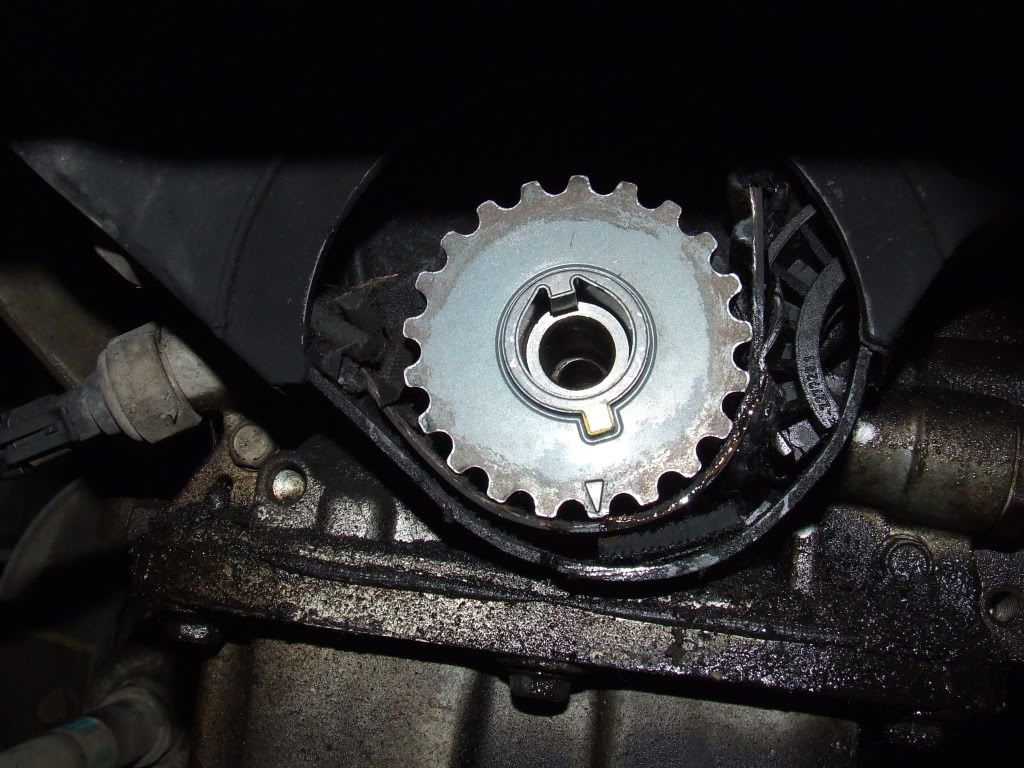
    At the crank pully:

    DSCF3318.jpg

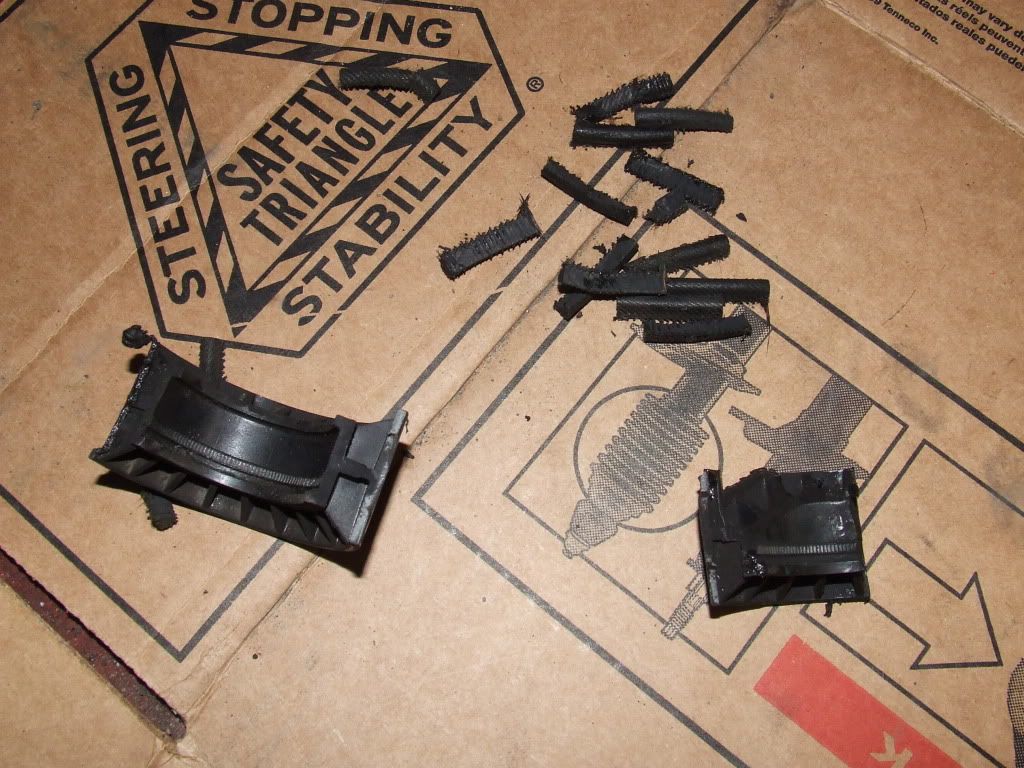
    Broken pieces and stripped belt:

    DSCF3320.jpg

    DSCF3321.jpg

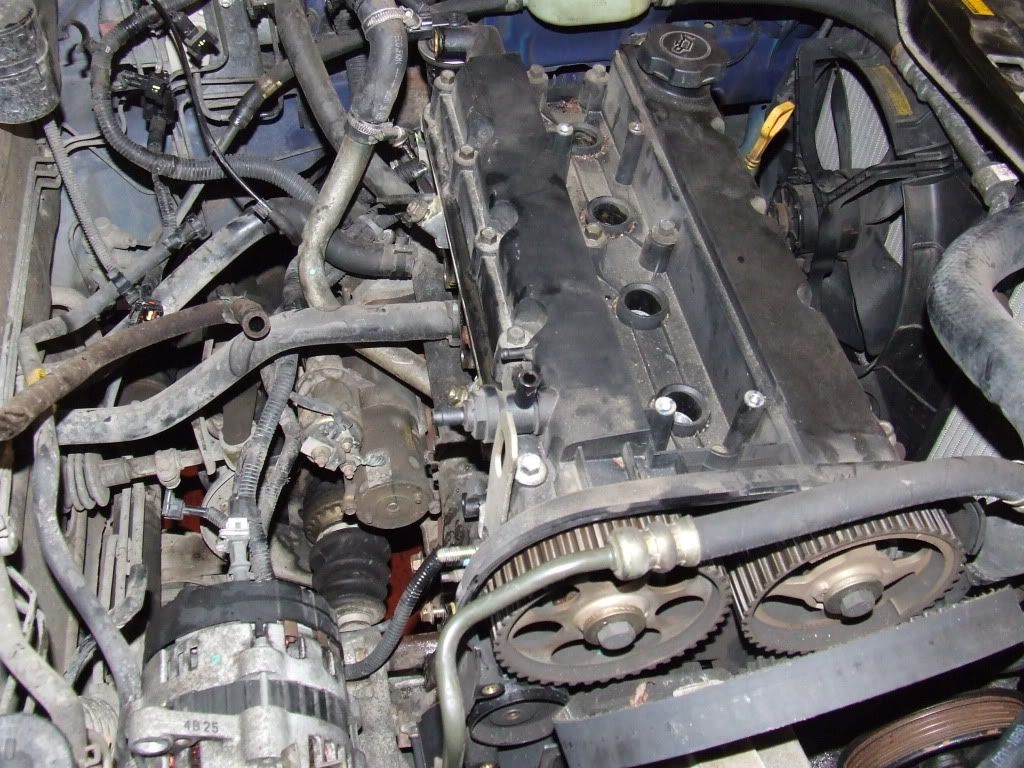
    Onto the strip down, manifolds removed:

    DSCF3316.jpg

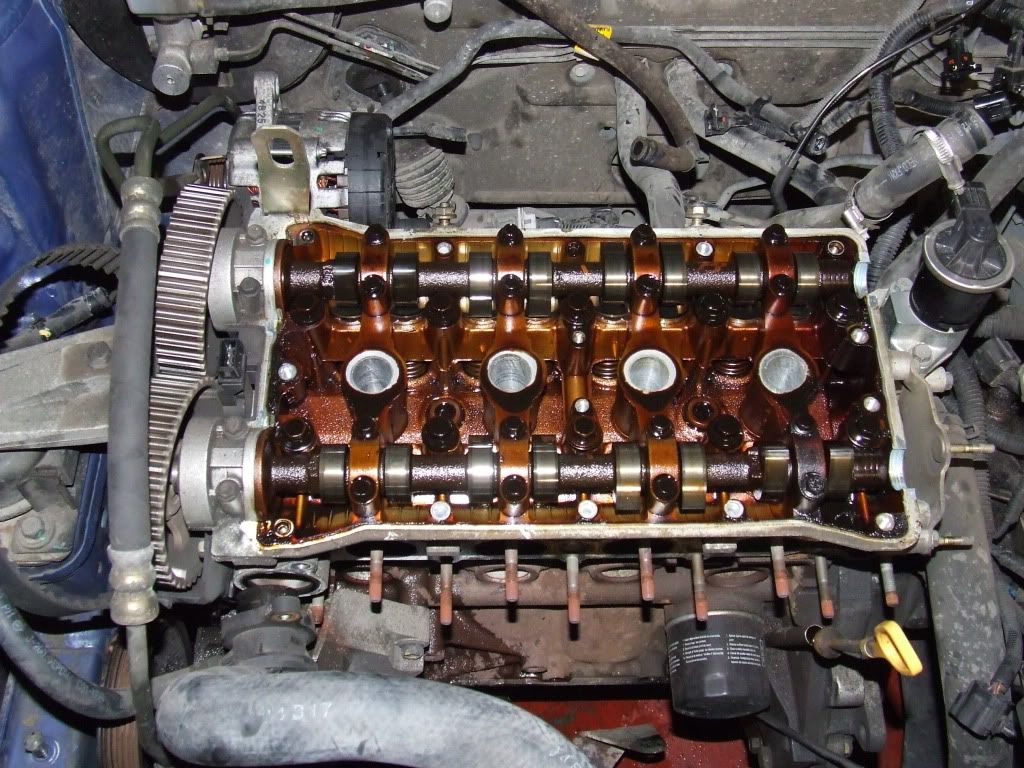
    Rocker cover removed:

    DSCF3317.jpg

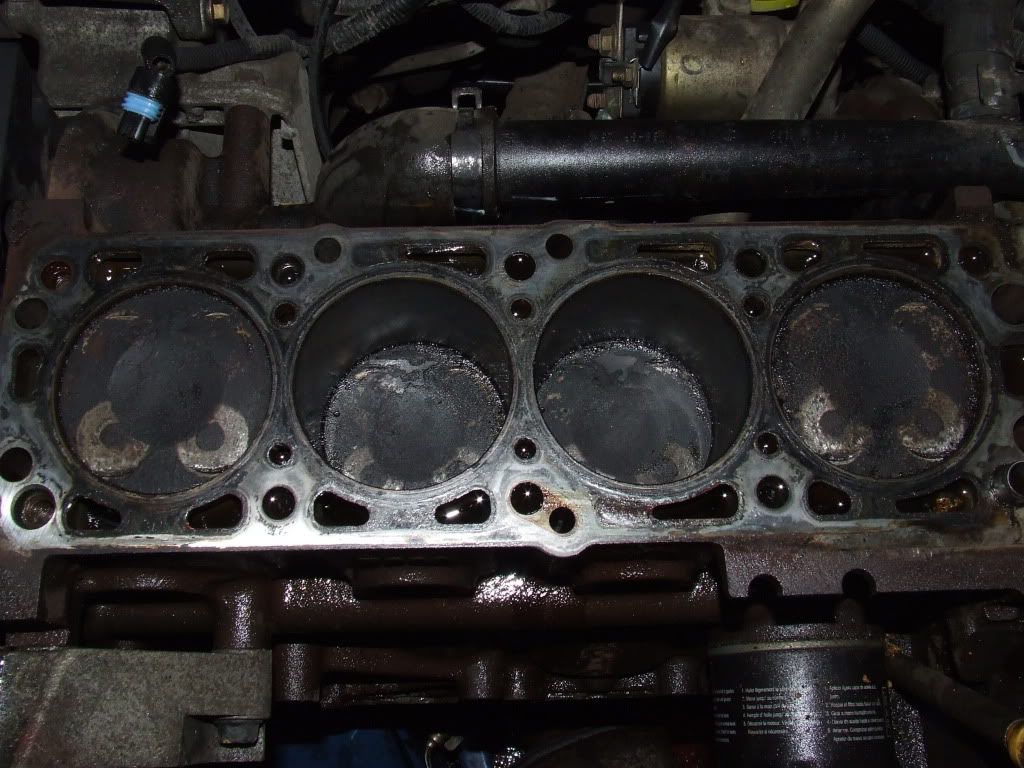
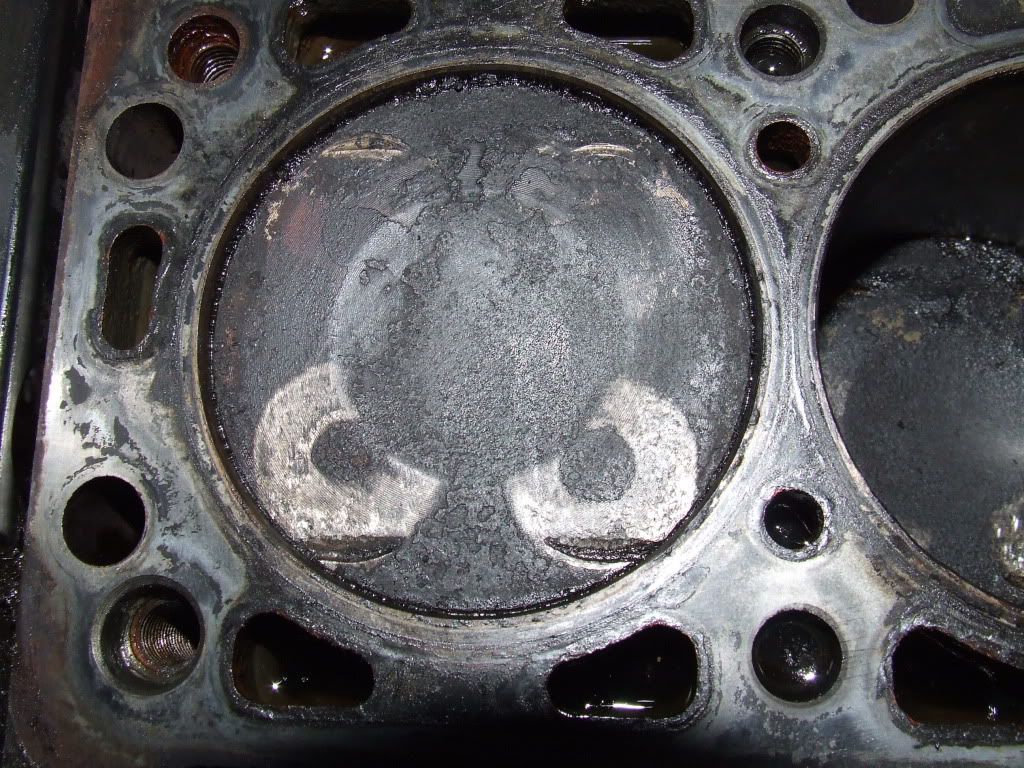
    The head off and the impact marks from the pistons contacting the valves is pretty obvious:

    DSCF3322.jpg

    DSCF3323.jpg

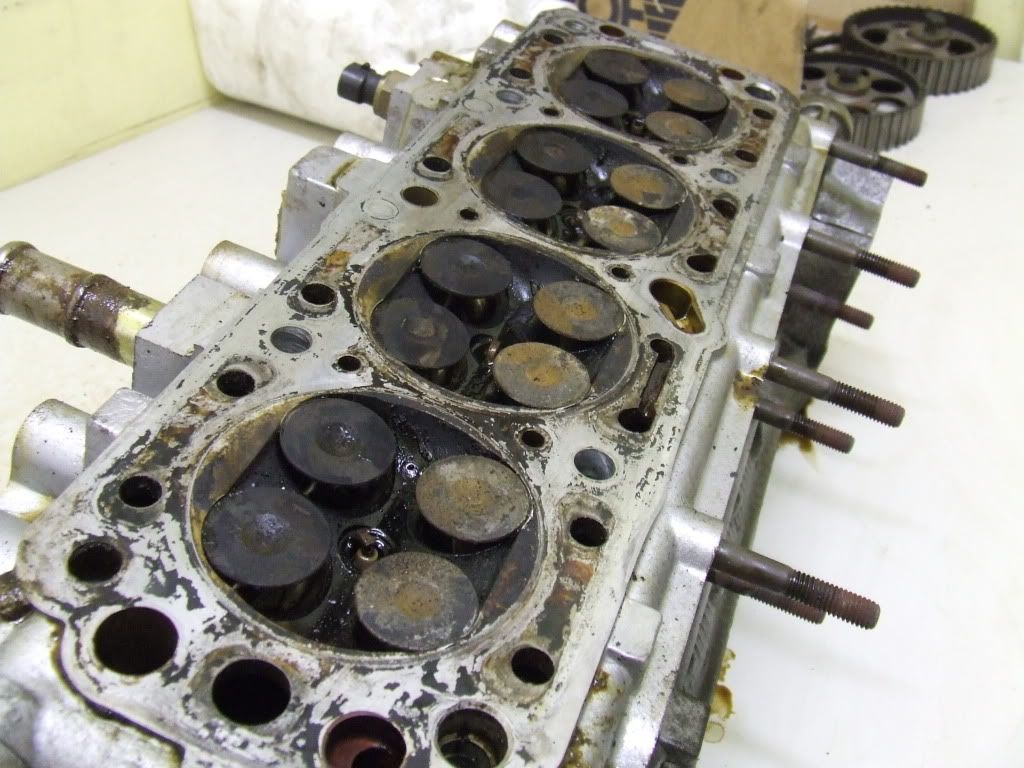
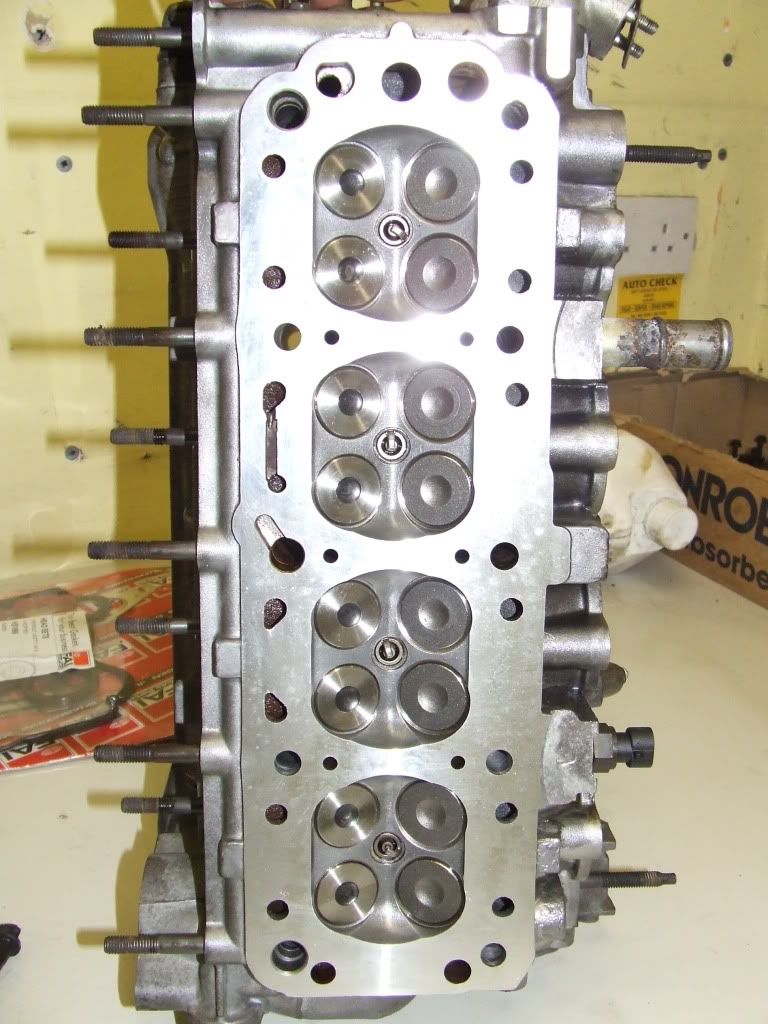
    And the view of the valves....all 16 flattened by the pistons:eek: The cars was seemingly doing 120kph when the belt failed.

    DSCF3325.jpg


«13

Comments

  • Closed Accounts Posts: 8,223 ✭✭✭Nissan doctor


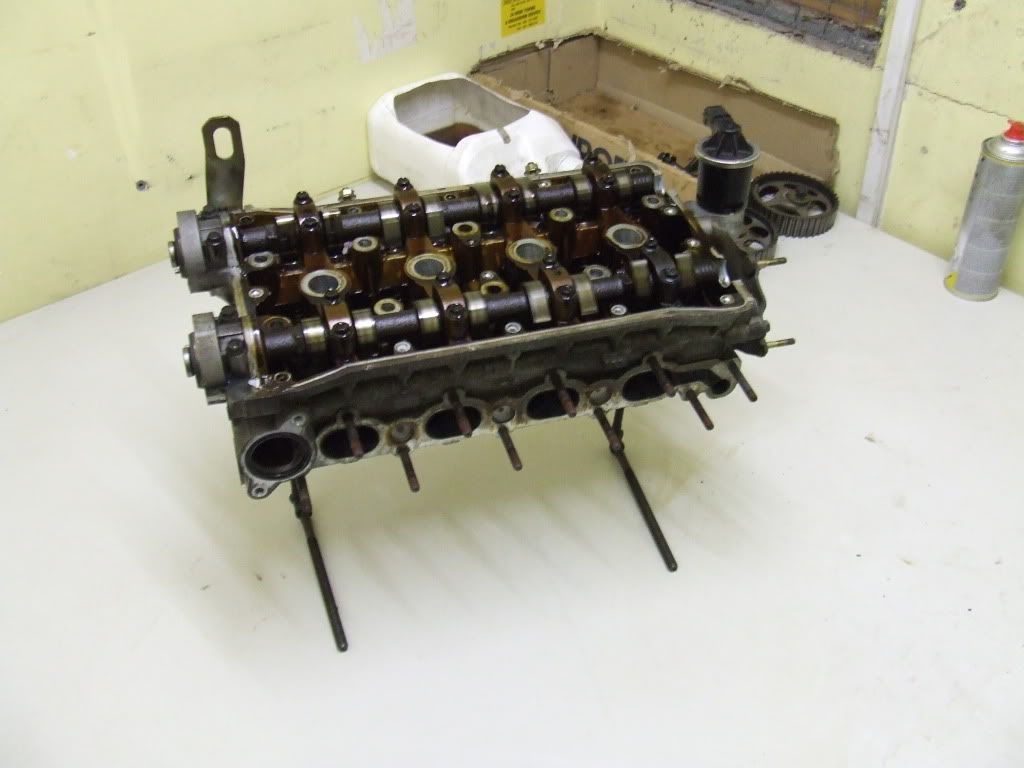
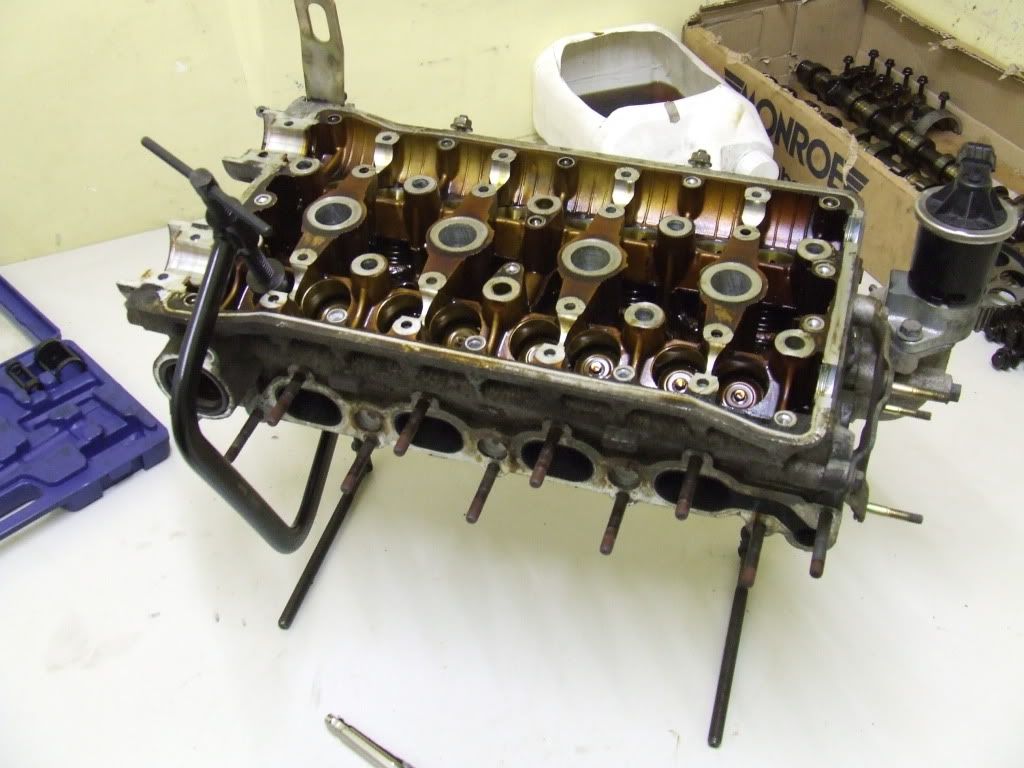
    Cylinder head ready for disassembly:

    DSCF3326.jpg

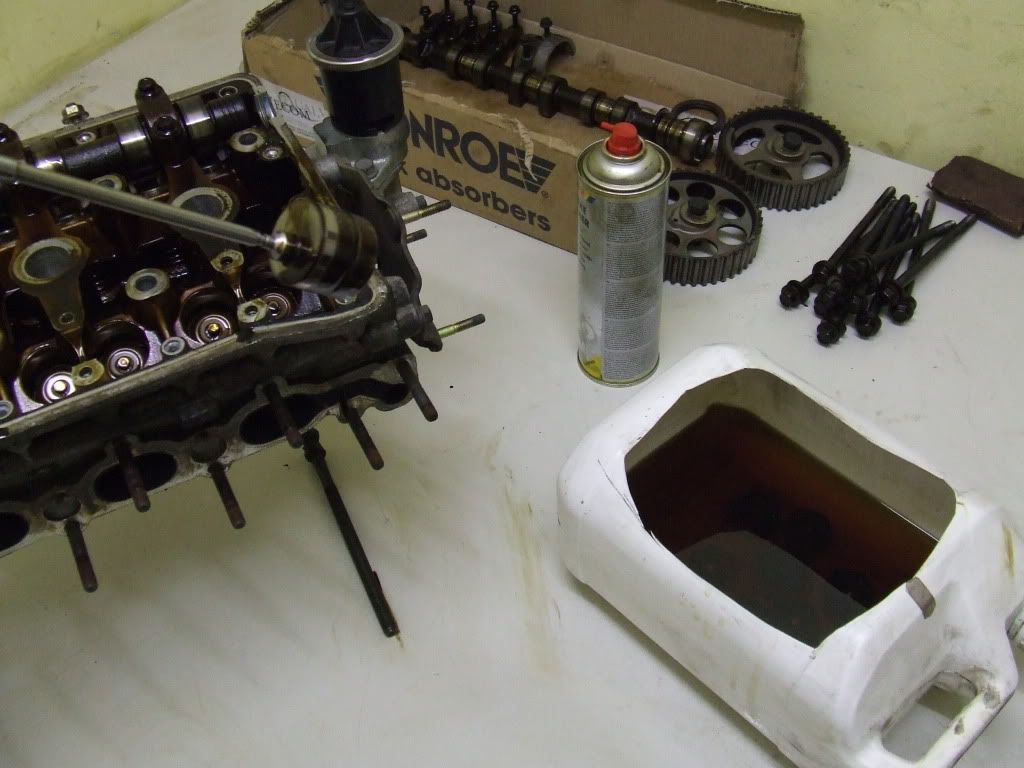
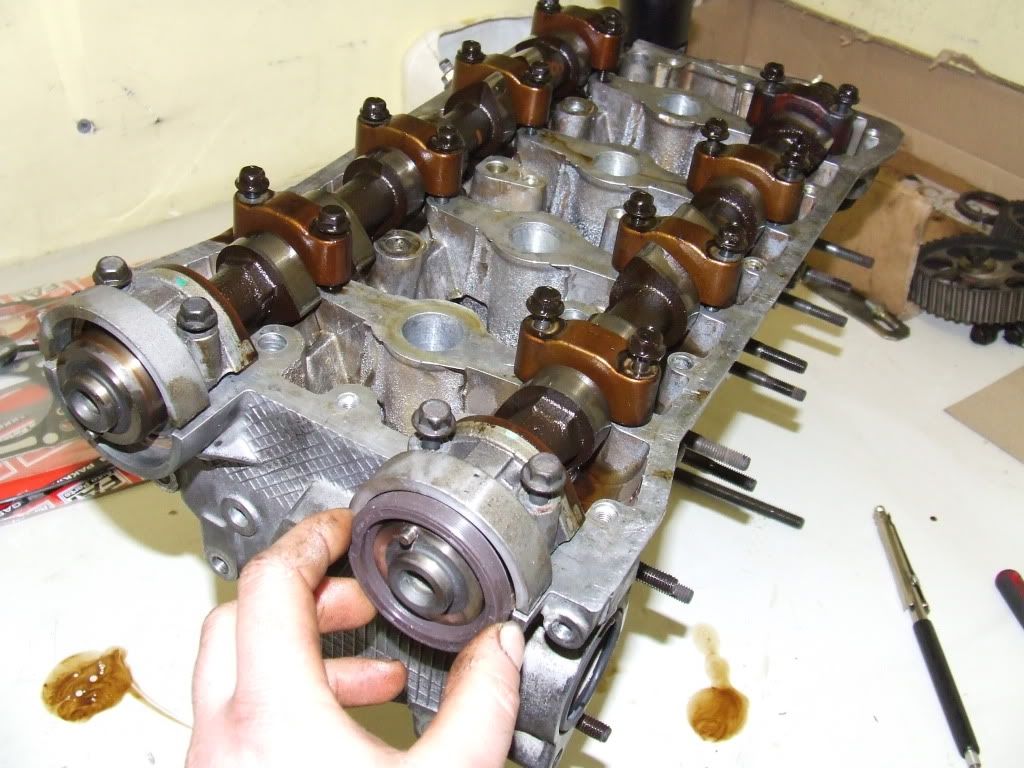
    With the cams removed, the hydraulic tappets come out and get stored in fresh oil to prevent then running try and a noisy start up when refitted:

    DSCF3327.jpg

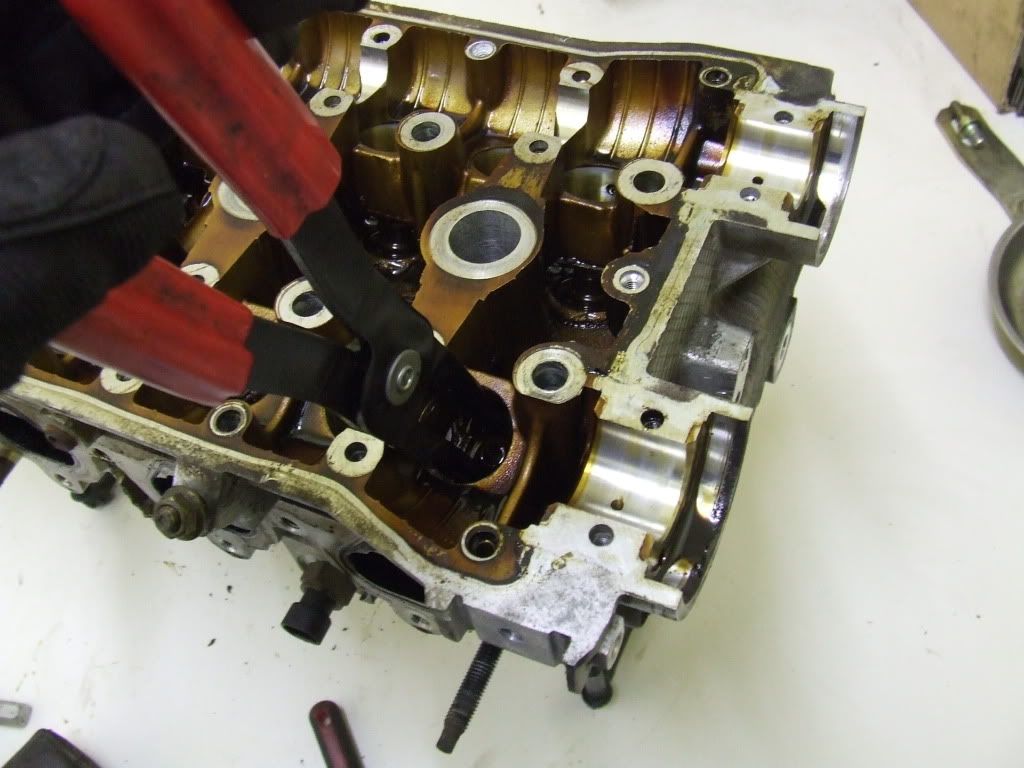
    Compressing the valve springs to release the retainers/collets and remove the valves:

    DSCF3328.jpg

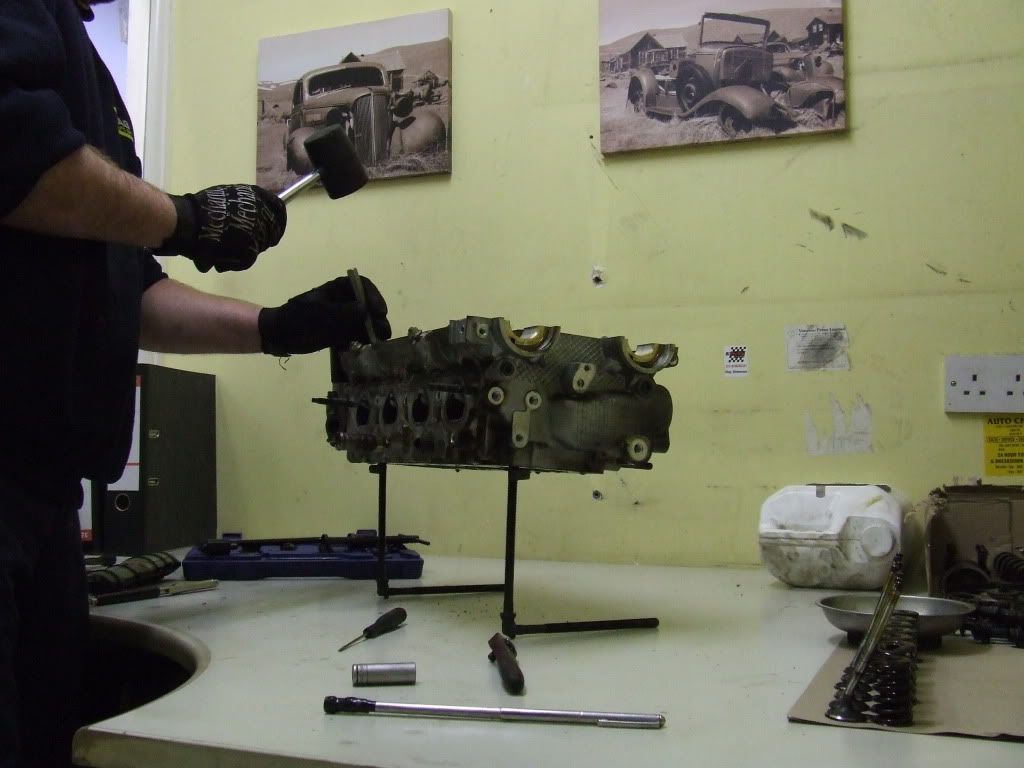
    The valves needed to be driven out with a rubber mallet and punch as they were jammed into the valve guides:

    DSCF3331.jpg

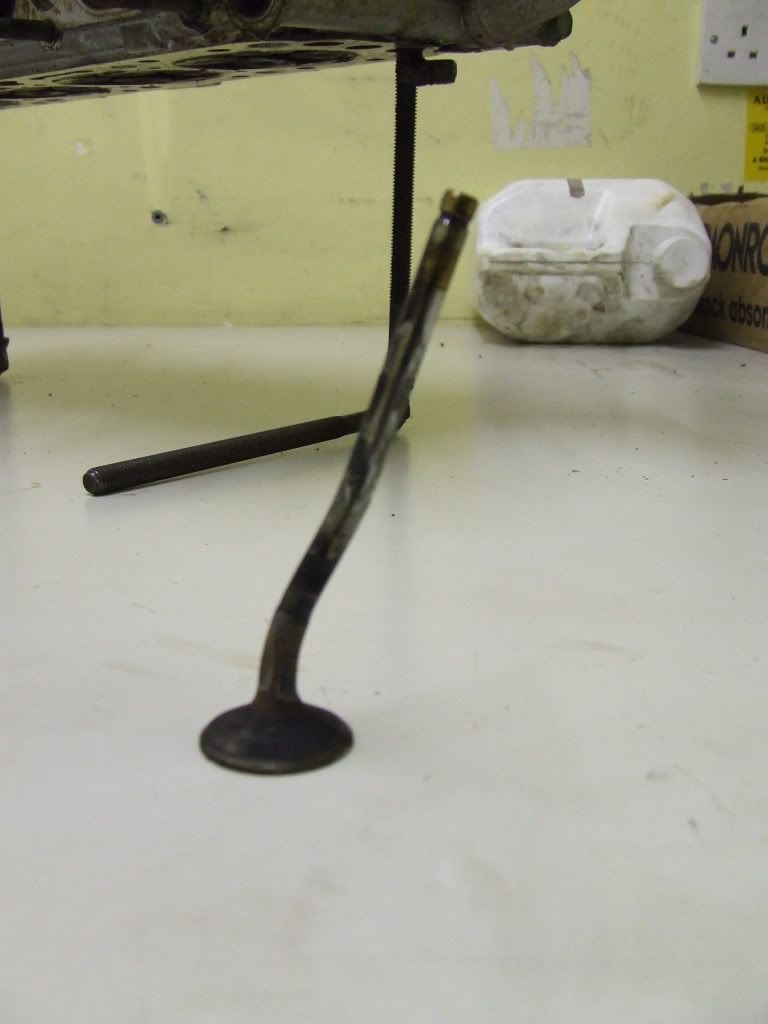
    And here is why:eek: All 16 were exactly the same:

    DSCF3329.jpg

    With all the valves out, the stem seals are next:

    DSCF3332.jpg

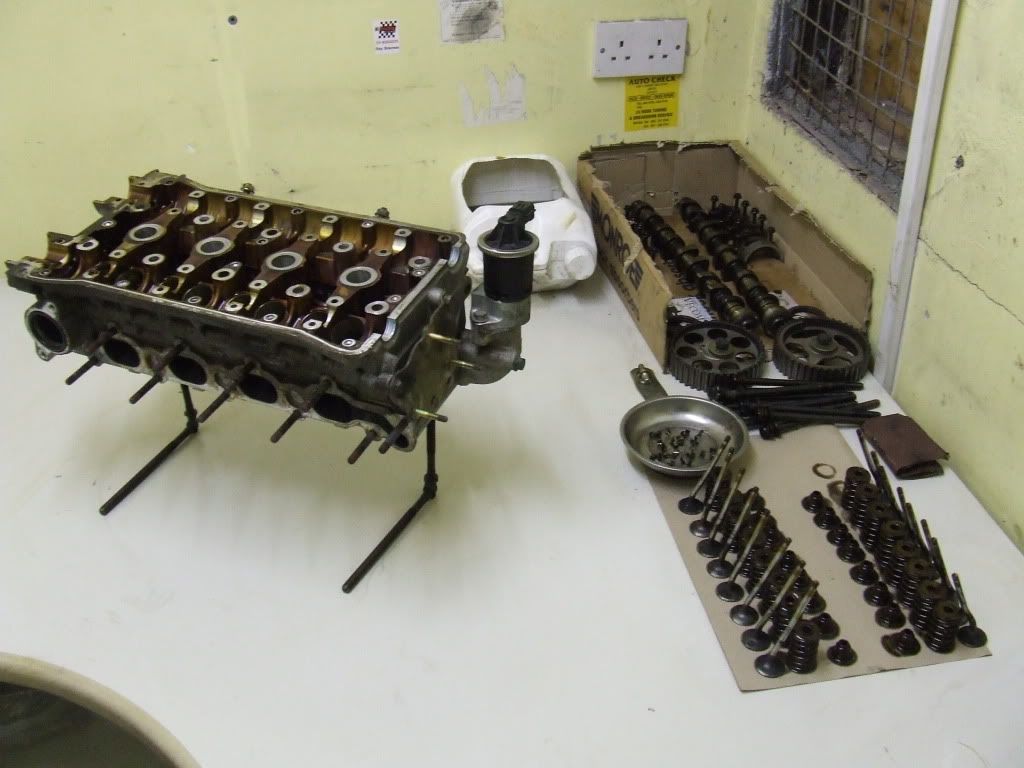
    Cylinder head stripped and everything stored in position for correct re-assembly. Waiting now on all the new parts and the head will be getting sent for new valve guides too:

    DSCF3333.jpg


    Thats it for now....tune in next time:P


  • Registered Users, Registered Users 2 Posts: 5,728 ✭✭✭George Dalton


    Nice post, I would have put the thing out of its misery though, scrap metal is making good money these days :D:p


  • Registered Users, Registered Users 2 Posts: 741 ✭✭✭therewillbe


    You must be good at the Lego! Fair play to you. I wish I had your patience.You saved quite a few quid doing it yourself .Keep us up to speed.


  • Closed Accounts Posts: 14,983 ✭✭✭✭tuxy


    Interesting post, thanks :)


  • Registered Users, Registered Users 2 Posts: 3,844 ✭✭✭Jimdagym


    Great work Doc. Thanks for that,

    Can't believe how bent those valves are :eek:


  • Advertisement
  • Registered Users, Registered Users 2 Posts: 17,875 ✭✭✭✭MugMugs


    Good Job Doc!


  • Registered Users Posts: 416 ✭✭trixyben


    love to see these quality step by step photos like these, makes alot more sense to me seeing it done like this than just reading it from books or the net...

    Doc you say you have to send the head away for new valves, can you not fit new ones yourself or do they have to be installed by certain machine?

    Would really like to see this type of step by step guide for changing head gaskets, replacing clutches etc... As a keen amature dear I say mechanic :D these are the best ways if find I learn an awful lot...

    Anyhow fab job Doc


  • Registered Users, Registered Users 2 Posts: 7,525 ✭✭✭kona


    trixyben wrote: »

    Doc you say you have to send the head away for new valves, can you not fit new ones yourself or do they have to be installed by certain machine?

    The Valve guides need to be pressed into the head. The head will also need to be reamed to the correct size to ensure a proper fit. So the use of a hydraulic press and a pillar drill with the reaming tool is needed. However, the valves, springs and collets are reinstalled with the spring compressor you can see in the pics above, when the shiney new guides are installed, the oile seals are like a top hat and sit ontop of the guides.


  • Registered Users, Registered Users 2 Posts: 2,352 ✭✭✭Mar4ix


    will pistons goin to be replaced also ? well... i suppose.

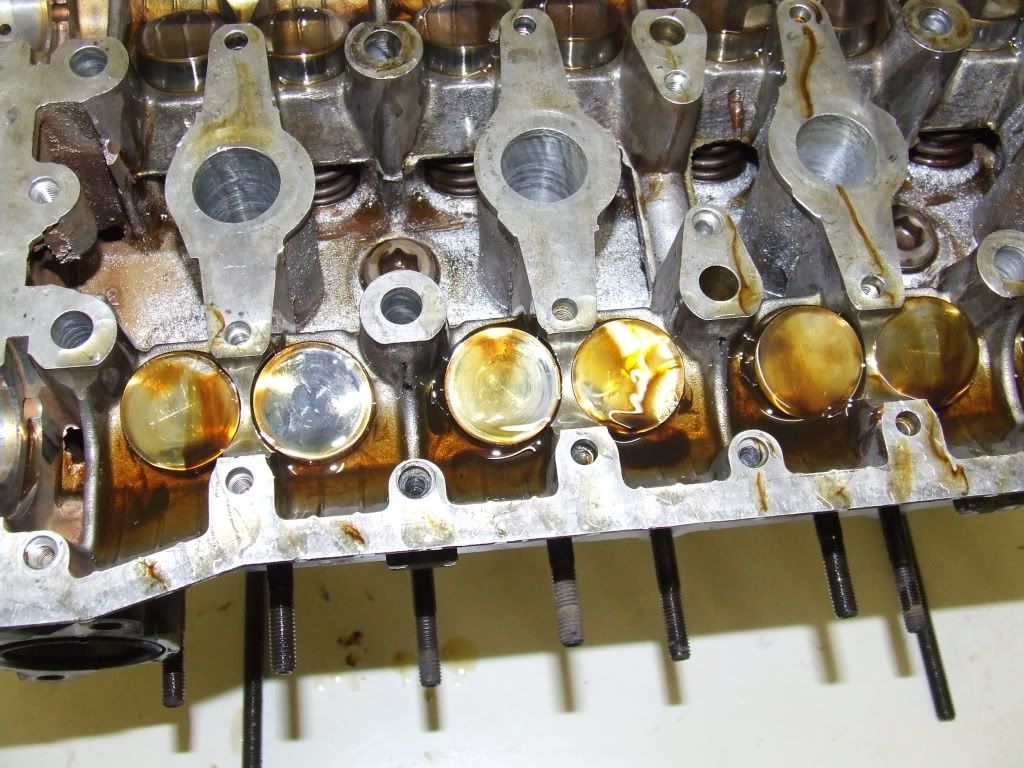
    in seventh picture where rocker cover off, is it just light or it is red ish on head walls ... indicating wrong oil in engine.


  • Closed Accounts Posts: 8,223 ✭✭✭Nissan doctor


    Mar4ix wrote: »
    will pistons goin to be replaced also ? well... i suppose.

    in seventh picture where rocker cover off, is it just light or it is red ish on head walls ... indicating wrong oil in engine.


    There is no damage to the pistons, there rarely is unless the failure has happened at very high RPM or the valves have actually broken.


  • Advertisement
  • Registered Users Posts: 416 ✭✭trixyben


    kona wrote: »
    The Valve guides need to be pressed into the head. The head will also need to be reamed to the correct size to ensure a proper fit. So the use of a hydraulic press and a pillar drill with the reaming tool is needed. However, the valves, springs and collets are reinstalled with the spring compressor you can see in the pics above, when the shiney new guides are installed, the oile seals are like a top hat and sit ontop of the guides.

    who and where does that job out of interest?


  • Registered Users, Registered Users 2 Posts: 3,382 ✭✭✭jimmyw


    Mr Foxman of this parish/forum is doing the same job on a Renault Megane he picked up for free.I have seen his youtube channel (and no he is not paying me;)), you can check it out, if he doesnt give out out to me:o for the mention.

    If anyone is reluctant to have this job done, then this is the result and a warning for not changing your timing belt.


  • Closed Accounts Posts: 8,223 ✭✭✭Nissan doctor


    trixyben wrote: »
    who and where does that job out of interest?

    I'm using cylinder head services in Kilbarrack to fit the guides.

    All 16 guides in this head where cracked due to the valves being forced sideways into them by the impact.


  • Registered Users, Registered Users 2 Posts: 2,025 ✭✭✭Row


    Nice one Doc...I see you keep your surgery impeccably clean....:cool:


  • Closed Accounts Posts: 8,223 ✭✭✭Nissan doctor


    Row wrote: »
    Nice one Doc...I see you keep your surgery impeccably clean....:cool:

    Don't want any infections getting in:p

    That's a room we have out the back which I emptied out and cleaned for engine assembly work. Could do with a lick of paint though:P


  • Registered Users, Registered Users 2 Posts: 2,025 ✭✭✭Row


    Don't want any infections getting in:p

    That's a room we have out the back which I emptied out and cleaned for engine assembly work. Could do with a lick of paint though:P

    Its good to have a room away from the dusty Environment of a shop
    floor....:)
    Last thing you want while doing this kind of work is some lad cutting off a section of an exhaust and covering the place with dust...:eek:


  • Registered Users Posts: 911 ✭✭✭engrish?


    This is fantastic! I was the poster with the timing belt gone in the Nubira.

    It is my intention to deconstruct the engine during the summer and have a go at repairing it. I will be following this with a lot of interest!

    Can you tell me how much the parts and repairs will set you back?

    Thanks


  • Closed Accounts Posts: 2,142 ✭✭✭shamwari


    I know its a Chevy but it looks very similar to a GM 16V ecotec. Are the bits the same by any chance ? ;)


  • Closed Accounts Posts: 8,223 ✭✭✭Nissan doctor


    engrish? wrote: »
    This is fantastic! I was the poster with the timing belt gone in the Nubira.

    It is my intention to deconstruct the engine during the summer and have a go at repairing it. I will be following this with a lot of interest!

    Can you tell me how much the parts and repairs will set you back?

    Thanks


    I stuck a link to it on your thread....though it might be of interest to you alright.


  • Closed Accounts Posts: 8,223 ✭✭✭Nissan doctor


    shamwari wrote: »
    I know its a Chevy but it looks very similar to a GM 16V ecotec. Are the bits the same by any chance ? ;)


    Its basically the same engine...Chevy part of GM too.


  • Advertisement
  • Closed Accounts Posts: 8,223 ✭✭✭Nissan doctor


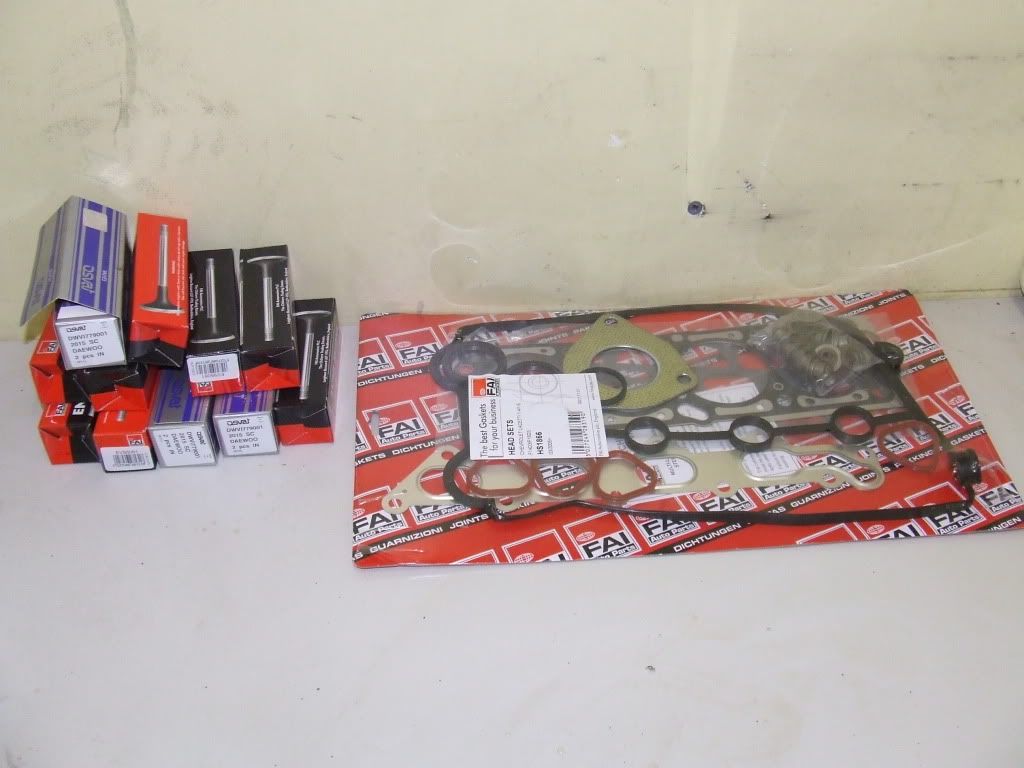
    Few parts arrived..

    DSCF3340.jpg


  • Closed Accounts Posts: 717 ✭✭✭TURRICAN


    Is this irish eric the car guy?:D


  • Registered Users Posts: 911 ✭✭✭engrish?


    I stuck a link to it on your thread....though it might be of interest to you alright.


    I am so excited about taking this on. This will be my summer project!


  • Registered Users Posts: 416 ✭✭trixyben


    I'm using cylinder head services in Kilbarrack to fit the guides.

    All 16 guides in this head where cracked due to the valves being forced sideways into them by the impact.

    again just out of interest Doc how much roughly would ya be paying for the new guides to be put in?

    Is it pretty much the same with most engines that have a snapped timing belt to be repaired in the way you have shown?


  • Closed Accounts Posts: 8,223 ✭✭✭Nissan doctor


    trixyben wrote: »
    again just out of interest Doc how much roughly would ya be paying for the new guides to be put in?

    Is it pretty much the same with most engines that have a snapped timing belt to be repaired in the way you have shown?

    I'll post prices when I've the total job done to give people an idea.

    Almost every belt failure is the same repair with varying degrees of damage. If the belt breaks on start up, as often happens, then the guides are often ok and all the valves may not be bent but if at very high speed or RPM then pieces of the guides or valves can break causing damage to pistons etc but this is rare in your average road car.


  • Registered Users Posts: 416 ✭✭trixyben


    I'll post prices when I've the total job done to give people an idea.

    Almost every belt failure is the same repair with varying degrees of damage. If the belt breaks on start up, as often happens, then the guides are often ok and all the valves may not be bent but if at very high speed or RPM then pieces of the guides or valves can break causing damage to pistons etc but this is rare in your average road car.

    If say half of the valves or bent and guides cracked would you replace all anyway as you have it stripped down or just repair whats needed?

    Im in the process of buying a cheap banger to start experimenting on, cant wait to start stripping it down and doing timing belts, clutches, engine rebuilts etc, only want to spend small money on one but hard to find as price of scrap so high!!!!

    I actually went to look at a car yesterday evening it was a 1996 punto, no test or tax his long time, fairly rough was sitting up over a year with green algae all over it and rust patches, was advertised at €350 ono... Offered €200 and he wouldnt move a cent, said the car was going perfect and he was selling it cheap :eek: (I was thinking are we talking about the same car here :pac:


  • Closed Accounts Posts: 8,223 ✭✭✭Nissan doctor


    If there are any visible cracks in any valve guides I'd replace them all as there could be hairline cracks in others that you wouldn't see. As for the valves, it depends, my preferance would be to change them all as, depending on the engine, they are not expensive in the scheme of the whole job.

    You'd normally do a leak down test on an engine with a failed timing belt and if you got readings of less then 20% leakdown on any cylinders then the valves are fine and you could leave them in place if you wanted.


  • Posts: 23,339 ✭✭✭✭ [Deleted User]


    I don't like threads like this :(
    The ZT is on the factory belts :pac:

    Only joking ND, great thread, fair play for taking the time to take the pics and lash them up :)


  • Closed Accounts Posts: 8,223 ✭✭✭Nissan doctor


    RoverJames wrote: »
    I don't like threads like this :(
    The ZT is on the factory belts :pac:

    Only joking ND, great thread, fair play for taking the time to take the pics and lash them up :)


    You'd better takes notes so.:P


  • Advertisement
  • Posts: 23,339 ✭✭✭✭ [Deleted User]


    You'd better takes notes so.:P

    I'd need more than notes to tackle a KV6 before it snapped a belt, not to mind after :o


  • Closed Accounts Posts: 8,223 ✭✭✭Nissan doctor


    RoverJames wrote: »
    I'd need more than notes to tackle a KV6 before it snapped a belt, not to mind after :o


    Sure they are easy:eek:


  • Posts: 23,339 ✭✭✭✭ [Deleted User]


    Sure they are easy:eek:

    For you no doubt, me not too good with spanners.
    That crowd your man that used to be on TV owns (KC garage is it ?) quoted me €1100/€1200 to do the belts and water pump :)


  • Closed Accounts Posts: 8,223 ✭✭✭Nissan doctor


    :PI was joking....I'd cringe at the thought of having to do one of them again TBH


  • Posts: 23,339 ✭✭✭✭ [Deleted User]


    ... bad enough to do the rear three plugs on the bastad (for me) :pac:


  • Closed Accounts Posts: 409 ✭✭john reilly


    why?


  • Advertisement
  • Closed Accounts Posts: 8,223 ✭✭✭Nissan doctor


    why?

    Why what?


  • Closed Accounts Posts: 409 ✭✭john reilly


    why would you waste your time and money


  • Registered Users, Registered Users 2 Posts: 4,929 ✭✭✭Raiser


    Well ignoring ****head..... ^^^

    - Thanks a million for posting that Doc, great to get a chance to see actual mechanical surgery taking place, class post :D


  • Registered Users, Registered Users 2 Posts: 4,929 ✭✭✭Raiser


    Is there any reason why more/all engines don't just use a timing chain?

    - Do timing chains have any interval or warning signs before requiring a change?


  • Closed Accounts Posts: 8,223 ✭✭✭Nissan doctor


    Raiser wrote: »
    Is there any reason why more/all engines don't just use a timing chain?

    - Do timing chains have any interval or warning signs before requiring a change?


    Belt driven engines are quieter and simpler to design, they are also lighter so create less drag on the engine. Chains naturally create more noise and also run in oil and need an oil supply to the tensioner but should, in theory, last the life of the engine.

    Some manufacturers are now developing belts which run in oil and are supposed to last the life of the engine.


  • Advertisement
  • Closed Accounts Posts: 8,223 ✭✭✭Nissan doctor


    Part 2:


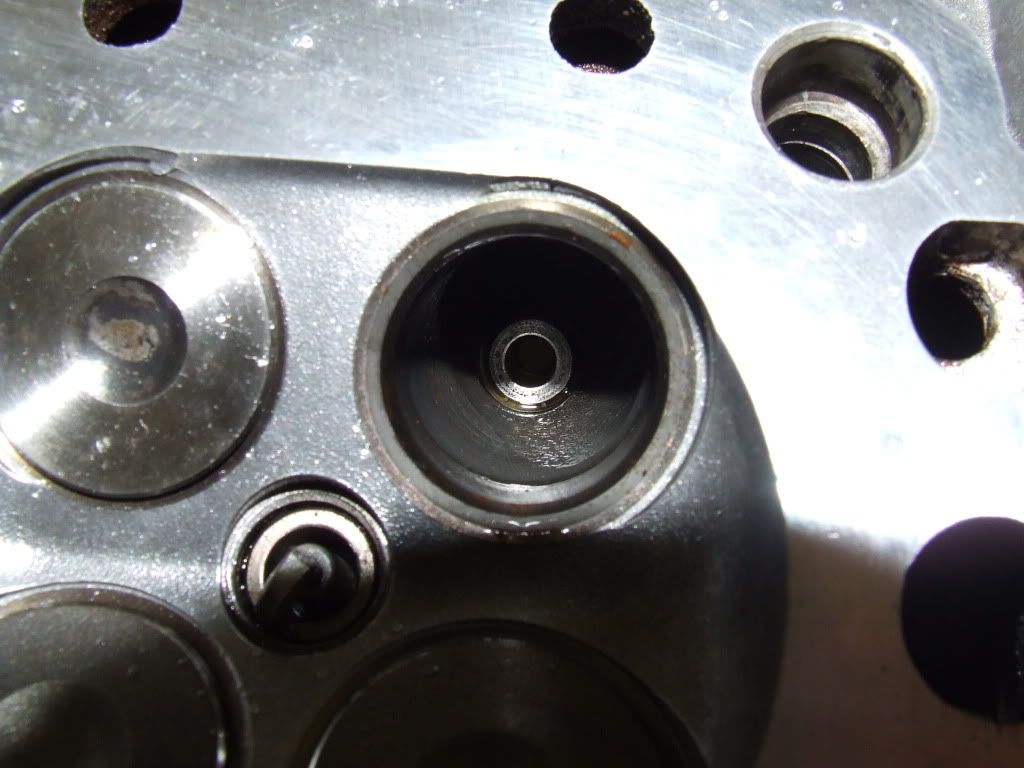
    A view of one of the new valve guides:

    DSCF3359.jpg


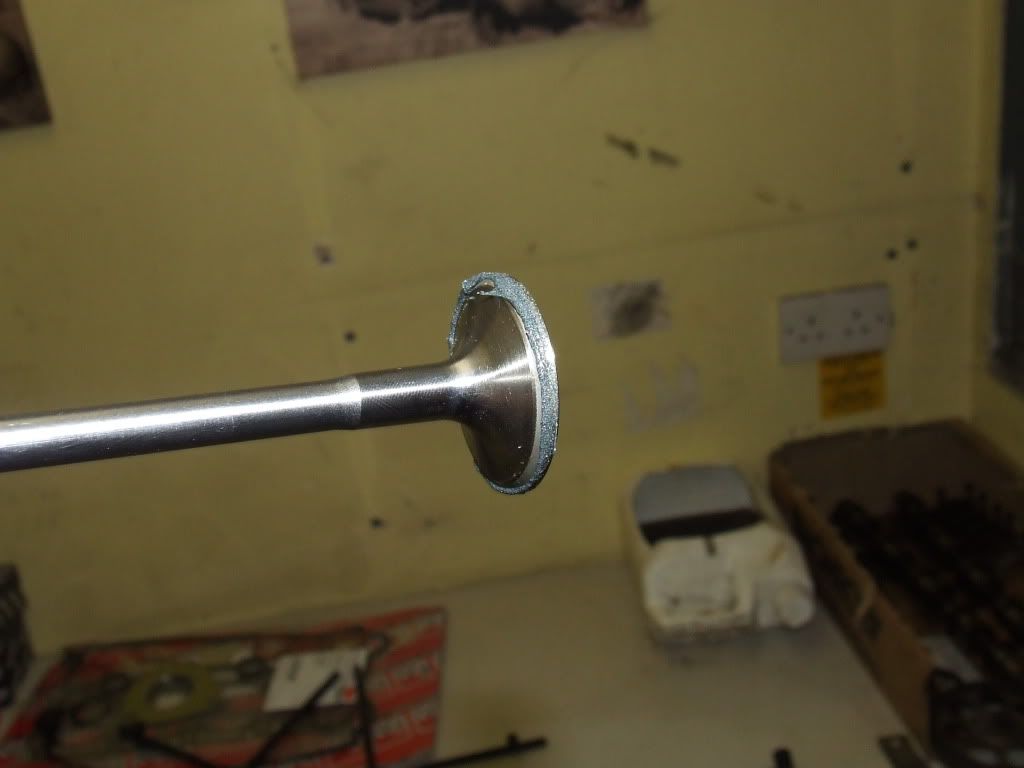
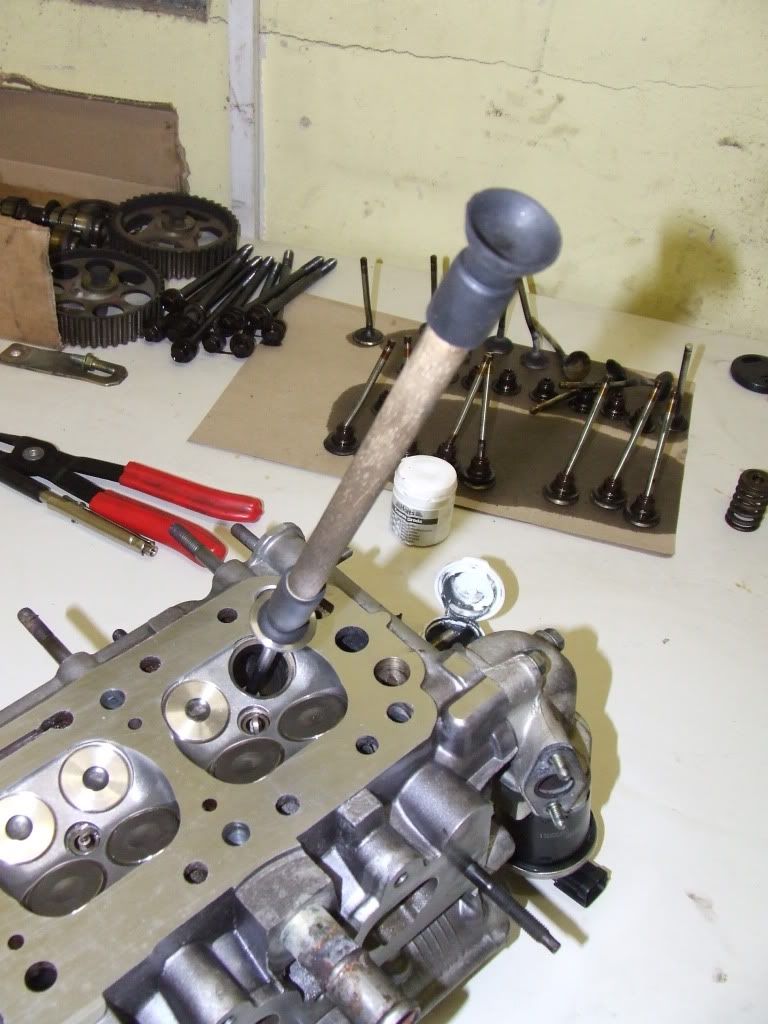
    On to lapping the valves, Lapping compound applied to the valve:

    DSCF3360.jpg


    Lapping stick on the valve:

    DSCF3361.jpg

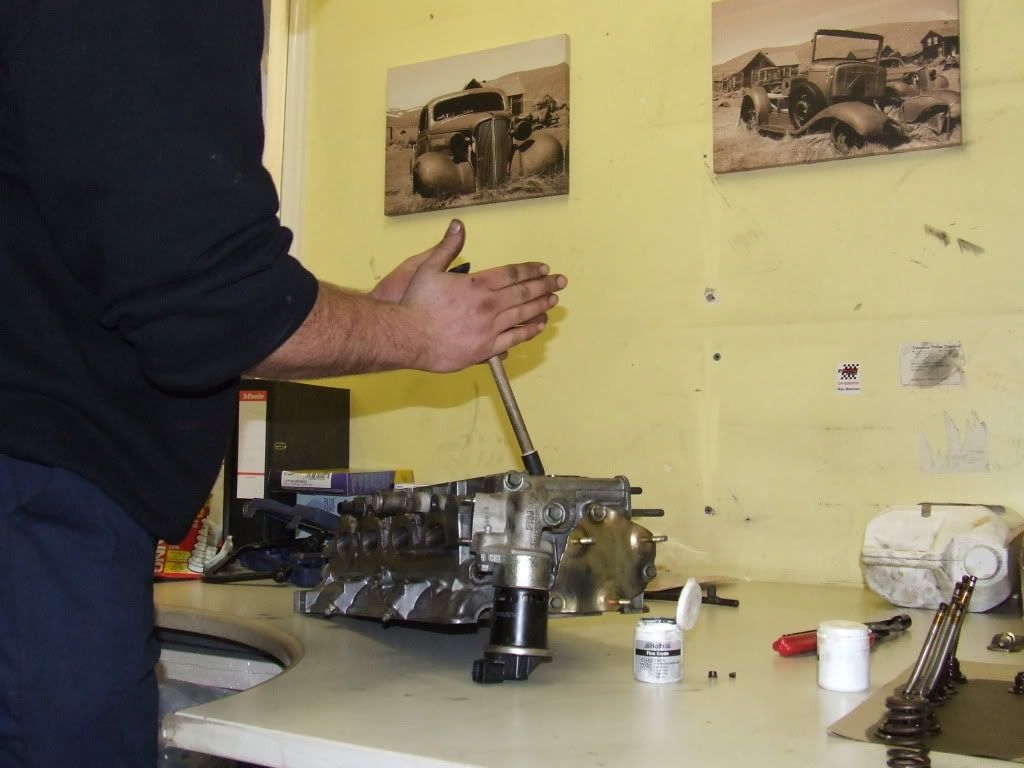
    And getting stuck in....its a bit of a tedious job:

    DSCF3363.jpg


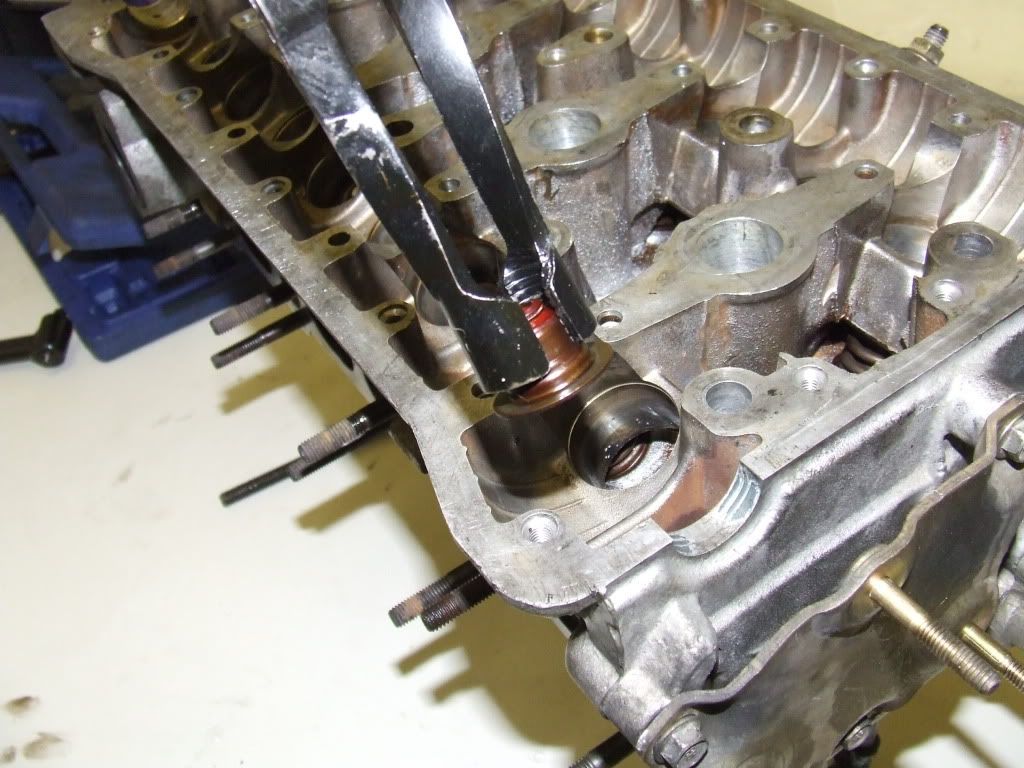
    After the valves are finished, remove them again(keeping them matched to the positions they were lapped in) and fit the valve stem oil seals:

    DSCF3364.jpg

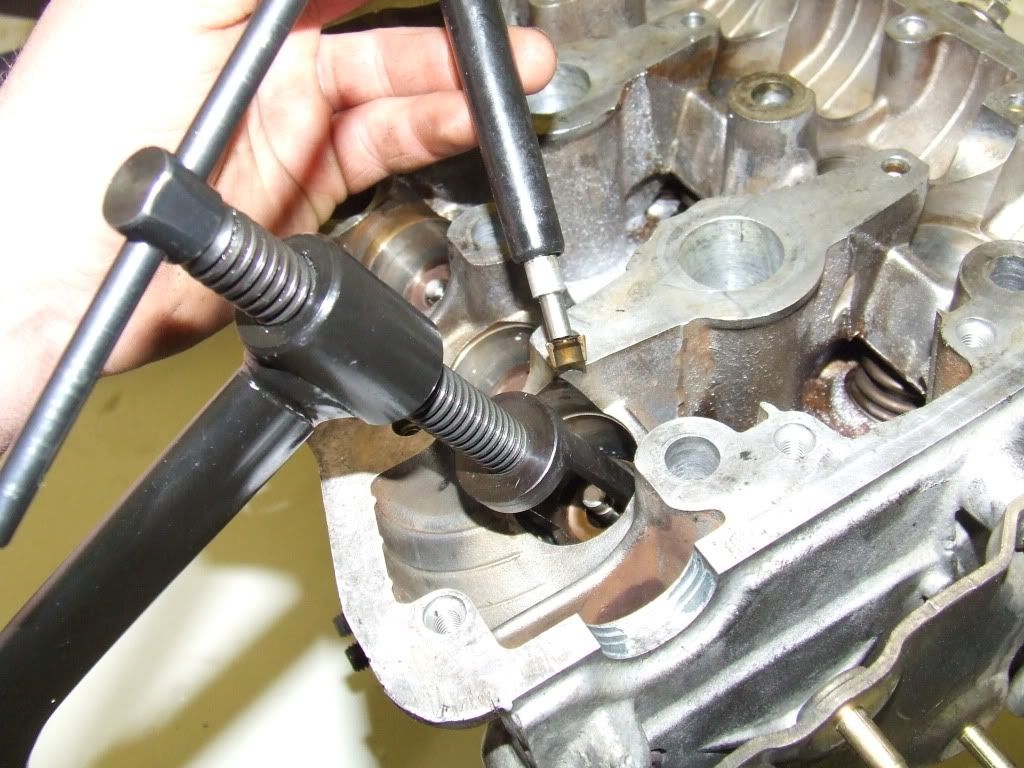
    Then in with the valve springs, compress and fit the collets:

    DSCF3365.jpg

    Collets in place:

    DSCF3366.jpg


    All valves in place and everything nice and clean:

    DSCF3367.jpg


  • Closed Accounts Posts: 8,223 ✭✭✭Nissan doctor


    Next the tappets go back in:

    DSCF3368.jpg


    Cams in place but before they are tightened down, the new camshaft oil seals go on:

    DSCF3369.jpg


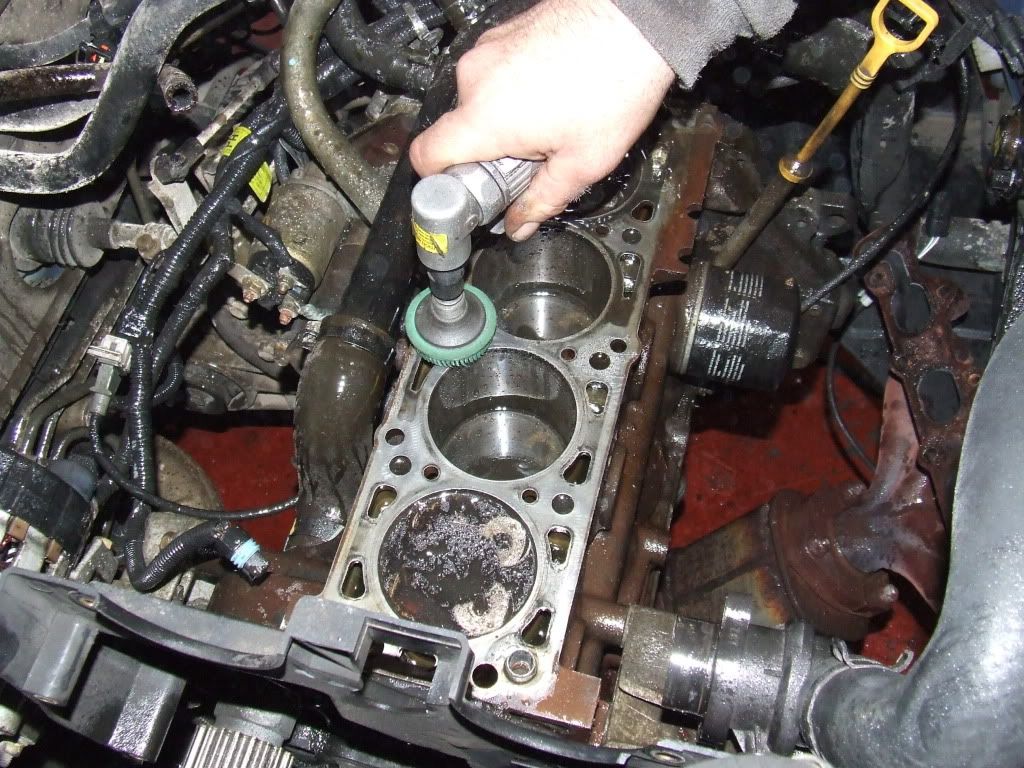
    Next, a bit of block preparation before fitting the head. A nylon grinder gives a clean, smooth surface to cast block decks:

    DSCF3370.jpg


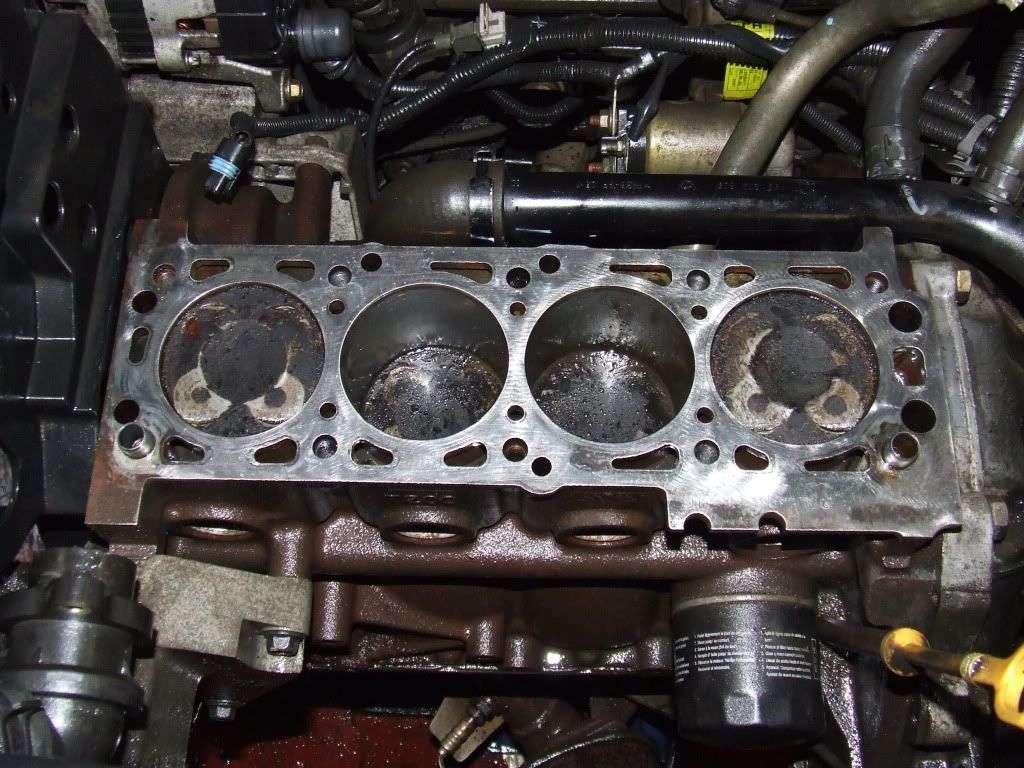
    And fully cleaned:

    DSCF3371.jpg


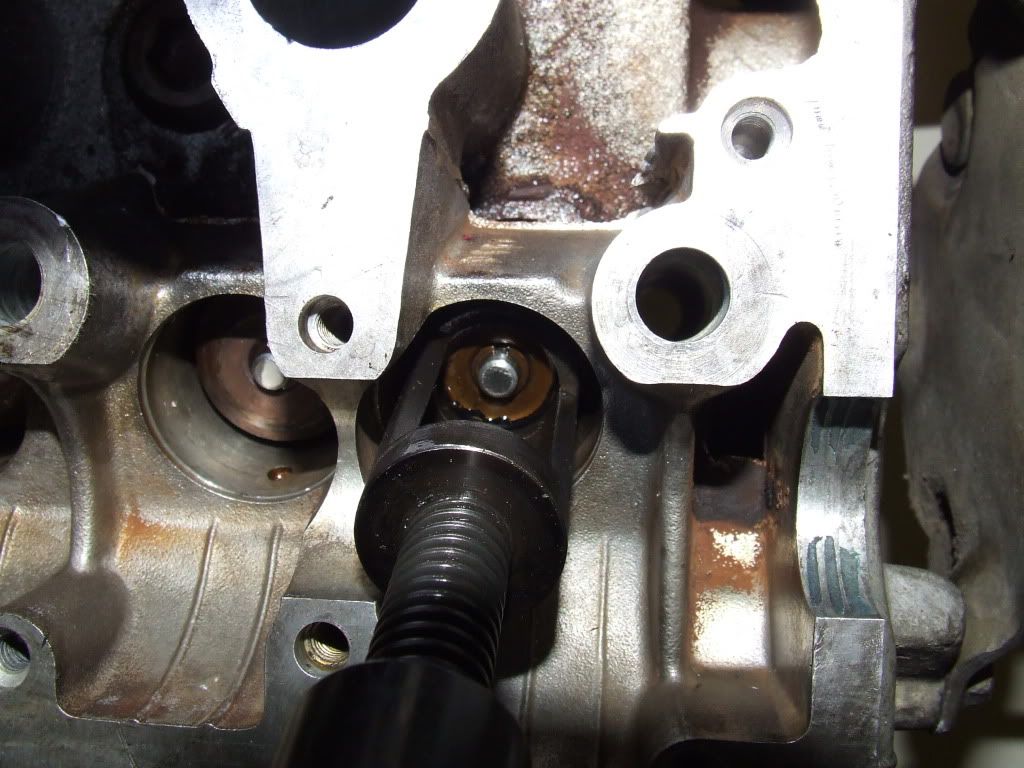
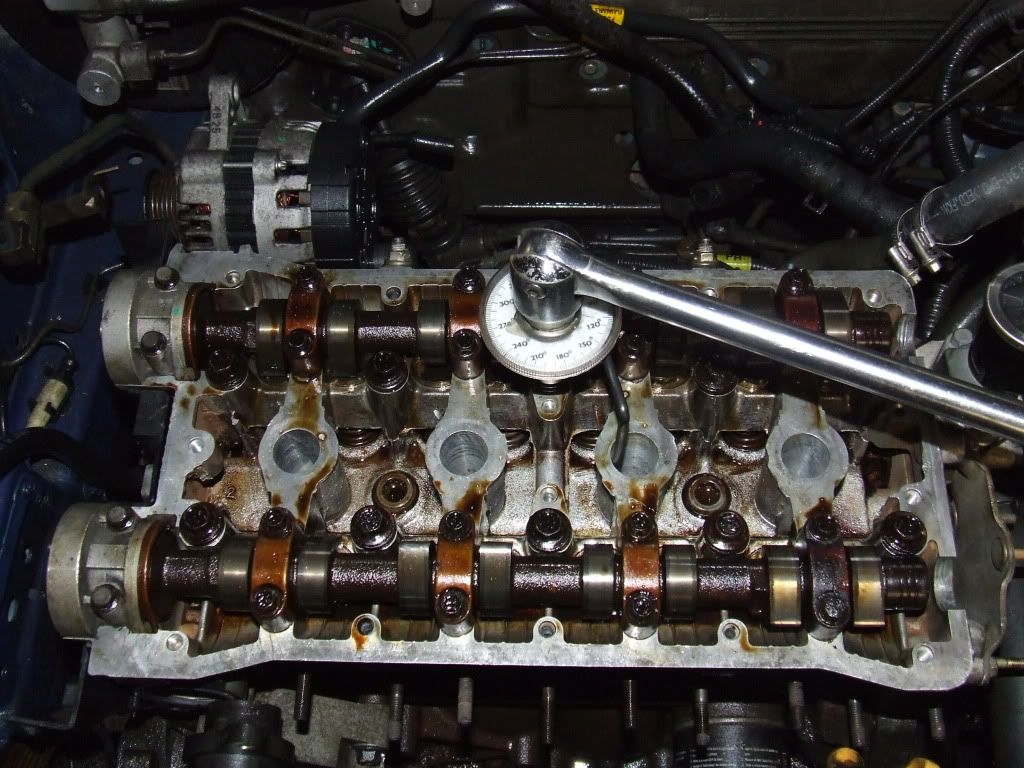
    Head back on at last, this head requires a combination of torque and angle measurements to tighten correctly(25nm of torque, then 70 degrees X2 and finally 50 degrees):

    DSCF3372.jpg


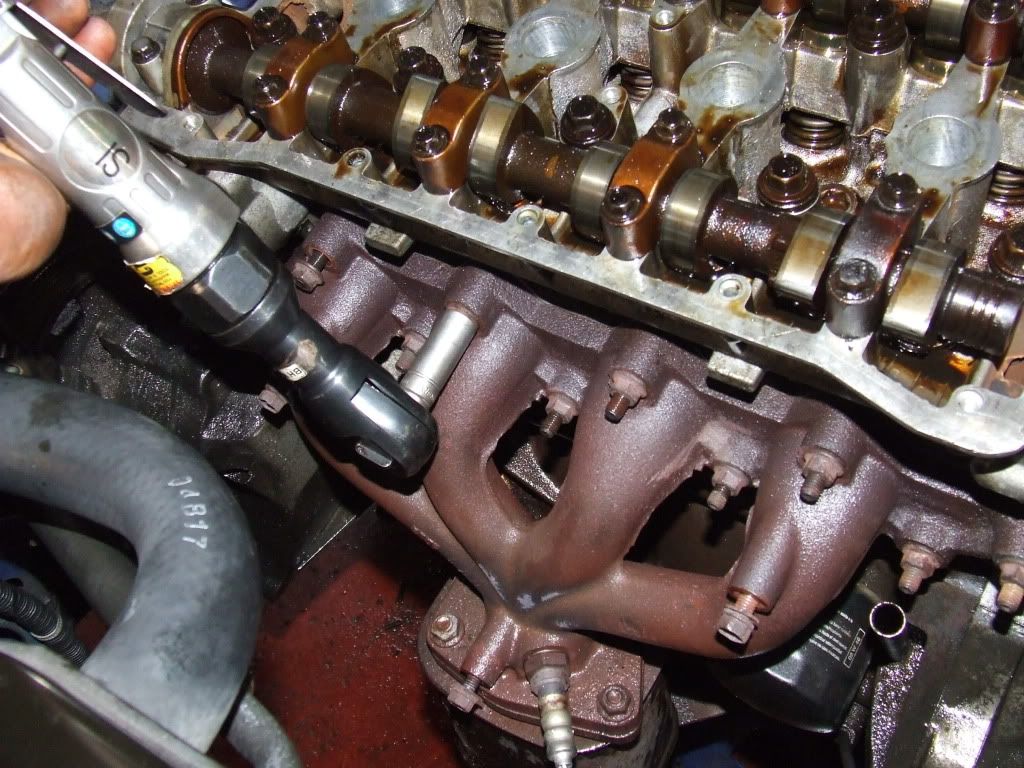
    With the head tightened down its on to the external componants. Exhaust manifold:

    DSCF3373.jpg


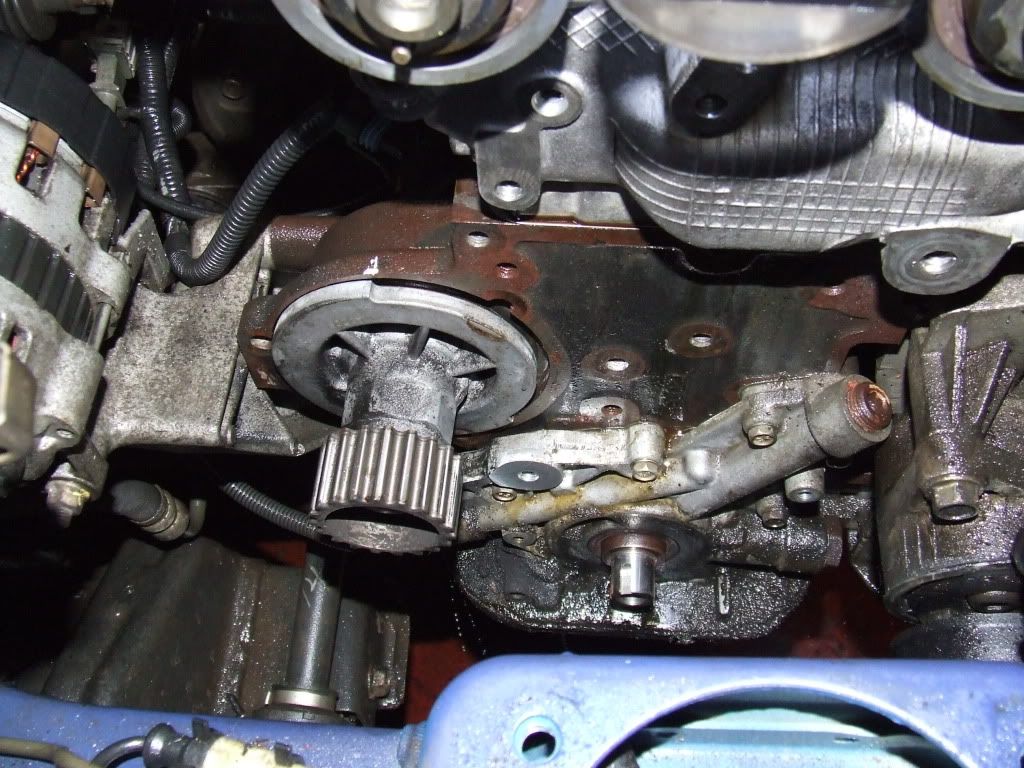
    Old water pump being replaced too:

    DSCF3374.jpg


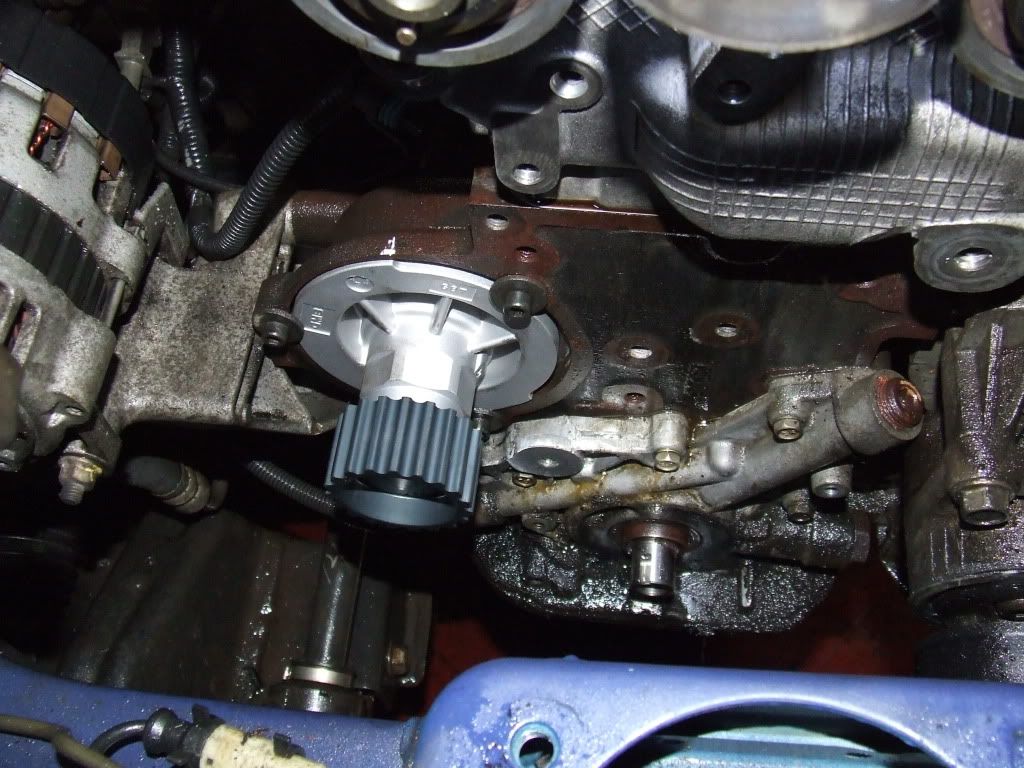
    New pump in place:

    DSCF3375.jpg


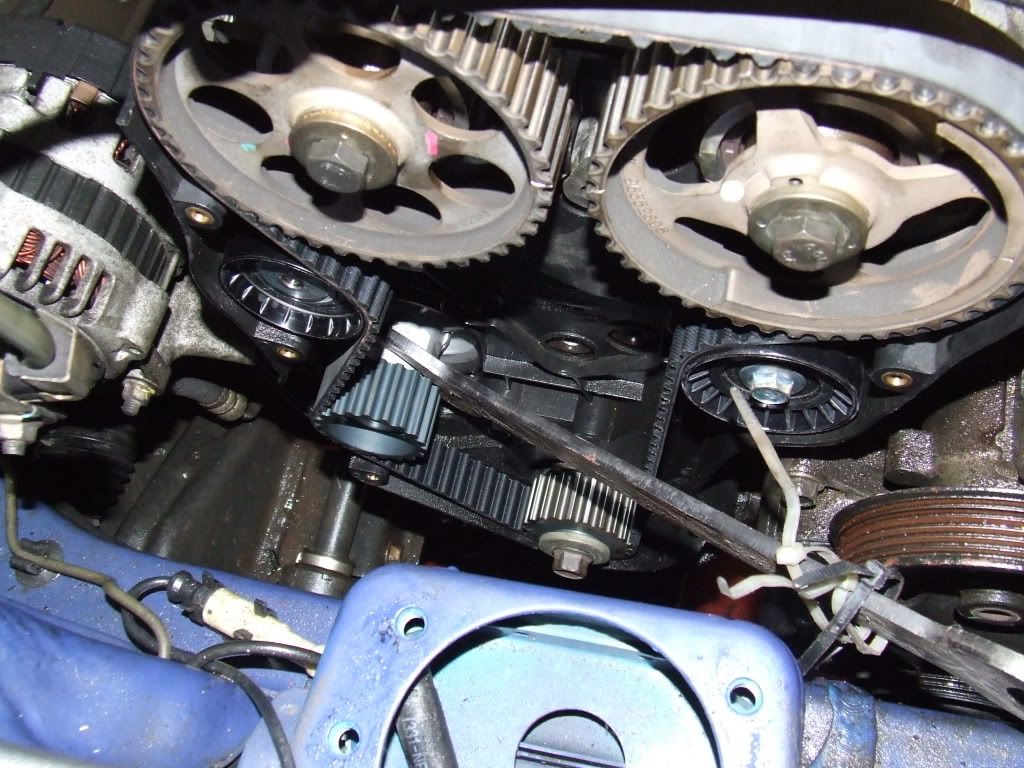
    This engine is unusual in that you actually use the water pump to tension the belt. The water pump id offset so you rotate it to tension the belt:

    DSCF3376.jpg


    And the engine back looking fairly complete again:

    DSCF3377.jpg


    And the moment of truth......:D

    http://www.youtube.com/watch?v=n7N5iRa_bqE&list=UUf2FXl96khtO_Jl43BrAzuA&index=1&feature=plcp

    Please excuse one of the lads shouting in the backround:P


  • Closed Accounts Posts: 8,223 ✭✭✭Nissan doctor


    Required tools(in addition to normal sockets etc)

    -Torque wrench
    -Angle gauge
    -Valve spring compressors
    -Lapping paste and stick
    -stem seal pliers(ideally, to prevent damage to the seal)


    This head had standard 14mm heads for the cylinder head bolts but many manufacturers use various spline/ribe/torx head bolts which would require specific sockets.
    This engine also requires at 38mm spanner/tool to rotate the water pump when tensioning the belt.

    Total (retail price) cost totalled approx €600. I left the invoices in work so will post the exact costs when I'm back from my hols.


    A youtube video showing the action of lapping the valves:
    http://www.youtube.com/watch?v=fhXsH12Rg6s


    Hopefully I might help anyone who wants to try it themselves or at least gave people an idea of the work involved.

    Thanks for reading:)


  • Registered Users, Registered Users 2 Posts: 2,357 ✭✭✭Fiona


    Where was the qualified adult while you were doing all this playing?
    Fair play! Hope I NEVER need you to do this type of work for me however!


  • Registered Users, Registered Users 2 Posts: 3,422 ✭✭✭Avns1s


    Well done ND.

    A well structured very informative thread which will help many. It makes the job look a lot simpler than it actually is, though. (Meant very much as a compliment rather than a criticism btw!)

    You still need a fair bit if mechanical cop on and experience IMO, before tackling this job and expecting 100% success.


  • Closed Accounts Posts: 8,223 ✭✭✭Nissan doctor


    mrs crilly wrote: »
    Where was the qualified adult while you were doing all this playing?
    Fair play! Hope I NEVER need you to do this type of work for me however!


    Hmmm, come to think of it, your timing belt looked a bit dodgy:P


  • Registered Users, Registered Users 2 Posts: 2,357 ✭✭✭Fiona


    Hmmm, come to think of it, your timing belt looked a bit dodgy:P

    * runs to car with torch and Haynes manual


  • Registered Users, Registered Users 2 Posts: 4,929 ✭✭✭Raiser


    Thanks Doc, your expertise, photography and writing skills combined with my ability to skull good german beer has given me all the courage I need to rebuild my own, perfectly functioning engine tonight, armed with nothing but dreams and an shiny unworn socket set :p

    - I'll post pics tomorrow of what, ahm remains.......


  • Registered Users Posts: 416 ✭✭trixyben


    at the stage where you are lapping the valves what exactly does this mean and what does it acheive Doc?


  • Registered Users, Registered Users 2 Posts: 3,844 ✭✭✭Jimdagym


    trixyben wrote: »
    at the stage where you are lapping the valves what exactly does this mean and what does it acheive Doc?

    You use a grinding paste to clean up the valve seat. A better seal means you don't lose compression. I done it once years ago and it's a pain.

    Fair play Dr Nissan. Very interesting thread.


  • Advertisement
Advertisement