Advertisement
If you have a new account but are having problems posting or verifying your account, please email us on hello@boards.ie for help. Thanks :)
Hello all! Please ensure that you are posting a new thread or question in the appropriate forum. The Feedback forum is overwhelmed with questions that are having to be moved elsewhere. If you need help to verify your account contact hello@boards.ie
Hi all! We have been experiencing an issue on site where threads have been missing the latest postings. The platform host Vanilla are working on this issue. A workaround that has been used by some is to navigate back from 1 to 10+ pages to re-sync the thread and this will then show the latest posts. Thanks, Mike.
Hi there,
There is an issue with role permissions that is being worked on at the moment.
If you are having trouble with access or permissions on regional forums please post here to get access: https://www.boards.ie/discussion/2058365403/you-do-not-have-permission-for-that#latest

1980s bungalow renovation

2456

Comments

  • Closed Accounts Posts: 3,296 ✭✭✭FortySeven


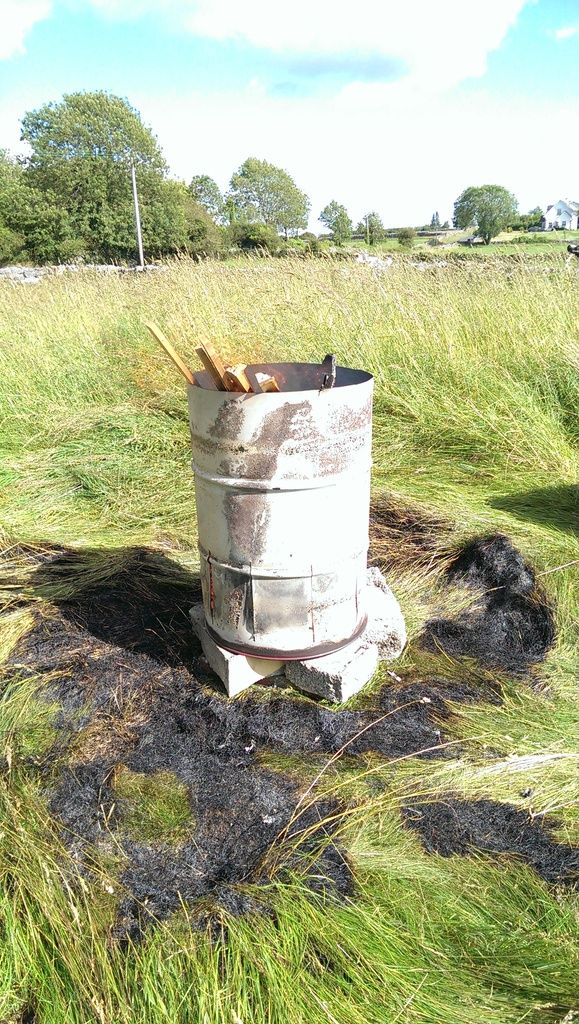
    Got my burning barrel finished, must have put a good transit load of wood through it so far today. Still a good bit to go.

    IMAG0540_zps7lnnfics.jpg


  • Registered Users Posts: 80 ✭✭intro


    Just came to this discussion and I was wondering if you disinfected the water system after you flushed it? If you hav'nt the pipes and tank could still be contaminated with god knows what bacteria. If you need to do it get the cheapest "thin" bleach available, most of which are around 5% sodium hypochlorite. Pour it into the water tank. Run each cold tap until you get a smell of chlorine from the water and then close the tap. When you have the cold system done you could do the hot system. You may need to top up the chlorine in the main tank depending on the volume of water used into the hot water cyinder/system. Leave overnight if possible. then flush all pipes. Run each tap until there is no chlorine smell from the water. Do every tap in turn so you dont end up with a mouthtful of chlorine or a change in hair colour. You can get test strips to show the presence of the chlorine but if you can smell ok it would not really be necessary. If anyone has had rats in the attic it is also safer to disinfect the water system. Best of luck with the job.


  • Closed Accounts Posts: 3,296 ✭✭✭FortySeven


    Cheers intro, I did flush the water system with 10 litres of 10% acetic acid. Twice as strong as vinegar. I'm happy enough it cleaned the pipes as it flushed through the green oxidation from the pipes. Only that one tap from the water tank, didn't do the shower right enough but that is getting replaced.


  • Closed Accounts Posts: 3,296 ✭✭✭FortySeven


    No updates for a while. Been too tired.

    Got my damp meter and it confirms my suspicions with larger readings the closer I get to the pipe that was dripping when we moved in. It was repaired ages ago but the wall next to it is reading 40% and the readings going down the further I move away. That wall is coming down and we will extend the bathroom out by about 2m. No need to worry about damp in that wall.

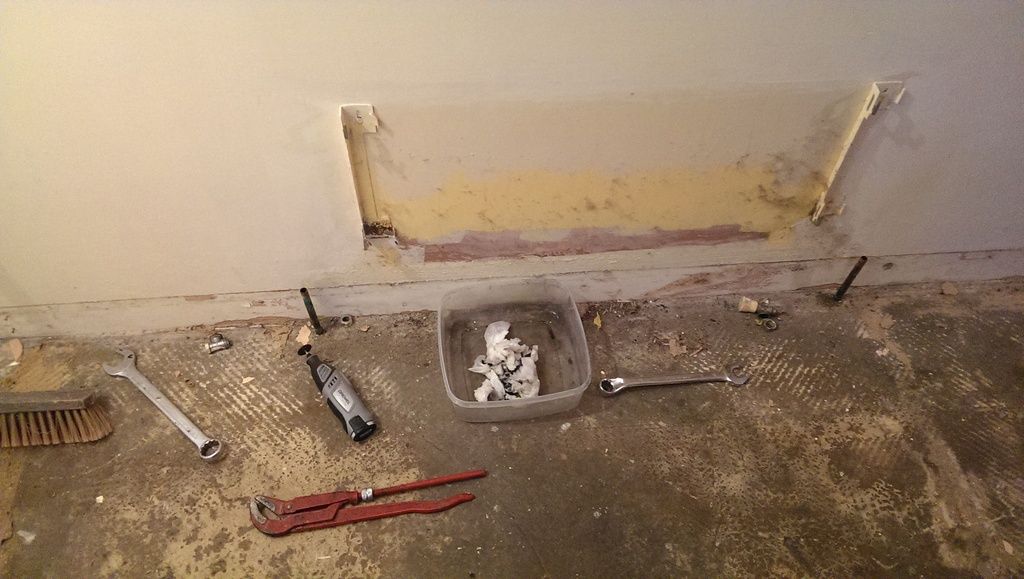
    Spent the last few evenings removing the radiators, bought myself a dremel, been meaning to for years but needed something to cut the olives off the pipes. Great tool.

    IMAG0546_zpsduczhpow.jpg

    Received two bags of white powder in the post too. No issues with customs. Now ready to treat the affected plasterwork.

    Dehumidifier has been working away, took a load of water from the room nearest the bathroom, less from the one further away.

    Altogether, pretty happy with the progress, hope to get a lot more done this weekend.


  • Closed Accounts Posts: 3,296 ✭✭✭FortySeven


    After the dehumidifier dried out the bathroom I noticed the wall started darkening again the next day. Decided to do a bit of digging.

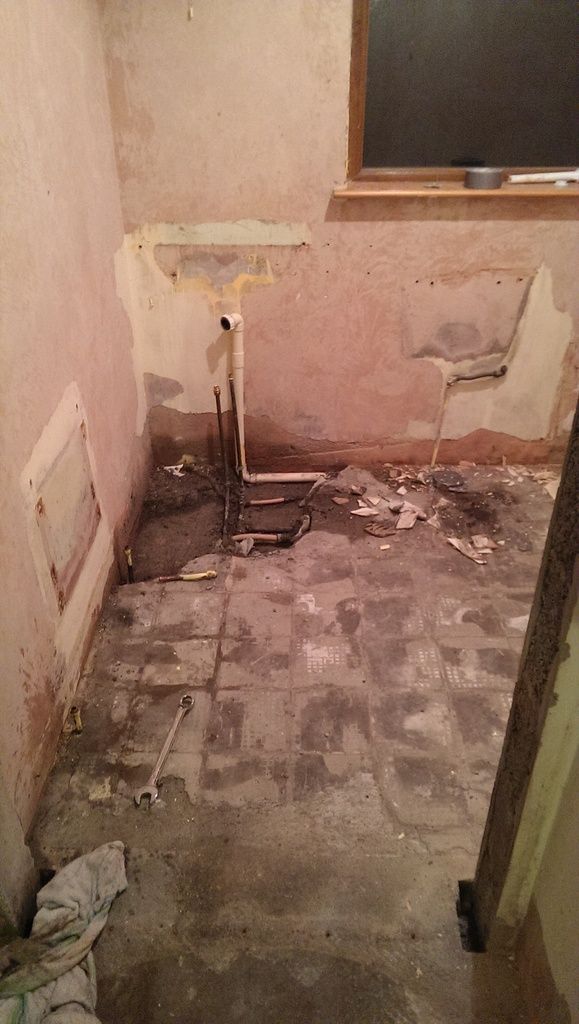
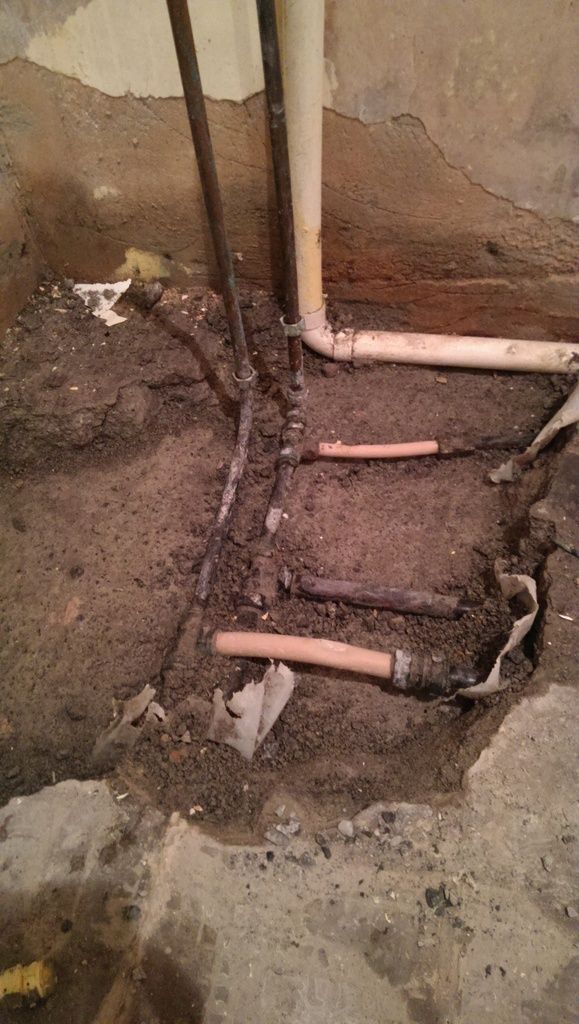
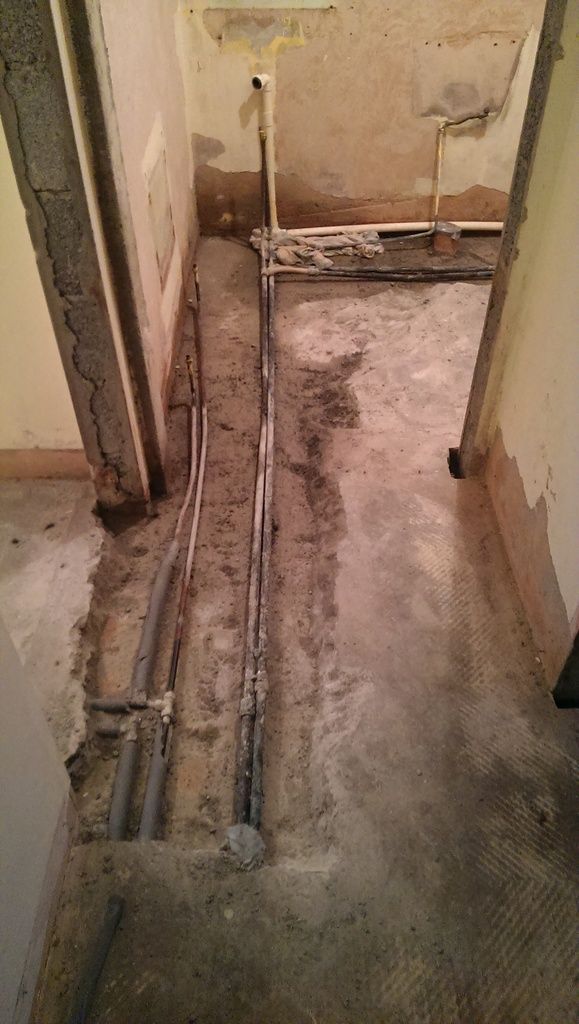
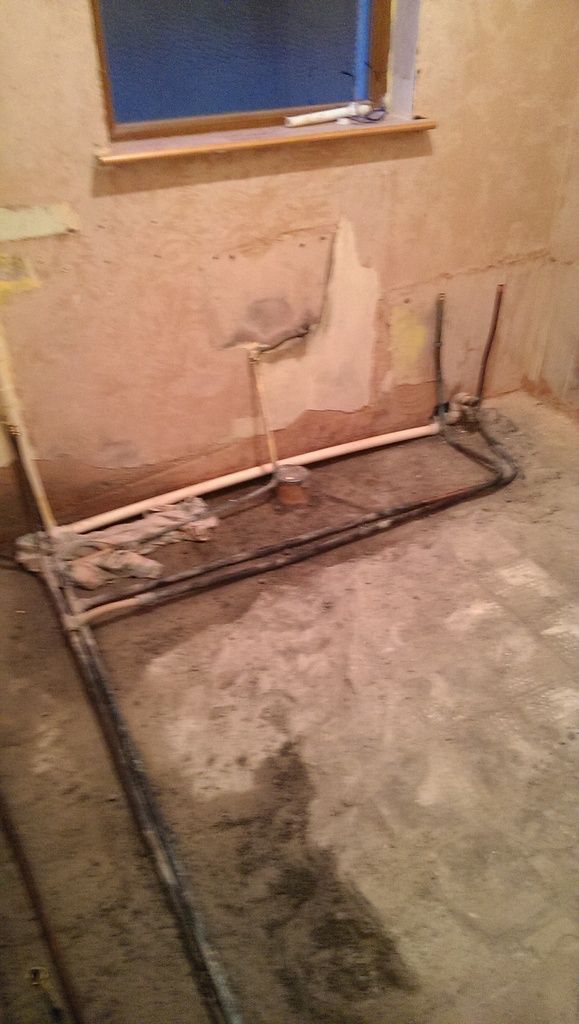
    Wow. Clearly there had been some work done here. Best bit was digging, first surprise was a biro, then some tiles, a few cloths and a load of gravel. Seems they just tipped the rubble into the hole and cemented over it. Anyway, exposed this.

    IMAG0555_zps2lynqb0q.jpg

    IMAG0551_zpsg1z3ol2p.jpg

    I nicked one of the plastic pipes so had to switch off the water so decided to remove the bath and toilet too. Now have an empty box and can dig up the rest of the floor, I will be replacing all the pipes.


  • Closed Accounts Posts: 3,296 ✭✭✭FortySeven


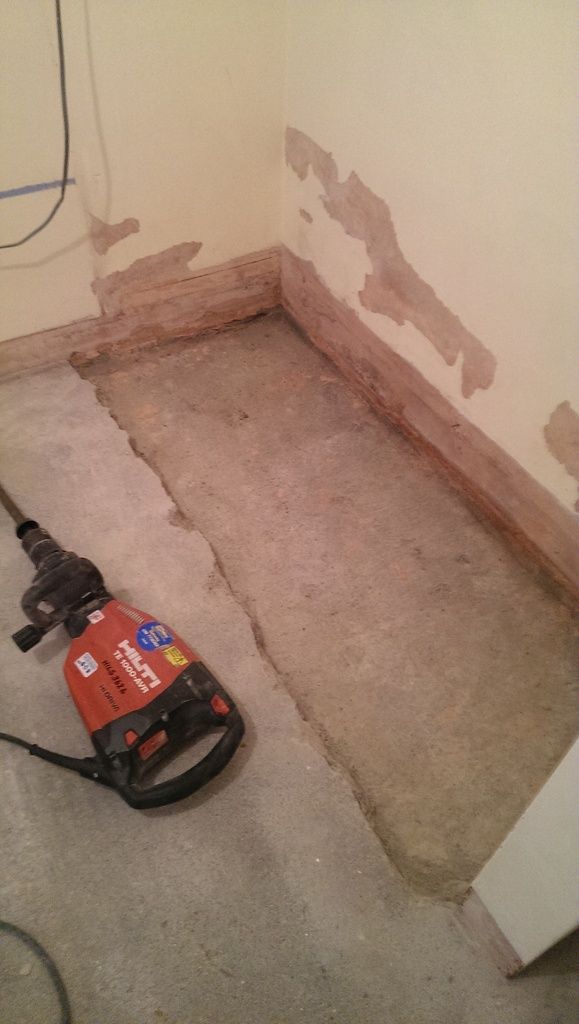
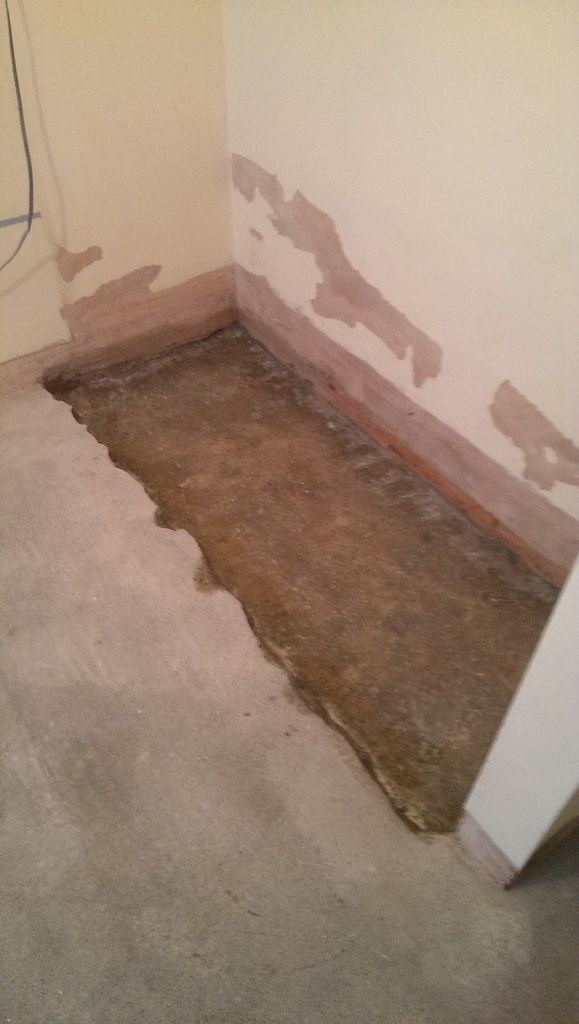
    So, killed myself for a few days and then bit the bullet and went and rented a hilti for the weekend. Could have rented it for a day really but at €39 for the weekend was certainly good value. Have dug the floor as far as the wetness spreads. Seem to have hit dry concrete now so problem must have been along here but I am still not convinced by the loose stack pipe outside so will be taking up the concrete out there too.

    IMAG0557_zpsz8uydauq.jpg

    IMAG0558_zpsm0hjndty.jpg

    I took up the floor in the bedroom to enable us to move the wall. Also rented a couple of props to hold the ceiling for €5 plus vat per week.

    IMAG0559_zpsrq63iztt.jpg


  • Closed Accounts Posts: 3,296 ✭✭✭FortySeven


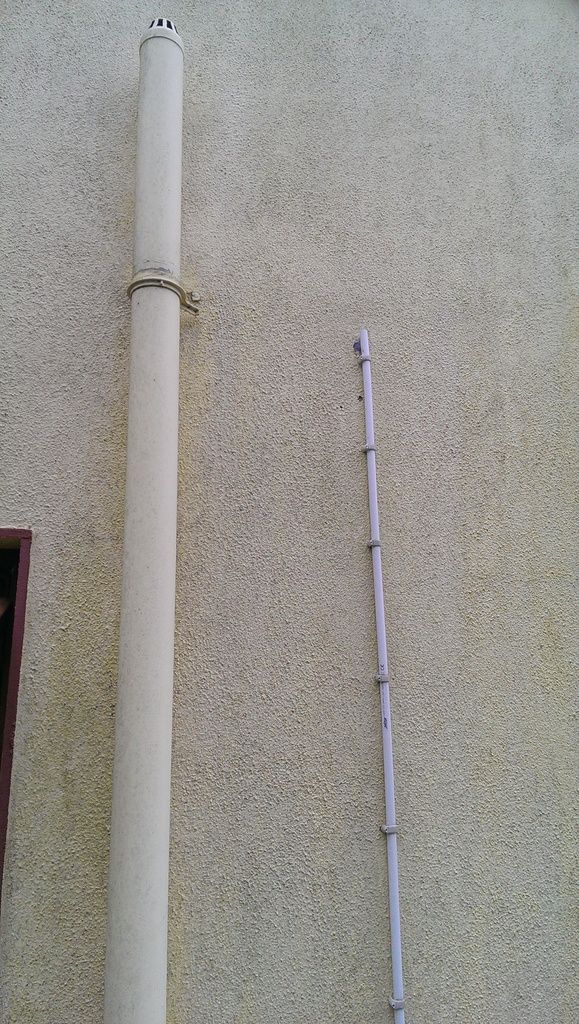
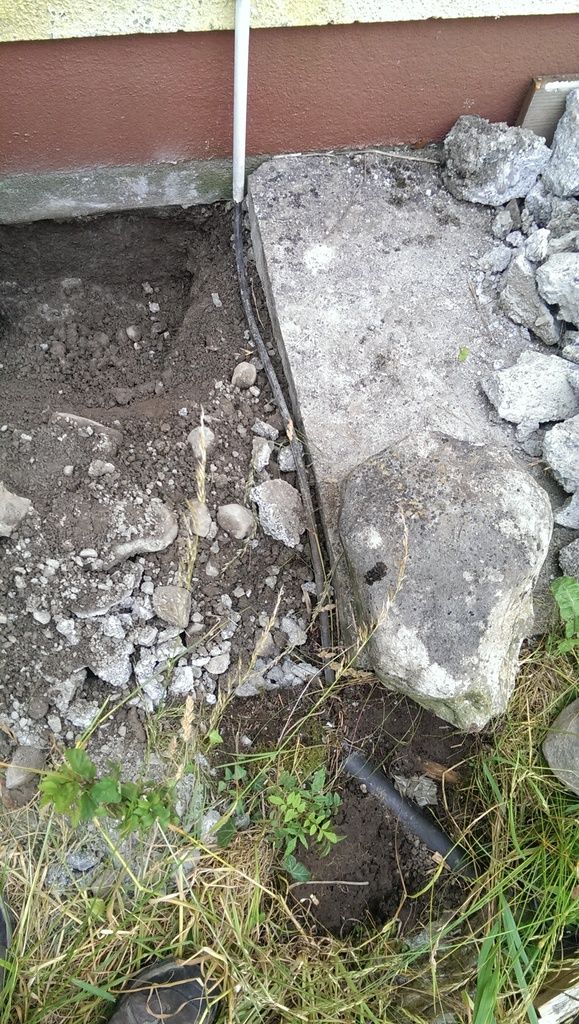
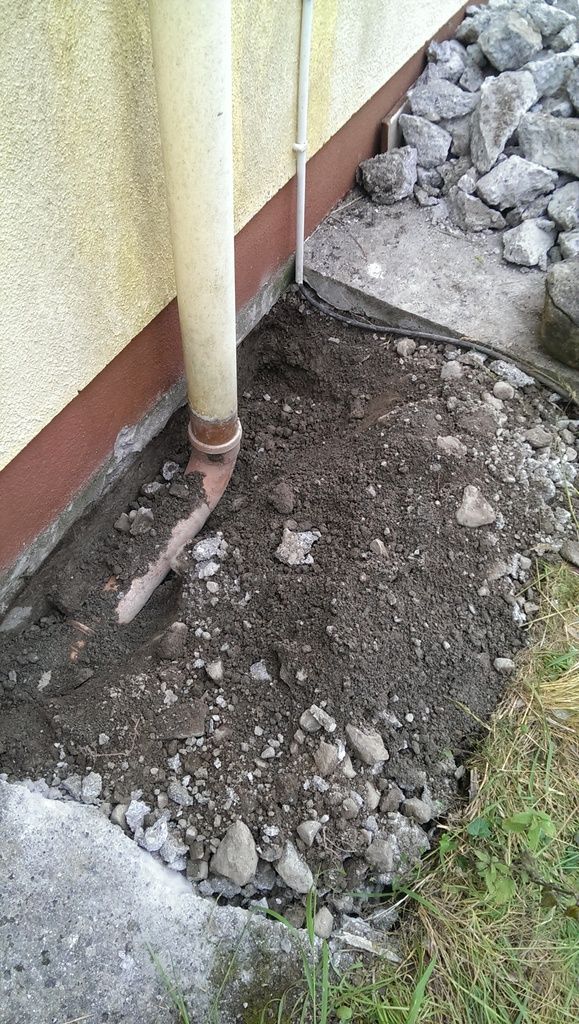
    So, we have decided not to move the wall. We are limited for time and are getting distracted by this and it is a considerable amount of extra work we don't need. Wish we had made this decision before I broke up the screed in the bedroom but I suppose it was wet and smelly anyway. Spent today removing the pipes from the bathroom, have capped the ends and have the water back on. Fitted a couple of radiators too. I also did a bit of digging outside to check the sewer pipe was not damaged from the stack pipe swinging in the wind. (The brackets are broken and it is not secured to the wall.)

    IMAG0562_zpscmjkisik.jpg

    That ducting you can see to the right is the imaginatively routed cable for the air pump in our septic tank. It runs through the loft and down the cavity a bit and then out through this duct to THIS!

    IMAG0563_zpsj3hx5a1r.jpg

    They had cut a trough in the concrete, laid the wire in it and put some wood over the top, then the wire goes into underground ducting, hidden under a conveniently placed large rock, then disappears under a flowerbed of sorts made out of decking.

    Dug out the waste pipe to check for leaks. Seems fine.

    IMAG0561_zpsl1o7ce3a.jpg

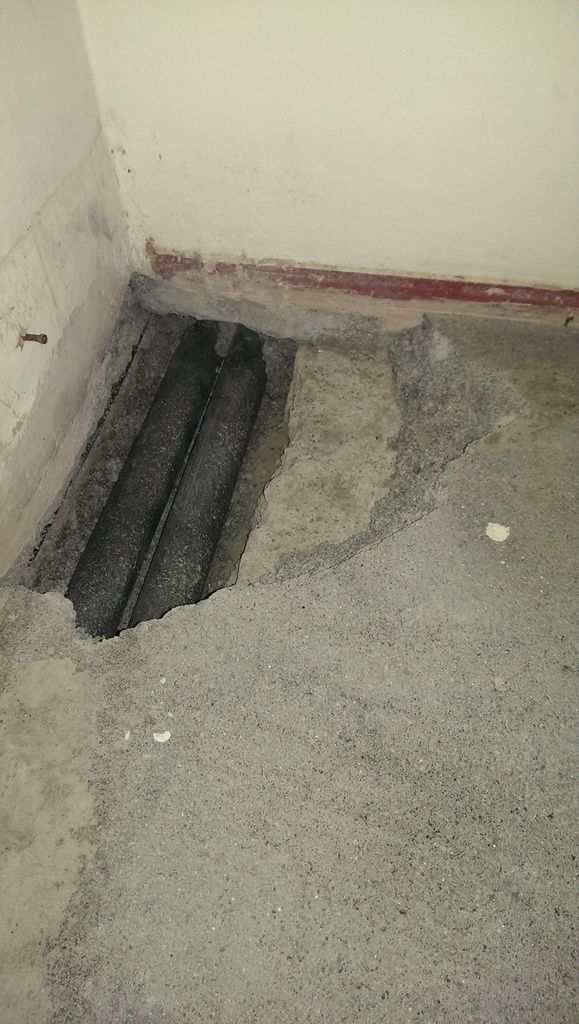
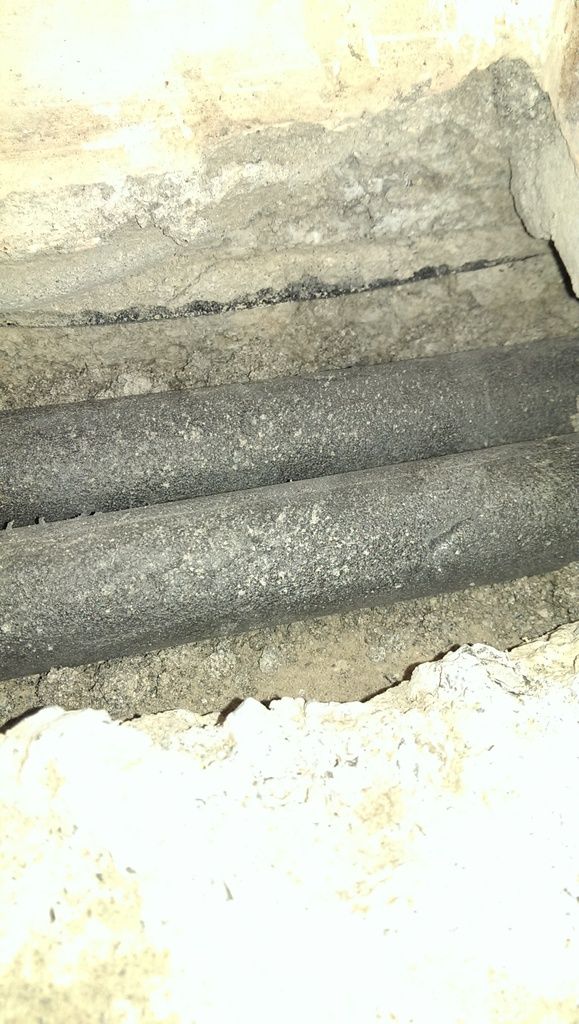
    Need some advice on this though if there is anyone following this thread that can advise I would be most grateful. There was a very hollow sounding corner in our bedroom, could not work out why as I would not expect the pipes to be there as this wall backs onto our front step. (Outside) So I decided to chop a bit up and discovered this.

    IMAG0565_zpspz7uipyl.jpg

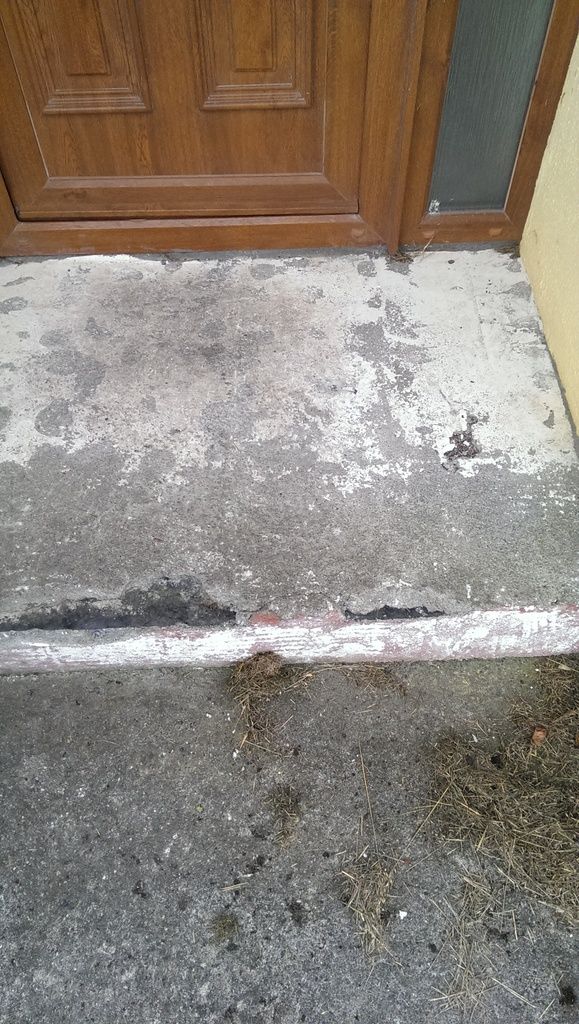
    This is very different to the setup in the hall and bathroom. Here the pipes are laid below the screed. You can see the damp proof membrane in the wall. They go out under the wall and then through our concrete step, here is a pic of the step. You can see a dpm here too.

    IMAG0566_zpsopgqjrrr.jpg

    Is this normal? I was under the impression that the dpm should not be bridged yet this hole was full of (albeit bone dry) screed. Here is another closer pic of DPM.

    IMAG0564_zpshwtp4lo0.jpg

    Cheers in advance for any advice.


  • Registered Users Posts: 18 crow75


    following your thread with interest as my house is in a similar condition! did you check attic joists and lathes for woodworm?


  • Registered Users Posts: 4,151 ✭✭✭kupus


    Dpm should not be bridged. Maybe it's a retro fit. Sorry can't help much with Dpm

    For googles, clean out googles with warm water. Then coat it with a film of shaving cream or soap or fairy liquid wipe it in good and well. It helps to prevent condensation. And invest in a good mask. It saves money and coughing in the long run.
    In the past if I had the full enclosed glasses I would cut holes in the underside where they wrap around under eyes to give it space to breathe. Coz the mask would be under the glasses and it's just a case of direct condensation.

    As for running wires. I think you can run all you want to the circuit board but you need a qualified licensed electrican to wire the board. That piece of paper would come in handy if something happens and insurance company gets involved. They will do everything in their power not to pay out so better not give them a reason not to.


  • Advertisement
  • Closed Accounts Posts: 3,296 ✭✭✭FortySeven


    crow75 wrote: »
    following your thread with interest as my house is in a similar condition! did you check attic joists and lathes for woodworm?

    All seems to be in order in the loft except for a few squint supports the wood is good and dry. No sign of infestation except for the bats.

    Thanks for popping in, was starting to think I was the only person here, if I can help in any way feel free to ask but I'm purely an amateur DIYer and I'm learning most of this as I go.


  • Closed Accounts Posts: 3,296 ✭✭✭FortySeven


    kupus wrote: »
    Dpm should not be bridged. Maybe it's a retro fit. Sorry can't help much with Dpm

    For googles, clean out googles with warm water. Then coat it with a film of shaving cream or soap or fairy liquid wipe it in good and well. It helps to prevent condensation. And invest in a good mask. It saves money and coughing in the long run.
    In the past if I had the full enclosed glasses I would cut holes in the underside where they wrap around under eyes to give it space to breathe. Coz the mask would be under the glasses and it's just a case of direct condensation.

    As for running wires. I think you can run all you want to the circuit board but you need a qualified licensed electrican to wire the board. That piece of paper would come in handy if something happens and insurance company gets involved. They will do everything in their power not to pay out so better not give them a reason not to.

    Cheers for the tip on the eyeware. I will try it next time I am up in the loft. Will be getting a pro, (much as it pains me) to do the panel. I will try to do as much of the rest as I can myself. Appreciate the input. Cheers.


  • Closed Accounts Posts: 3,296 ✭✭✭FortySeven


    Not much to report on the work front. I am dog tired from the long nights after work and the last few nights have been mostly looking at ideas for tiling and flooring etc. It is all getting done as cheap as possible for now as we will be extending at a later date. I scored an ex display bathroom suite for €190 so the bathroom furniture is sorted. We have decided on tiling etc and I am buying 6mm fibreboard for insulation under the laminate floors.

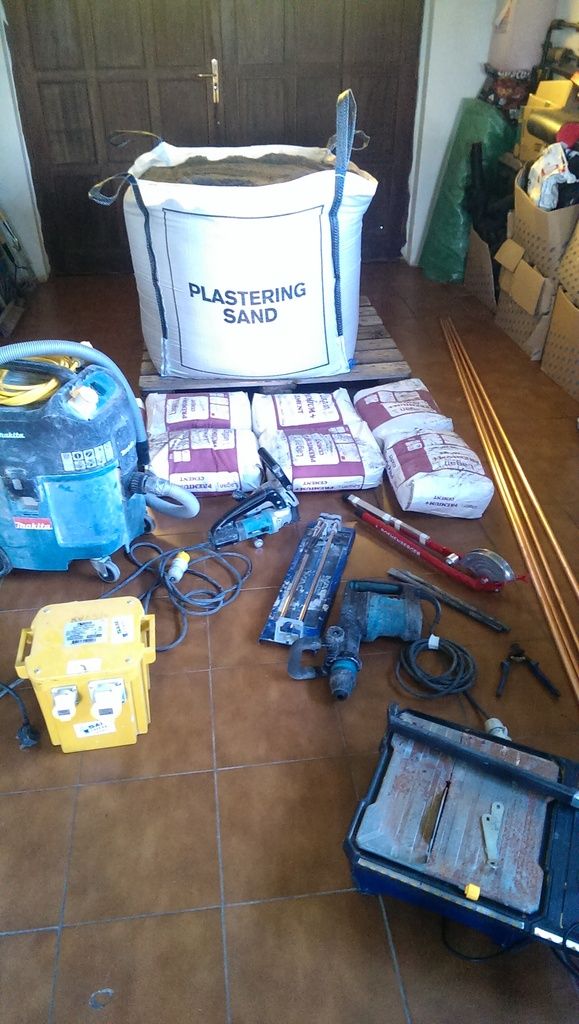
    Bought a new pipe bender for €70 and an electric tile cutting table, plus manual cutter and pincer nips for €50. Think I did well, the pipe benders are a good brand so should be better than the cheap Ebay jobbies.

    Good news, the bathroom is finally dry! Seems all our damp issues were down to leaking pipes under the floor. Now need to re-pipe and fill the holes with screed. Once I get the benders I will buy the pipes and connectors.

    Have plumbed a few radiators fully. Also got some brackets on the soil stack pipe so it is now secured.


  • Registered Users, Registered Users 2 Posts: 540 ✭✭✭biketard


    FortySeven wrote: »
    was starting to think I was the only person here

    Not at all. Plenty of people like myself watching this thread with great interest.


  • Registered Users, Registered Users 2 Posts: 846 ✭✭✭April 73


    I've loved reading through this thread. We moved house in April & although the house is only 20 years old, we've found ourselves confronted by more problems than we anticipated & are faced with putting many of the previous shoddy jobs right. We found light fittings held up with crate packing tape, burnt out wires going to the cooker hob, dangerous bathroom lights, leaking gutters, every blind we pulled came off the wall, the wooden floor creaks like a sinking ship, no burglar could climb the stairs without waking the neighbours they creak so much, plumbing pipes are embedded in concrete, the entire house has been covered with lining paper & painted over time & time again.

    Then I showed my OH this thread & we realised that things could be much worse!

    I think you're doing a great job FortySeven & I'm surprised to hear you're an amateur DIY-er. I don't think you're giving yourself enough credit at all!

    On the stove issue - we saw one of the pellet stoves in a friend's house. One of the things we thought would be great would be a self-igniting stove with a timer. Theirs does this & we're contemplating it as an option. Although it is expensive which is off-putting. They were very positive about it though. The other advantage is that the flue doesn't have to be as high above the house as the more traditional stoves which is another plus for me. Some of the flues are huge & off-putting - to me anyway.

    Best of luck with your project & please keep the updates & photos coming.


  • Registered Users, Registered Users 2 Posts: 1,614 ✭✭✭atilladehun


    Fair play FortySeven. I just read through this morning. WE're getting our place in the middle of next month. Can't wait. Loads of work to do.


  • Advertisement
  • Closed Accounts Posts: 3,296 ✭✭✭FortySeven


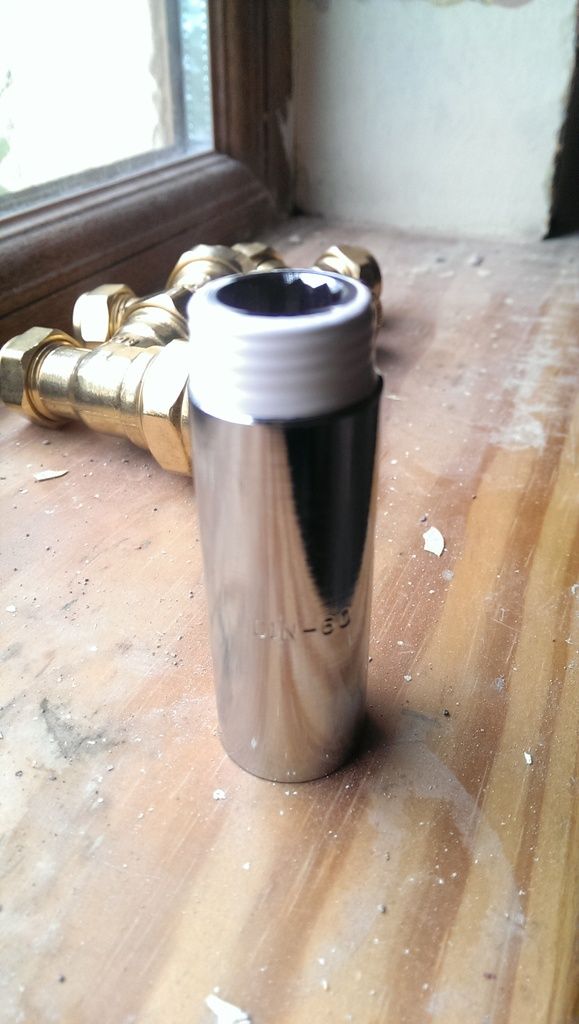
    Not a lot to report, finished hanging the rads. We are using these for extending the pipes. With PTFE tape 15 wraps.

    IMAG0574_zpsc111brvr.jpg

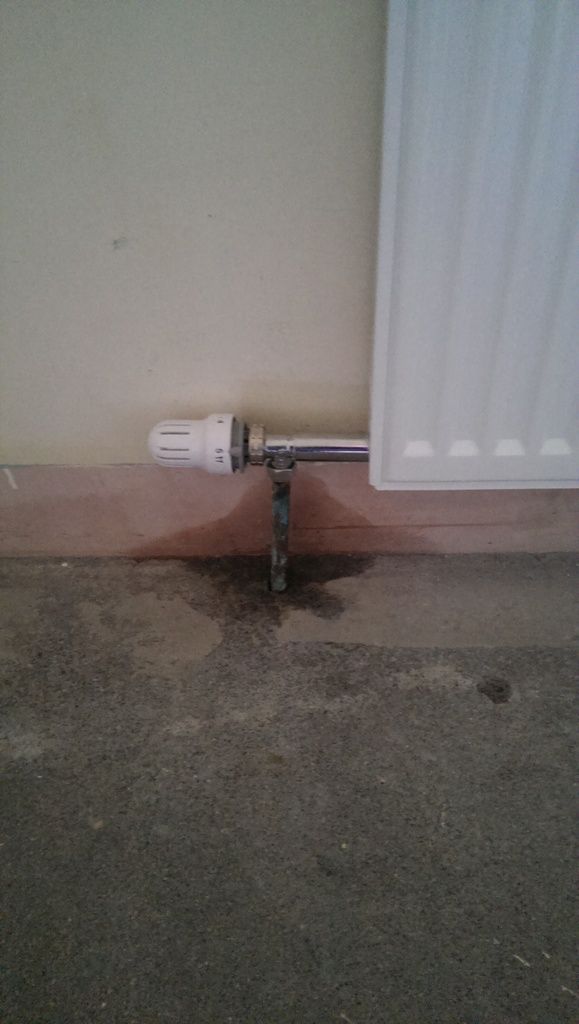
    No joy, they are pretty much all leaking from the valve to tail extension joint. Meh!

    IMAG0576_zpswos2rp1k.jpg

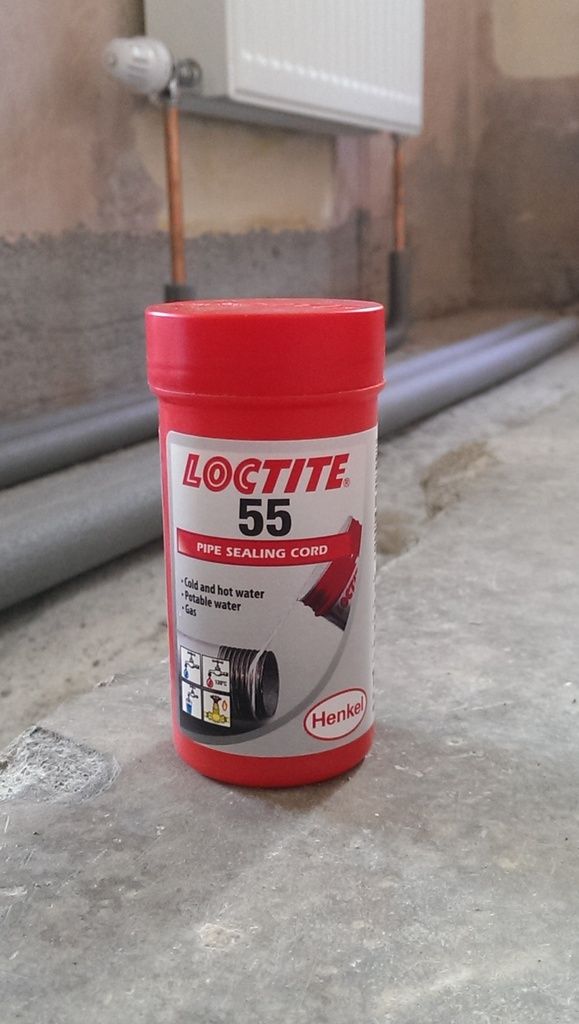
    Annoyingly with these, there is no way to disconnect them to rewrap the threads without completely removing the rad from the pipes. So, I went and bought a leak stopping liquid from Woodies, drained some water off and added it to the tank. Still leaking but I hope this will slow it down while I wait for the solution (I hope) to arrive. I got some loctite 55 which seems to be the bees knees in these situations. PTFE has proven to be useless here. I will drain and flush the system of the goo when the leaks are defeated.

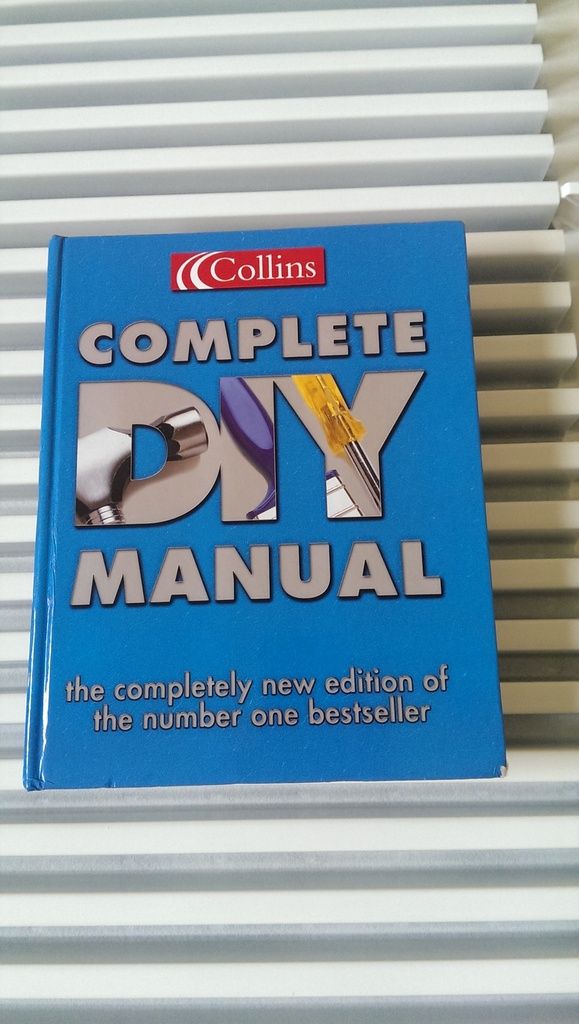
    I bought myself a book for a fiver from fleabay. Mainly for the wiring safety. It is a few years out of date but I don't recall houses blowing up or burning down en masse because of old regulations so I think I'll be grand working from the 2001 UK regs.

    IMAG0575_zpsfnsd1rna.jpg

    Did the calculations on the screed needs, ouch. 7 bags of cement and 700kg of sand so we have a tonne bag of sand, 7 bags cement and 4 lengths of copper pipe being delivered tomorrow. Cost €86.65 for the sand and cement and €85 for the pipes and connections, also another €56 on another radiator we forgot to buy.

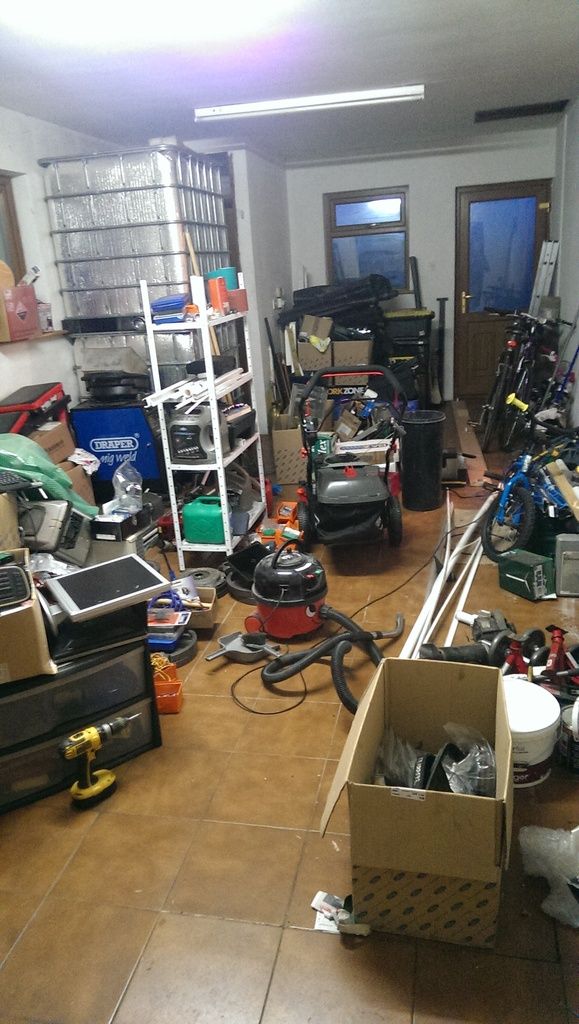
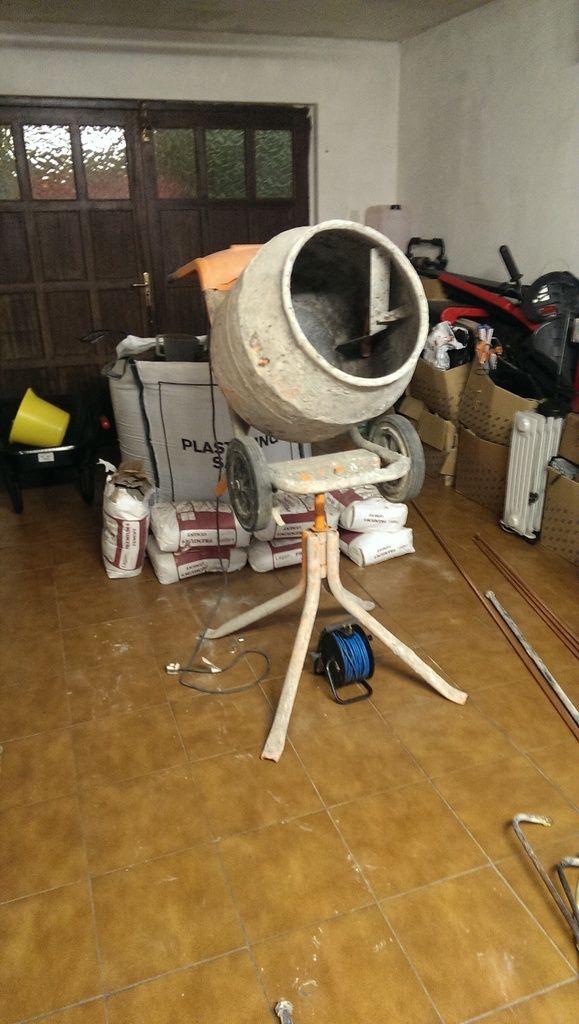
    Have to hire a mixer and our local hire shop has them on offer at €22 a week so we have been mainly clearing out the attached garage to house all this so we can mix indoors. Bloody spiders the size of mice in there. I need shelving for all my stuff, tools etc but I'm amazed by the prices. Decided to get some brackets and a buch of scaffolding planks and make a bunch of long shelves. I was planning on utilising the old kitchen in there but the smell of oldness was too much to bear.

    We were out pricing tiles and floors. Have found and agreed on the flooring. We found some tiles we both loved on display and went to order them. No longer available. Why do they keep them on display?

    So, more searching and we have found something not as nice but good enough. We will be getting them in the next few weeks.

    Seller doesn't have a box for my pipe bender and tile cutter so hoping he can get one tomorrow he has been promised. That pipe bender is holding up everything. Can't really move until we get the floor repaired. Fingers crossed we will get it soon. Typically, I had asked the rental shop if they had one for rent. No. After I bought one i was in the rental shop again, there is a pipe bender on the shelf.

    Not having much luck at the moment really but we soldier on. 3 weeks till the kids come home....:eek:


  • Closed Accounts Posts: 3,296 ✭✭✭FortySeven


    Garage tidying not going well either.

    IMAG0577_zpsfculg9zn.jpg


  • Registered Users Posts: 279 ✭✭MrMischief


    Well done sir....putting me to shame!!

    A great read and great progress to date - you have inspired me to get my finger out and start the man cave fixer upper.

    Cheers


  • Closed Accounts Posts: 3,296 ✭✭✭FortySeven


    Something for the weekend sir?

    IMAG0580_zpsxshbvpet.jpg

    That's our pipe benders and tile cutters, a chase tool with vacuum and a mini kangoo. Have to work tomorrow morning but I hope to get a lot done this weekend. Have to collect a cement mixer and hopefully we can get a lot done over the next 3 days.

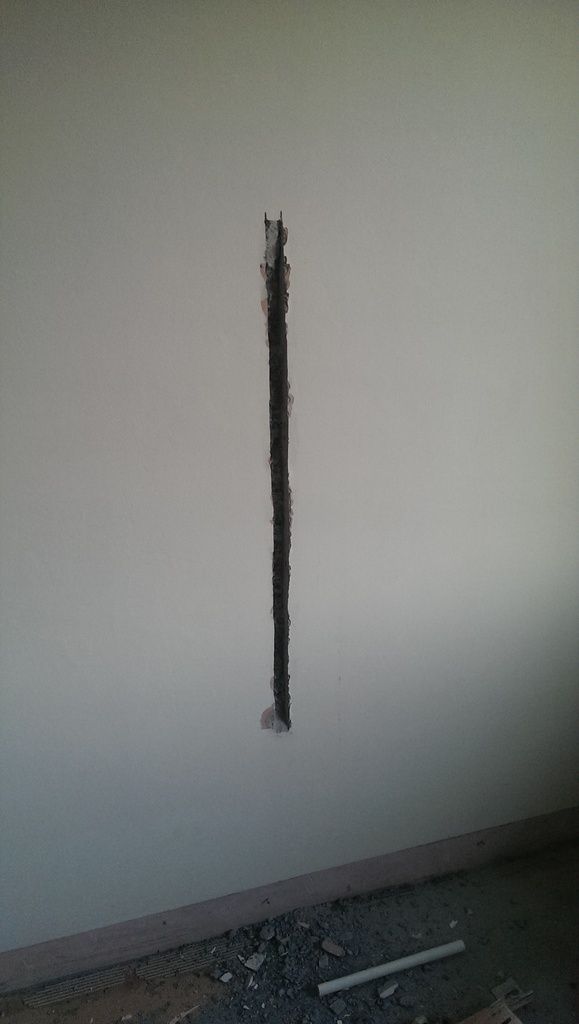
    Had a quick go with the chaser, seems easy enough. Happy enough with this as a first attempt.

    IMAG0582_zpsx52cfe6g.jpg

    Tired though. Seems I haven't had tiome to sit down for months.


  • Closed Accounts Posts: 18,066 ✭✭✭✭Happyman42


    That's a stud wall! :)


  • Advertisement
  • Closed Accounts Posts: 3,296 ✭✭✭FortySeven


    Happyman42 wrote: »
    That's a stud wall! :)

    I wish it was, no stud walls in our house. Yet.;)


  • Registered Users Posts: 4,151 ✭✭✭kupus


    Meant to say earlier, for the bathroom why don't you knock the wall the one the closet was in and just move it back and forward. Replace with wooden stud wall. Easy peasy.


  • Closed Accounts Posts: 3,296 ✭✭✭FortySeven


    kupus wrote: »
    Meant to say earlier, for the bathroom why don't you knock the wall the one the closet was in and just move it back and forward. Replace with wooden stud wall. Easy peasy.

    We did consider this but it leaves a pillar, it is also bearing some of the roof beams. We will be making a second bathroom in the current dining room at a later date so we decided not to make the small room any smaller, (we need all the rooms, 3 kids)

    If we convert the loft I may lose that room to the bathroom and a staircase. Still thinking about that one.


  • Closed Accounts Posts: 3,296 ✭✭✭FortySeven


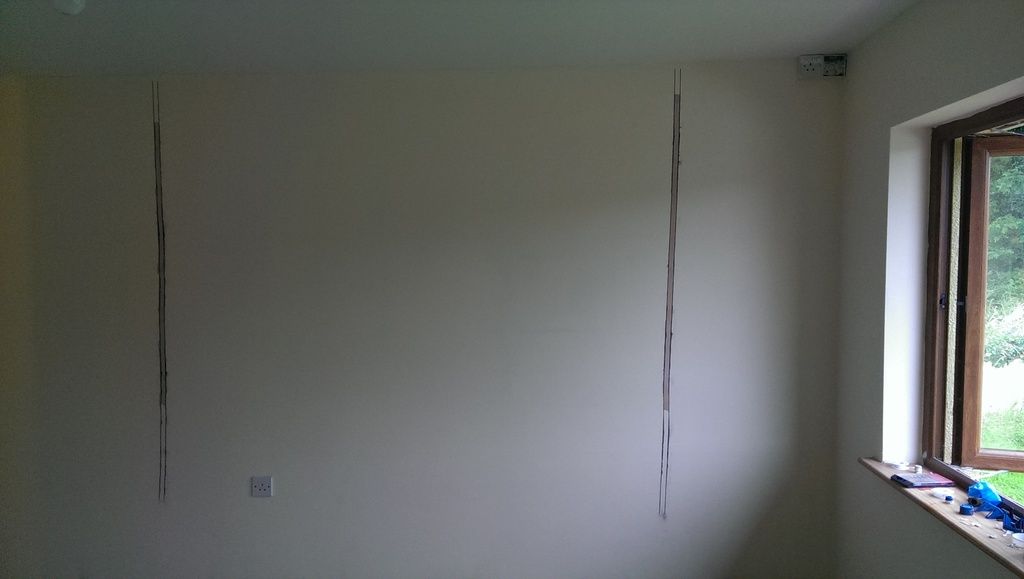
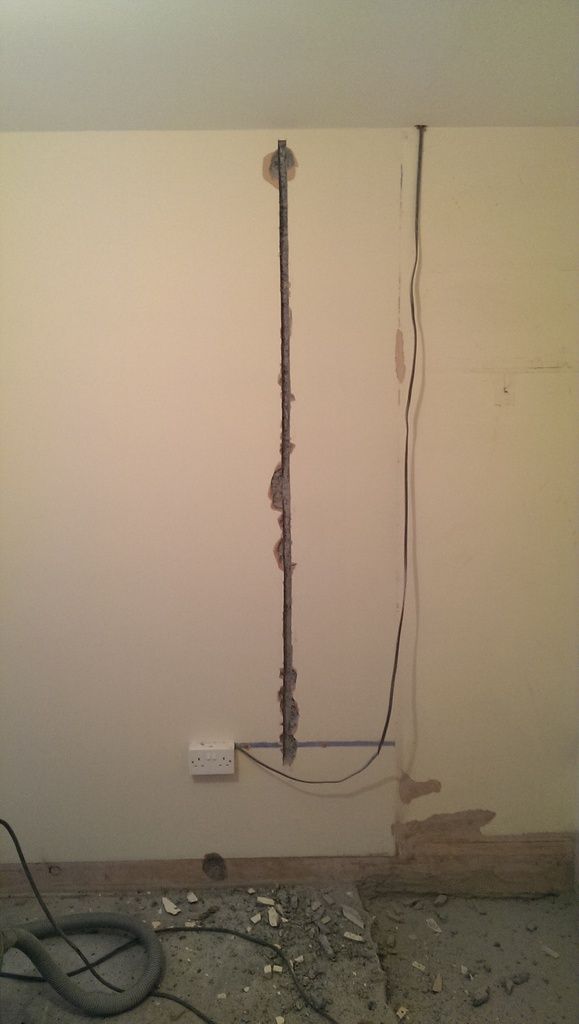
    Got the walls chased, hard bloody labour. Cut 7 in total, I am absolutely knackered. Pushing that thing into the wall is a nightmare.

    IMAG0583_zpsf3sirapu.jpg

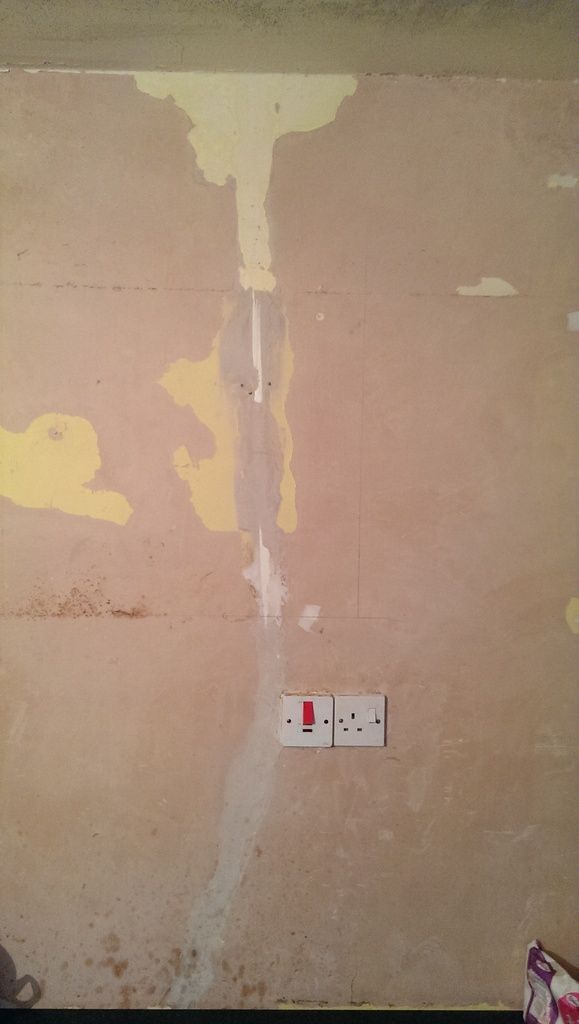
    Was at work this morning, them collected a cement mixer, came home and went to the hardware shop. Bought 7 lengths of 3/4" oval conduit, lagging for the pipes, a roll of 1000 guage polythene, a wheelbarrow, a shovel, a bucket and a double socket faceplate for the one in the kitchen that trips the circuit when I switch it on or off. All in €115.21.

    Then went back to the shop for stuff I forgot and spent another €41 on a plastic float and a new cooker switch and a double socket and a couple of cages as we are moving the diagonal chase for the cooker into a straight one that will not be in the way of the extractor and will not protrude from the wall.

    IMAG0587_zpsgyhmcl4l.jpg

    I have 4 of the chases cleaned out up to 1" from the ceiling, took a chunk of concrete to the top lip. Hurts like a bastard.

    IMAG0586_zpsdscxsdvq.jpg

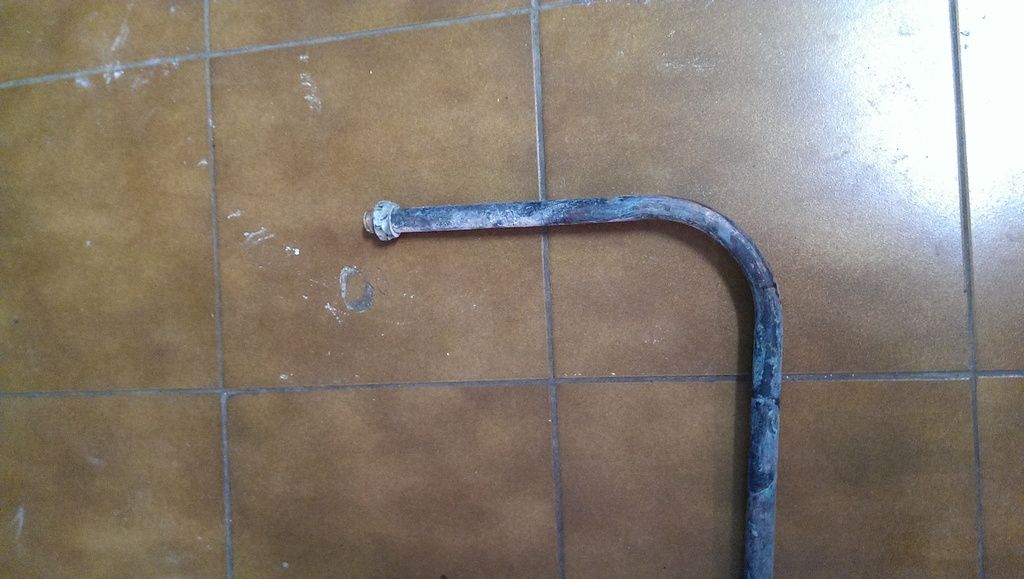
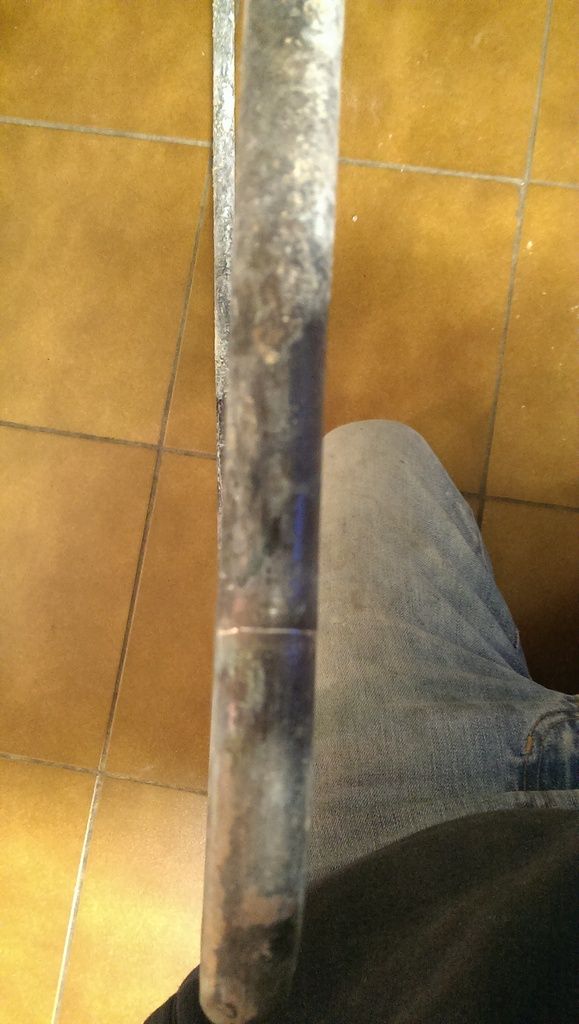
    Had a go at bending the old pipes, I can get a nice bend but have to work out how to stop the form from leaving a nip, might try some lube to stop it sticking.

    IMAG0588_zpseeui6e6a.jpg

    IMAG0589_zpsh0jclqso.jpg

    Forgot to buy PVA to make a cement slurry to put down before the screed. Will have to brave the traffic tomorrow and get it from Woodies. Have the cement mixer set up so we are ready to go this weekend with the plumbing and screed.

    IMAG0590_zpsm9jf45cu.jpg

    Can barely stand though, hopefully be back to normal tomorrow. :(


  • Closed Accounts Posts: 3,296 ✭✭✭FortySeven


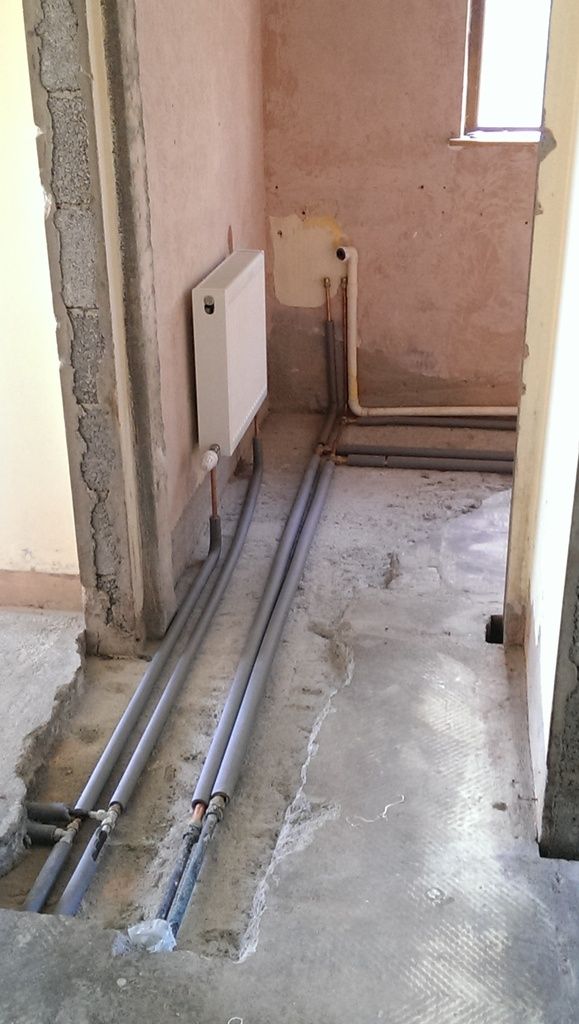
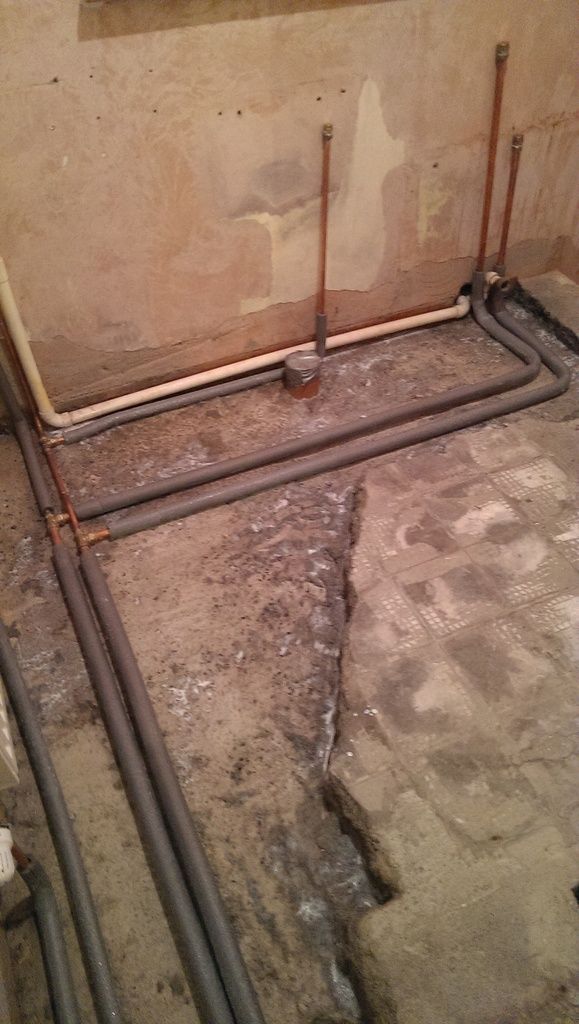
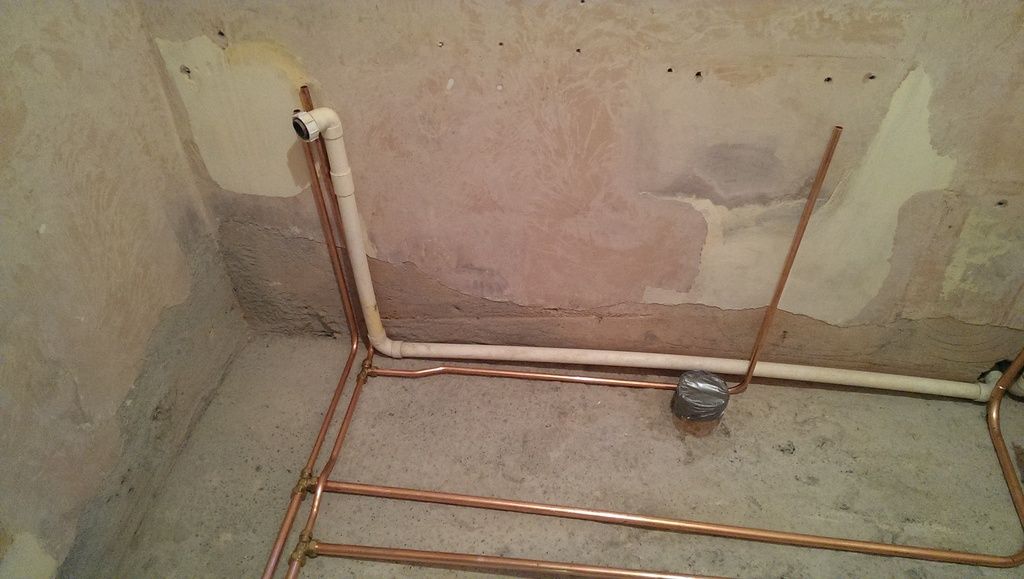
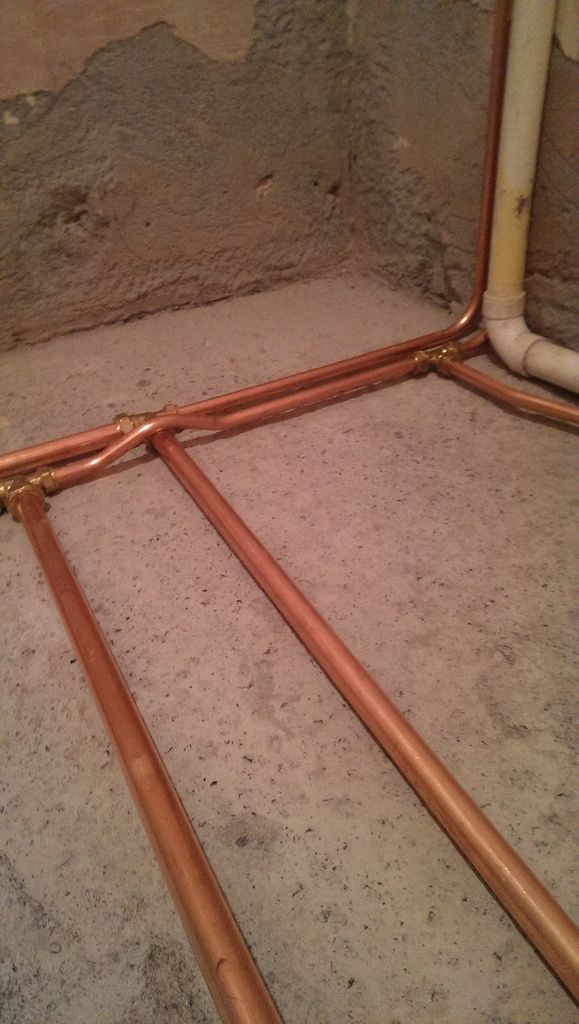
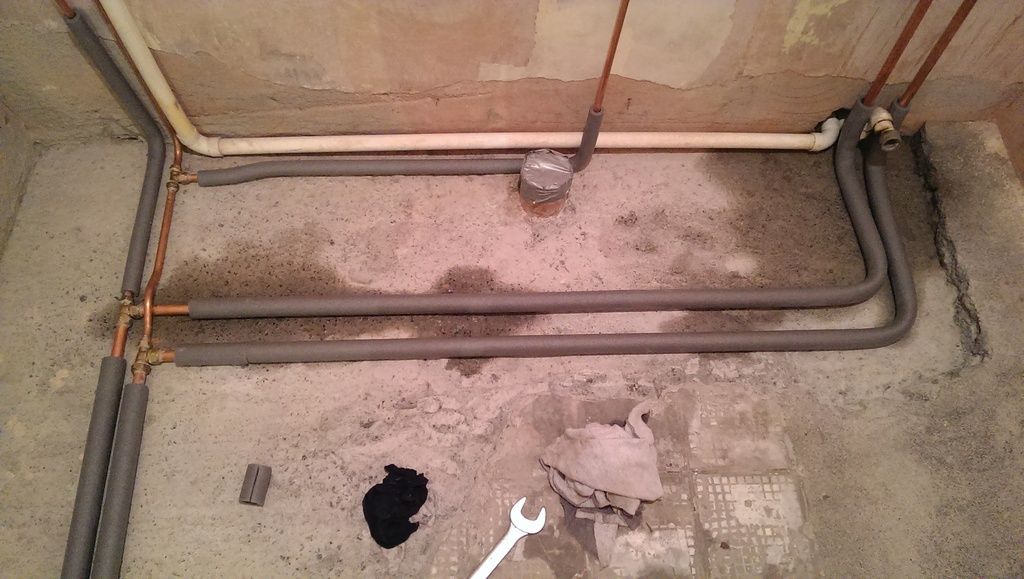
    Happy enough with this, not bad for a first attempt even if I say so myself. Very happy with this new arrangement and especially proud of my crossover pipe. The old.

    IMAG0558_zpsm0hjndty.jpg

    IMAG0551_zpsg1z3ol2p.jpg


    The new.

    IMAG0592_zpsilws9bhy.jpg

    IMAG0591_zpsut8hgzdo.jpg


    It is very hard trying to work out the 3rd dimension and then remember which way the pipe benders bend and then how much to allow for the bend itself. Have to admit that my brain hurts. I got one wrong and could not complete the bend because the arms of the bender were hitting the pipe where I had made the first bend. Hadn't allowed for this. I tried to finish it off by hand but the pipe has kinked, you can just see it on the far right of the first new picture above. I bought only just enough pipe so will have to go to B & Q tomorrow to get another length. The kink seems ok but I am not taking the risk that it will hold.

    All in all, not as much done today as I hoped but my head has had a good scratching so should be good for head and shoulders this month. :confused:

    Tomorrow I will lag the pipes and cap them then grease and tighten everything up and switch the water on. Fingers crossed.

    Have to cut two more chases in the kitchen yet and chip away some more screed to undercut the join for the new one to bond. Also clean out a few of the other chases I made before returning the kangoo and chase tool on Tuesday.


  • Registered Users, Registered Users 2 Posts: 540 ✭✭✭biketard


    Wow, what a difference. Great job.


  • Closed Accounts Posts: 3,296 ✭✭✭FortySeven


    Didn't get much done today. Bought a new length of pipe and bent it to replace the kinked one, then cleaned out the rest of the chases and cut a new one for the lightswitch in the kitchen, it currently runs externally on the dining room wall. Went to the loft to see where the socket next to the cooker switch runs and found out it is running off the same supply as the cooker. I decided to leave this alone for now as we will be moving the kitchen at a later date.

    I undercut the screed edges in the bathroom and tidied them up to make the new screed bond better.

    Had a look in the water tank while I was in the attic, 2 dead bats floating in the water tank and another in the heating tank. No wonder they are endangered, dumbasses. Fished them out anyway, there are 6 or 7 roosting in the top of the roof. I have read they leave in August so I will be sealing the loft after they go.


  • Registered Users Posts: 18 crow75


    where do you get the time from?? you are doing great!


  • Closed Accounts Posts: 3,296 ✭✭✭FortySeven


    crow75 wrote: »
    where do you get the time from?? you are doing great!

    Wish I had more! Got in from work tonight, had dinner and straight back to it. Drained the system and got the pipes ready for final fitting. Greased, lagged and cut to size properly. Now all connected and water back on. The ends are capped for now while we check for leaks, then will trim the risers for flexi tap connectors. Bit nervous about leaving the water in the system overnight and while we are at work tomorrow. I may drain the tank again before I go to bed. Could do a lot of damage in 18 hours. :eek:


  • Closed Accounts Posts: 3,296 ✭✭✭FortySeven


    Damn it! Initially there were a few leaks, I expected this as I did not tighten the nuts much so to allow for tightening while not overtightening. One leaked from the riser, the other from the 3 way reducer. Have been keeping an eye on it after tightening both a bit. Seemed to be just a slow leak from the three way left. Loosened it off a bit and re-tightened it as I read this helps reseat the olive. Lots of fiddling with it before I stripped back some lagging to try and trace where it is coming from.

    IMAG0593_zpshj4b1i0q.jpg


    It is just the water that leaked from the riser, it ran down the pipe and into the lagging and it is slowly running through it and dripping out at the other end. (Looks for slap the forehead emoticon) DOH! All my joins are good. Still draining the tank though, will let it all dry out and pressurise it again tomorrow after work.


  • Advertisement
  • Registered Users, Registered Users 2 Posts: 540 ✭✭✭biketard


    FortySeven wrote: »
    Damn it! Initially there were a few leaks, I expected this as I did not tighten the nuts much so to allow for tightening while not overtightening. One leaked from the riser, the other from the 3 way reducer. Have been keeping an eye on it after tightening both a bit. Seemed to be just a slow leak from the three way left. Loosened it off a bit and re-tightened it as I read this helps reseat the olive. Lots of fiddling with it before I stripped back some lagging to try and trace where it is coming from.


    It is just the water that leaked from the riser, it ran down the pipe and into the lagging and it is slowly running through it and dripping out at the other end. (Looks for slap the forehead emoticon) DOH! All my joins are good. Still draining the tank though, will let it all dry out and pressurise it again tomorrow after work.

    Bit of an annoyance for sure, but definitely better to find out now while everything is accessible (and easy to dry out).


  • Closed Accounts Posts: 3,296 ✭✭✭FortySeven


    Had a go at the screed last night. I primed the concrete Friday evening with a PVA/water mix and let it dry. Last night I made a cement slurry with a bit more PVA to prime it and lay the screed on it wet.

    IMAG0596_zpsqkmvyspl.jpg

    Started mixing screed, keeping it dryish, not convinced by the sand I have, it is quite coarse but I guess it will have to do.

    IMAG0597_zps6vrzwbqf.jpg

    Not sure if it was tiredness or just stupidity but I became convinced my mix was too dry and the last 2 batches were a good bit wetter, all in all I am not happy with this, where it joins the rest of the floor needs some tidying and it is not quite level but there we are. Good practice for the larger area I have to do in the hall and bathroom. Will learn from the mistakes made.

    IMAG0598_zpshfgllrrv.jpg

    Took a hell of a lot more mixing than I expected, not sure the neighbours were too happy with me washing my tools at the outside tap at midnight but such is life.


  • Registered Users Posts: 83 ✭✭Projectx


    Just spotted your thread. Well done so far. I will follow with interest.


  • Closed Accounts Posts: 3,296 ✭✭✭FortySeven


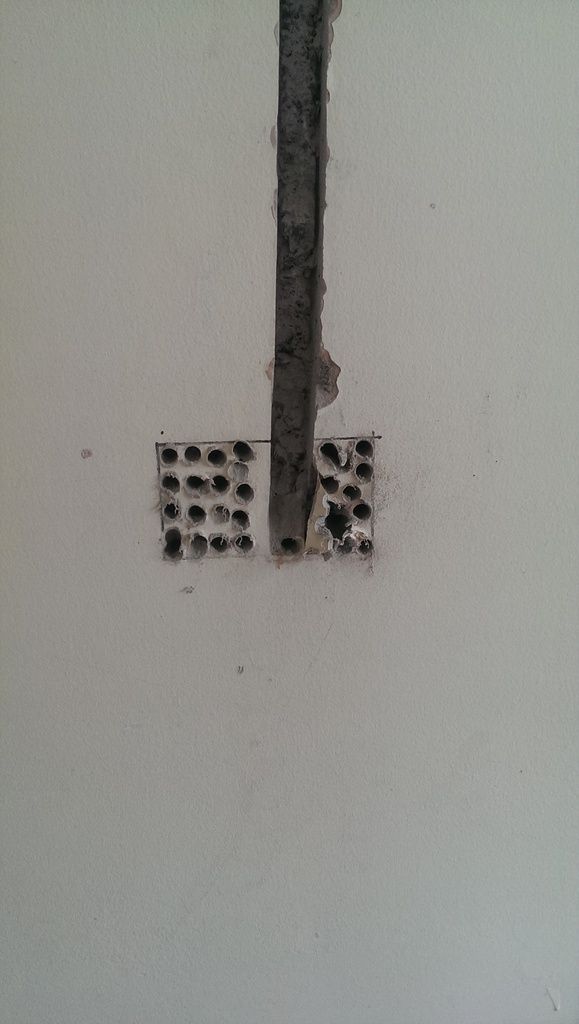
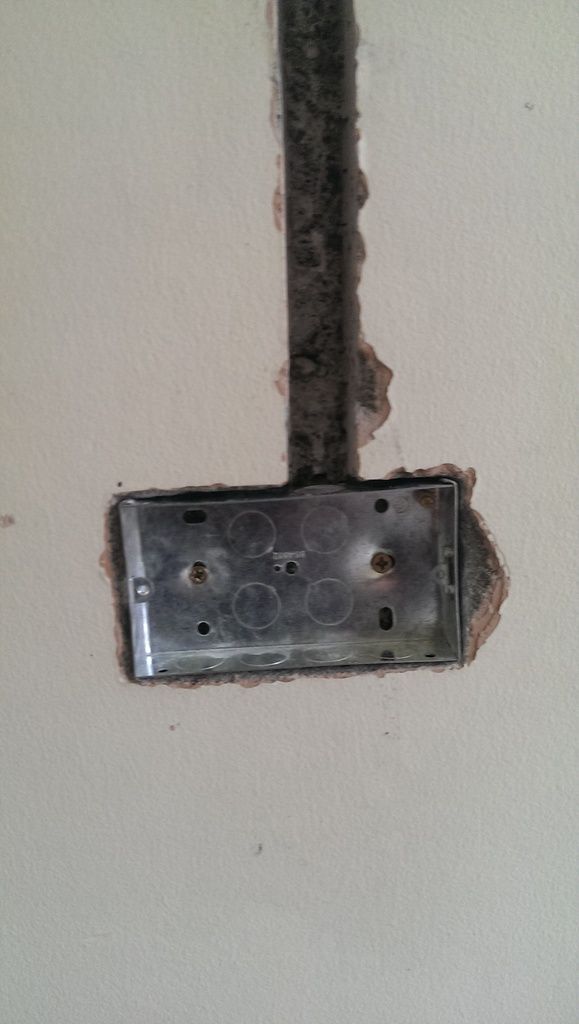
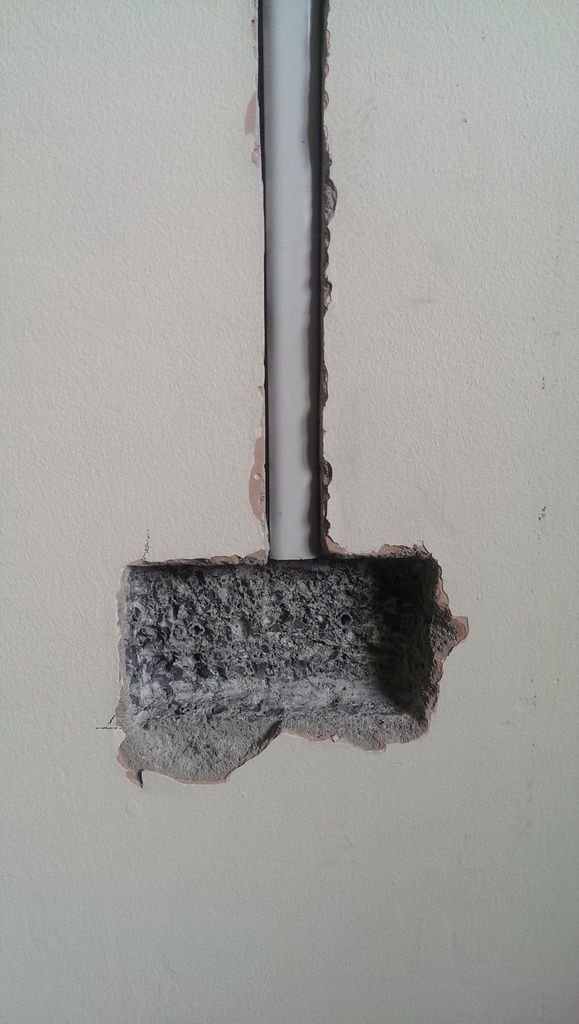
    Been chipping away at the walls to make socket housings. Bloody blocks are full of chips of rock hard rock. Taking me ages with the chisel. First one I managed to cut too big.

    IMAG0599_zpslf4o80ch.jpg

    Drilled it out first. The cheap ROK hammer drill I bought for the job will be going back after for a refund, it is stuck on full power so the only control I have is on/off at the socket. The socket looks squint but it is the chase that is slightly off straight, drove me mad looking at it and looking at the level, was convinced the level was off.

    IMAG0600_zpsdunugpyh.jpg

    Next one went better. I am learning.

    IMAG0601_zpsdr2zr6fm.jpg

    Going to take a few days holiday if I can from work, so much to do in the next weeks it is starting to look impossible.


  • Registered Users Posts: 4,151 ✭✭✭kupus


    I saw somewhere you have a kango, just stick on the flathed chisel and make the electrical box. Just don't go to deep into wall and you'll be fine. A lot easier than making holes with a drill.
    And drop the rok tools. Quick.
    Waste of money and time. Time meaning you will have to go back and return it. So that's time spent that you could be doing work instead of going back to woodys to get another rok pos


  • Closed Accounts Posts: 3,296 ✭✭✭FortySeven


    kupus wrote: »
    I saw somewhere you have a kango, just stick on the flathed chisel and make the electrical box. Just don't go to deep into wall and you'll be fine. A lot easier than making holes with a drill.
    And drop the rok tools. Quick.
    Waste of money and time. Time meaning you will have to go back and return it. So that's time spent that you could be doing work instead of going back to woodys to get another rok pos

    Kango was a rental, it went back a while ago. The ROK was bought knowing it would go back, (it cost €15) as I have a good Dewalt cordless that does me for most things, thought it might soldier on a bit longer though. Typically, the missus has thrown out the receipt. (Might have been me, but I'm blaming her :P)


  • Registered Users, Registered Users 2 Posts: 20,653 ✭✭✭✭amdublin


    Impressive. I'm now following this thread.

    You are doing brilliantly keep up the great work.


  • Registered Users, Registered Users 2 Posts: 1,606 ✭✭✭sgarvan


    Very interesting thread indeed. Also following with interest. Would love to do a project like this one.


    On the kango front you may be able to pick up one of these Hammer drills from Lidl. They have kango bits http://www.lidl.ie/en/Offers.htm?action=showDetail&id=28503


  • Registered Users Posts: 4,151 ✭✭✭kupus


    sgarvan wrote: »
    Very interesting thread indeed. Also following with interest. Would love to do a project like this one.


    On the kango front you may be able to pick up one of these Hammer drills from Lidl. They have kango bits http://www.lidl.ie/en/Offers.htm?action=showDetail&id=28503

    I had one of those and yeah it was fine. Nothing special. Just fine. Did what o wanted it to do.

    Just OT are those angle grinder holders any good? Never used one so I don't know. It's on that links page at th bottom.


  • Advertisement
  • Closed Accounts Posts: 3,296 ✭✭✭FortySeven


    Already have Thursday booked off work to go and grab one of those very drills. Friday off too.

    Have set myself a gruelling schedule that I hope to keep for the next few days. Tomorrow night I will finish the rad pipes in the bathroom and trim and recap the risers to the correct height. Then clean and prime the floor with PVA.

    Thursday, shopping for drill and some electrical bits. Screed the bathroom and fill the hole in the bedroom and the holes where the doorframes used to be. I will make up some cement plaster to fill the huge chase left from the shower pipe and cable.

    Friday will be finishing the chases, cutting the rest of the socket housings and light switch, wiring them up and pva the chases ready for plaster on Saturday.

    Saturday, refit all radiators with the loctite 55, remove shower wiring, fan and switches in bathroom and fit a vent for the new in line fan. Plaster all chases.

    Sunday. All the things I didn't finish in the preceding days. Need a big push now.

    I got an unexpected windfall today of a one 4 all voucher from my life insurance provider. I will be taking it to B&Q to spend on 2 rooms worth of 6mm fibreboard for under the floors. Have to get doorframes bought and laminate floor. I will be laying the floor continuous, no saddles and I will fit the door frames on top instead of undercutting the frames after. (Unless anyone can tell me any reason I shouldn't?) I will be putting skirting after floors so have the perfect setup to leave a good expansion gap all around. Still have to fit bathroom and we have decided to leave the tiling for later.

    Lots to do. Kids back in 2 weeks.


  • Closed Accounts Posts: 3,296 ✭✭✭FortySeven


    Didn't get anywhere near the schedule. Had to go to work on Friday so that spoiled the timeframe. I got the drill from Lidl, great job. Ended up watching football today, bloody fantasy football taking up too much of my time. :D

    Got all the rads off and had a good look at what was happening, the extension tails and the valve threads had loads of play in them, I had 20 turns of PTFE on some of the later ones and they were still leaking. The threads had chewed it up quite well.

    Enter stage left...... €12.50 delivered from Ebay.

    IMAG0610_zpstbehrrqn.jpg


    This stuff is amazing. I had 20 joints done in the time it took me to do 3 with the PTFE. Really easy, nip the threads with pliers to rough them up, (seems counter intuitive but it grips the threads and shreds it) 6 wraps in the thread direction accross the threads and make the joint. Easiest thing in the world. I noticed the difference straight away. I was tightening them by hand with 15-20 turns of PTFE, I needed a spanner with 6 turns of this. I undid one to see what it was like and it was shredded like a thick web. The other benefit with this stuff is that you can back it off. I fitted all the valves with the rads lying on the floor and had to adjust a few to get them to line up. Nothing leaks, first time. I will never look at PTFE again.

    Bathroom rad is now fitted and piped.

    IMAG0609_zps3ksvv8f1.jpg

    I refilled the system and ran the heating to test, all good, I then drained it again and put anti-corrosion additive before refilling.

    Have the floor PVAd ready for screeding tomorrow, have to admit I have been putting this off as it scares me a bit but will get it done tomorrow for sure.

    IMAG0611_zpskulklphp.jpg

    Had to cut the grass so lost a lot of time, it was getting out of control. I have a few of the chases done but not all.

    Bought the laminate floor, €1200 all in. Should get it next week. Bats are back, 12 up there tonight, they were flying around while I was up there.

    Will put up pics of the screeding tomorrow when it is done. Was looking for wire for the sockets, ended up buying a 100m roll of 2.5mm for €80. Won't need it all yet but I may as well replace the wires from the external sockets instead of extending them. Also ordered a rad valve with a drain from ebay to save me faffing about if I need to work on the heating. Looking for rubber grommets for the socket housings to protect the wire going in.


  • Closed Accounts Posts: 3,296 ✭✭✭FortySeven


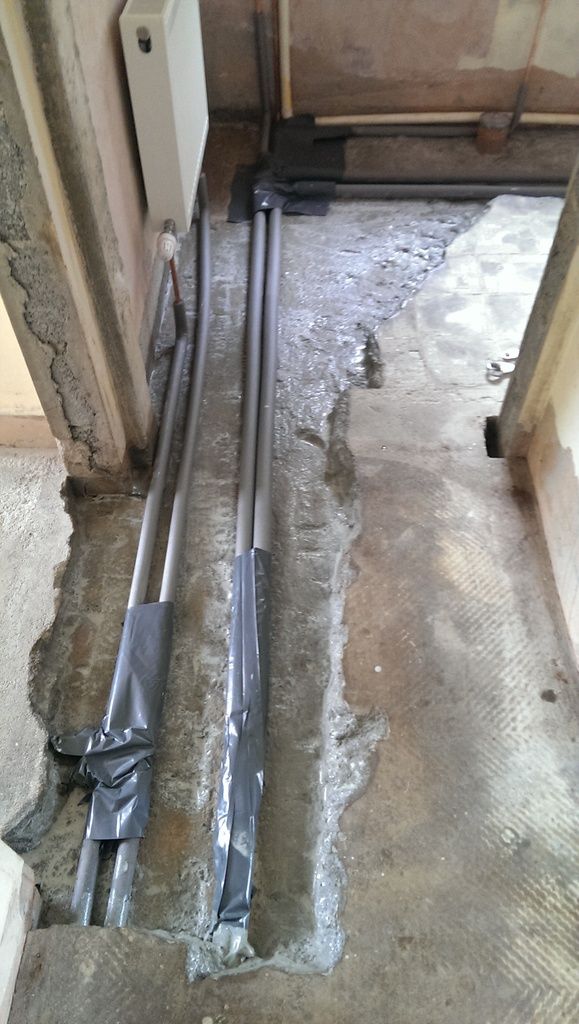
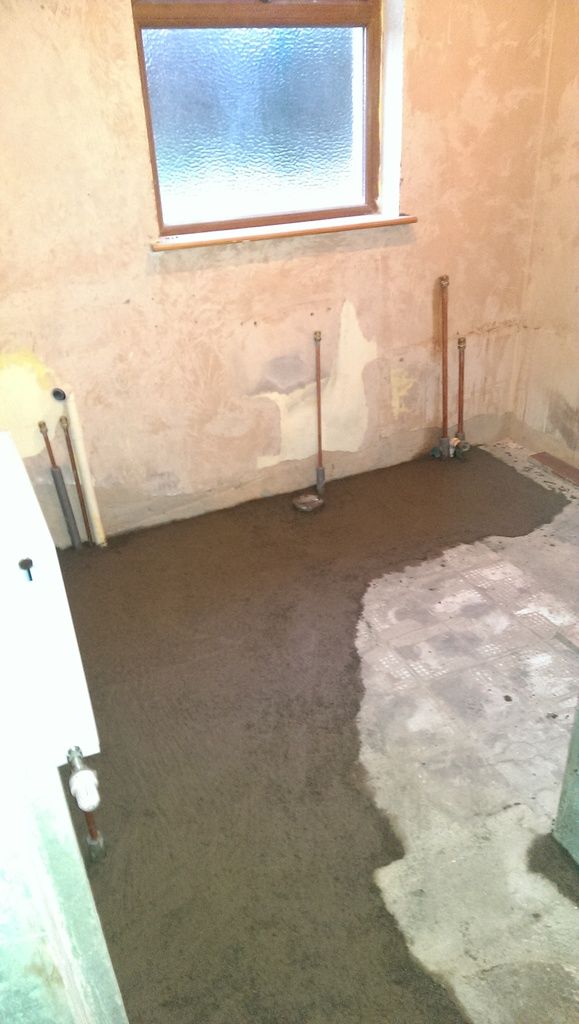
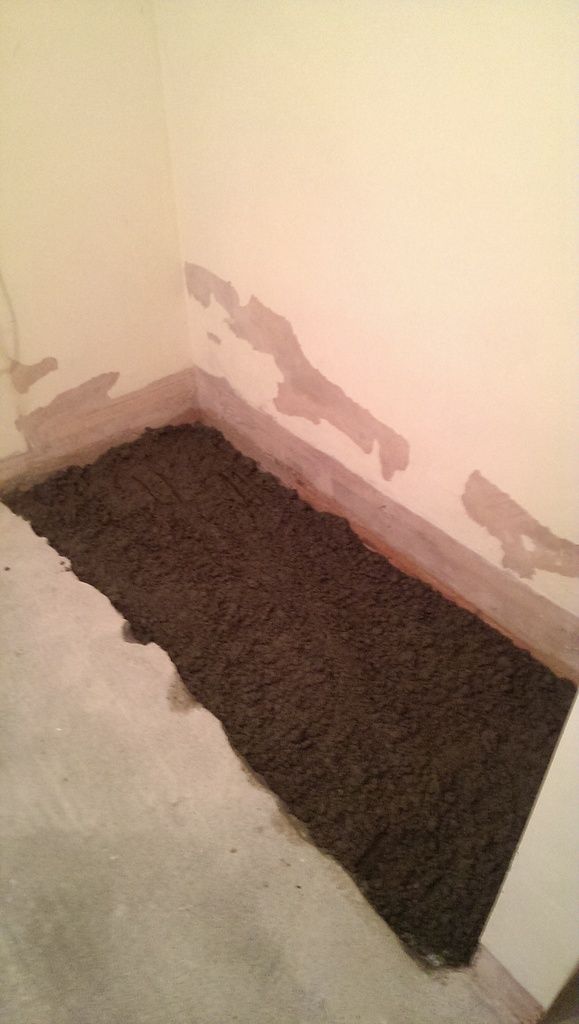
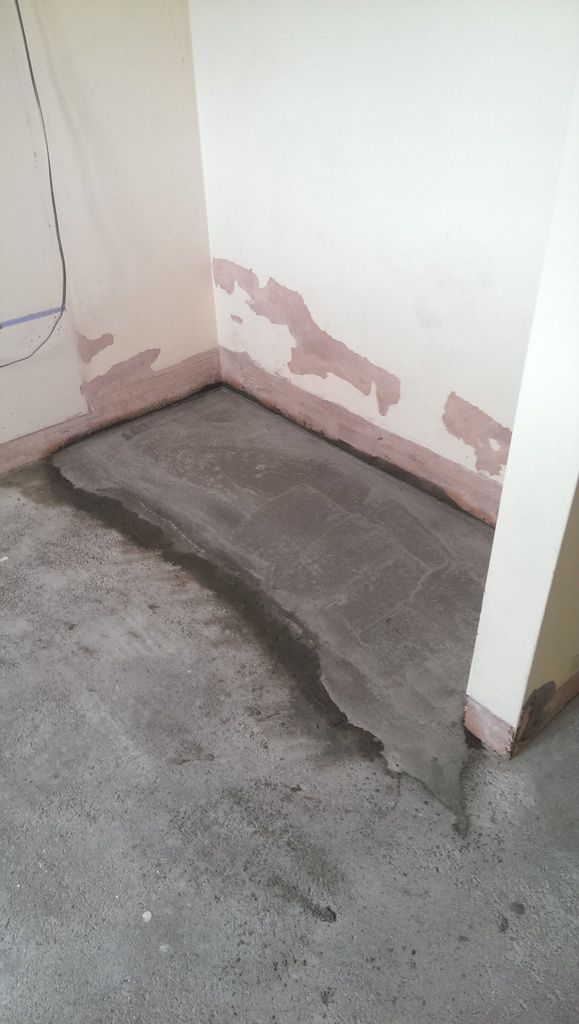
    Well, that was a lot better than my first attempt. Wrapped all the exposed parts of the pipes with plastic sheeting, Brushed on a cement slurry, (cement, pva and water)

    IMAG0614_zps0bor1snl.jpg


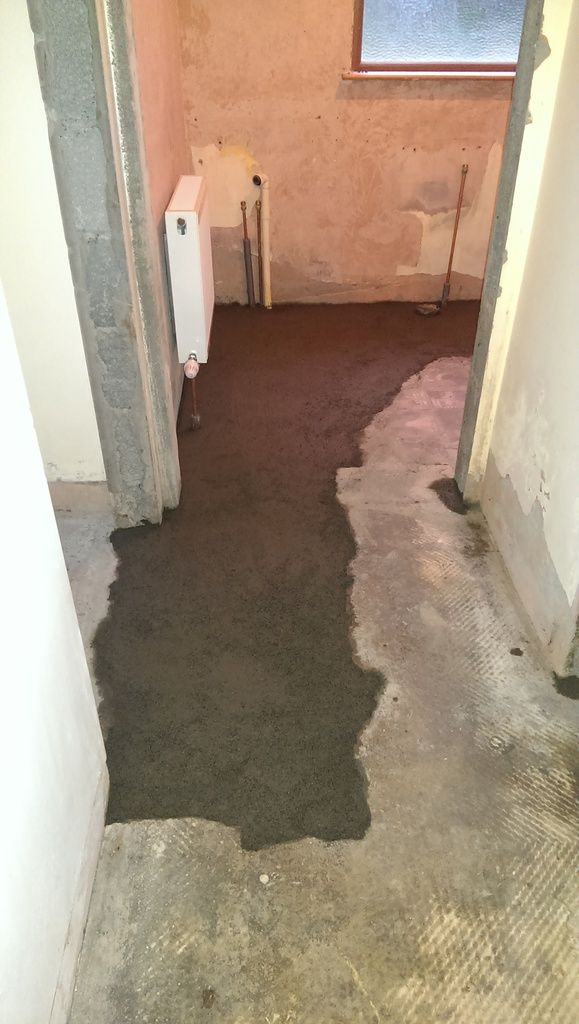
    Then on with the screed, kept it dryer this time and it is pretty easy once you know how. This one is perfectly level and is now covered in plastic to dry slowly.

    IMAG0615_zpszxeie7er.jpg

    IMAG0616_zps9dfcuka5.jpg

    Didn't get much else done today, filled all the holes where the door frames were buried, also filled the hole in the bedroom floor. Removed the old shower pipe from the water tank and capped it off and removed all the associated wiring for the shower.


  • Registered Users, Registered Users 2 Posts: 7,786 ✭✭✭slimjimmc


    Good work. A bag or two of levelling compound will have that floor perfect for tiling. Easier to do now before the ceramics go in.


  • Registered Users, Registered Users 2 Posts: 6,184 ✭✭✭Gavlor


    Jesus I hope my wife never reads this thread!!

    Great work and a really interesting read. Keep it up, we're in a 1980's dormer and have been tipping along at jobs over the last few years, chimneys to be repointed and we're almost there!


  • Closed Accounts Posts: 3,296 ✭✭✭FortySeven


    slimjimmc wrote: »
    Good work. A bag or two of levelling compound will have that floor perfect for tiling. Easier to do now before the ceramics go in.

    That's the plan, save chipping away at the old leftover adhesive. Will have to let it dry for a while though I think? I've read 1mm a day. That's 50 days but I think 3 weeks should be fine if I use flexible adhesive?


  • Advertisement
  • Posts: 0 [Deleted User]


    Very interesting thread.

    Been following for a few weeks now. Well done on what you've achieved so far. I'd love to be as handy as you!


  • Registered Users, Registered Users 2 Posts: 828 ✭✭✭dingdong1234567


    Excellent work and well done on taking on such a project.


  • Closed Accounts Posts: 3,296 ✭✭✭FortySeven


    Well, another busy weekend where I got not much done. Friday evening I collected half the laminate floor, noticed they had a deal on if you spend a thousand you get a free gift. Tried to wangle it with the 1200 I paid for the floor but they wouldn't count the deposit, so said I would buy the door frames and skirting to make up the difference, couldn't spend on building stuff had to be retail. Ended up buying a €175 mirror for the bathroom. :eek: It's nice, has built in LEDs. ;) Also bought some radon tape to join my underlay sheeting for the floors. Friday night I had to have a break, I am worn out.

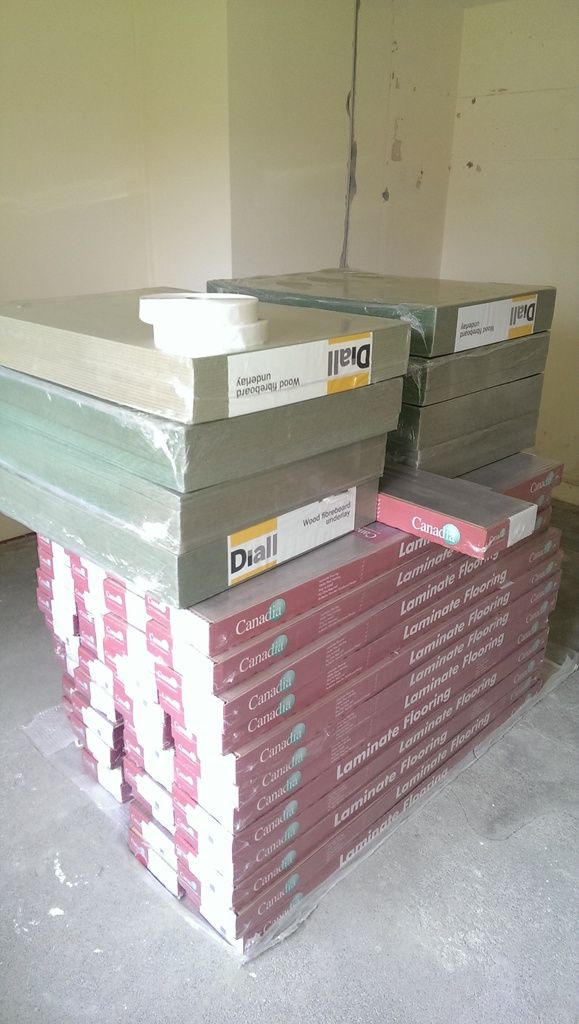
    Saturday, had to go into work to get the van, then over to B&Q to buy the rest of the fibreboard, had to buy a new filter for the poor fish, can barely see them in the tank, poor neglected beasties. Then back home, unload the fibreboard and over to collect the rest of the floor. Unload the floor and load the cement mixer to take it back. Return van and straight home to start working, went back to buy the door frames €186 for five as I will not be able to get in the shop again till Friday week. Most of the day gone thanks to turf collectors clogging the roads with their 40 year old tractors and dangerously overloaded jeeps and trailers. Anyway, now have this ready to go.

    IMAG0618_zpsdwcqpbew.jpg

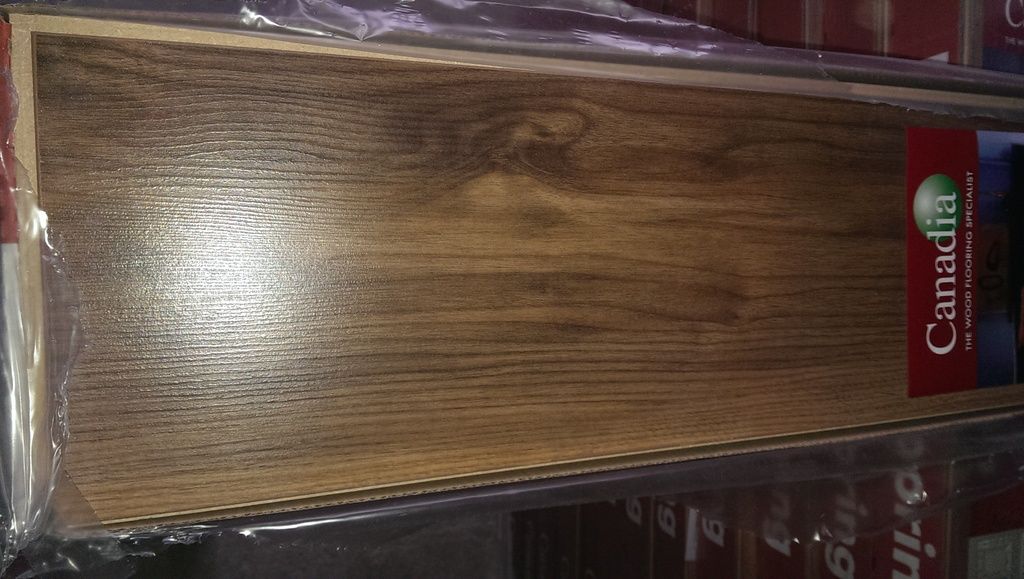
    It is a light walnut 7mm laminate, with the 6mm fibreboard it will be grand. The AC3 is the bit that matters.

    IMAG0619_zpsy9ou5dah.jpg

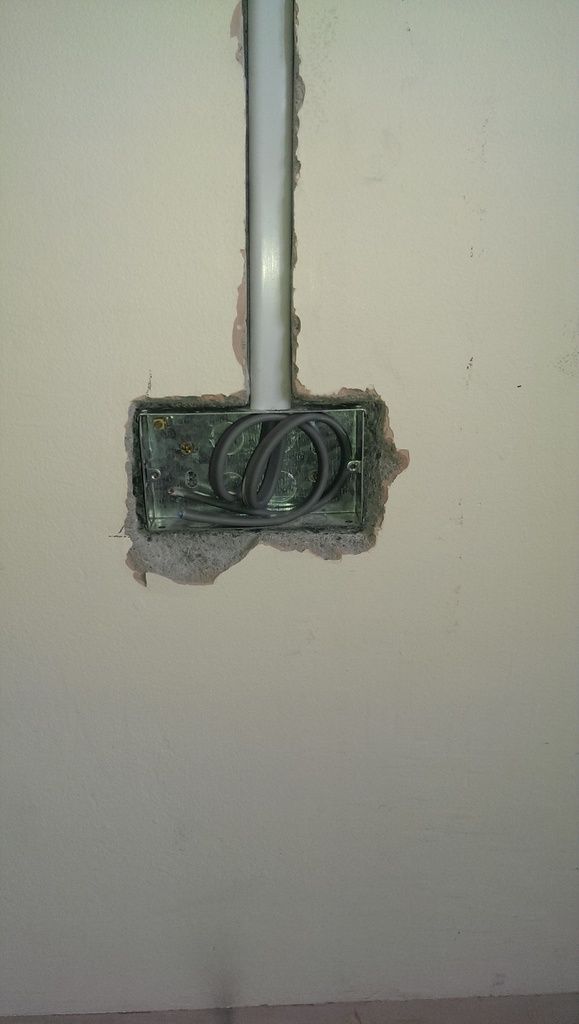
    Finally got back to working and over the rest of the evening and today I have wired the sockets and removed the old wiring and accessories.

    IMAG0620_zpsx2yi7kxj.jpg

    IMAG0623_zpszyzd5bar.jpg

    Crawling arounds in the loft all day, pulling and laying wires. Trying to manouver around with the heavy wire reel and tools is fun but it is all in place now and just the plaster and faceplates then connection. All the old loop is gone, sockets, backplates, wiring etc.

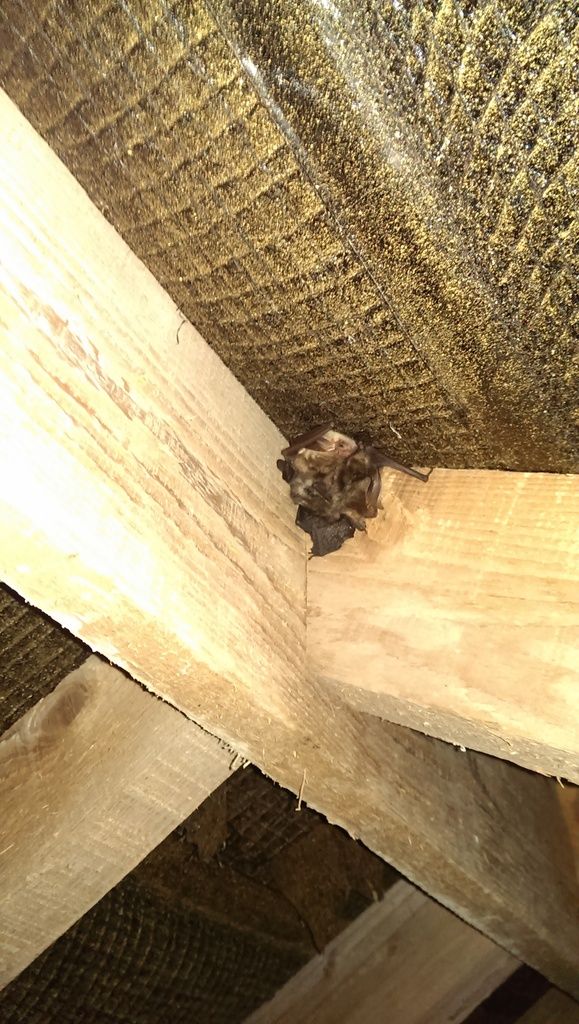
    These are the only inhabitants today, think it's three but may be four. They look like babies. Hopefully they will go soon, I will be replacing the roof next year so have to be sure they don't get back in in the spring.

    IMAG0621_zpsxftqzlqt.jpg

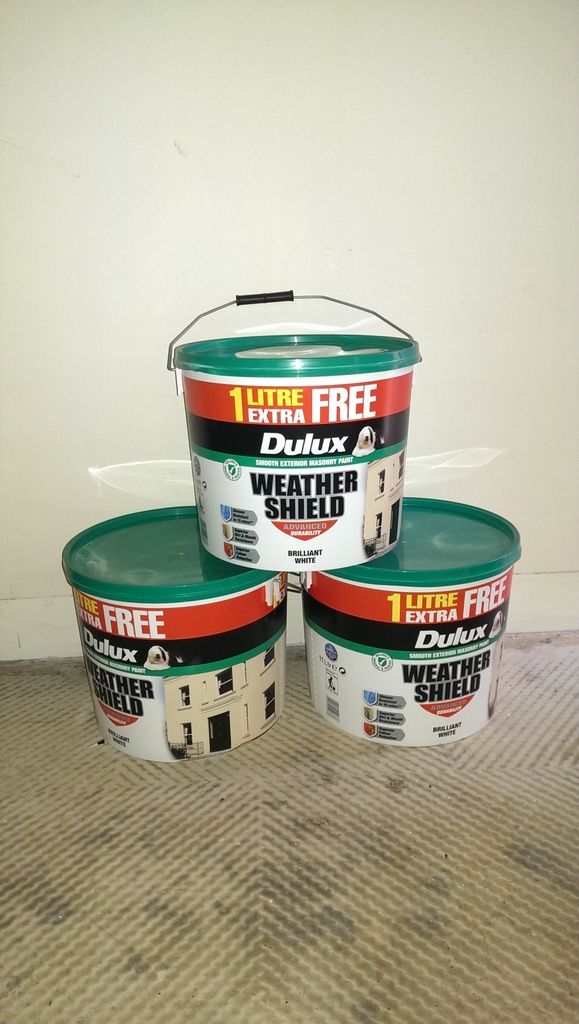
    Finally, my free gift for spending a thousand, (they weren't keen as I had already haggled them out of a good bit on the floor purchase but I stood my ground)

    IMAG0622_zps3chq6n5y.jpg

    1 liter extra free too! Needed this anyway as the house is a sickly yellow. It will be white eventually. So essentially I got the mirror for free. :p

    Tomorrow after work will be trying my hand at plastering, I have 1/2 a bag of patching plaster, it is 2 years old but I'm going to give it a try. Have to go get the kids on Thursday, my other half is gone already, I fly Thursday and we come back Sunday morning.

    Haven't got half as much done as I had hoped but since I'm learning as I go I am happy enough with the progress. We will manage.


  • Registered Users, Registered Users 2 Posts: 846 ✭✭✭April 73


    You've made great progress, don't knock it. I'm sure you're both looking forward to seeing the kids after the separation.

    We lifted a wood floor in our sitting room & hall over the weekend. Husband & kids lifted the floor - I was the donkey loading the wheelbarrow & trundling all the wood out to the shed. It'll be used to clad the shed (or sacrilege - will go on the fire this winter). I was a broken woman at the end of it.

    Total respect for all your hard work!


  • Registered Users, Registered Users 2 Posts: 20,653 ✭✭✭✭amdublin


    Nice choice of wooden floor!


    You are doing brilliant, so impressive.


  • Advertisement
Advertisement