Advertisement
If you have a new account but are having problems posting or verifying your account, please email us on hello@boards.ie for help. Thanks :)
Hello all! Please ensure that you are posting a new thread or question in the appropriate forum. The Feedback forum is overwhelmed with questions that are having to be moved elsewhere. If you need help to verify your account contact hello@boards.ie

first Mame build

Options
  • 02-03-2015 10:29am
    #1
    Registered Users Posts: 63 ✭✭


    Hi folks,
    Can anyone here help me out,first Mame build and I need to do t molding . anyone got access to use this for a couple of hours, never done this before so can throw a couple quid your way if needs be
    Thanks


Comments

  • Posts: 7,499 ✭✭✭ [Deleted User]


    Hay man,
    Did I buy a leasure 2000 cab off you a few years back?


  • Registered Users Posts: 4,146 ✭✭✭CathalDublin


    I bought one from you too, had sync issues, turned out to be the loom :D


  • Registered Users Posts: 63 ✭✭darth conway


    possibly .cant recall at this stage anyway nearly done with mame cab but few things fnish off, eg t moulding and is game on grafix the place to go for reproduction stuff?


  • Registered Users Posts: 4,146 ✭✭✭CathalDublin


    I've ordered from game on grafix 3 times now and the quality has always been amazing.


  • Registered Users Posts: 63 ✭✭darth conway


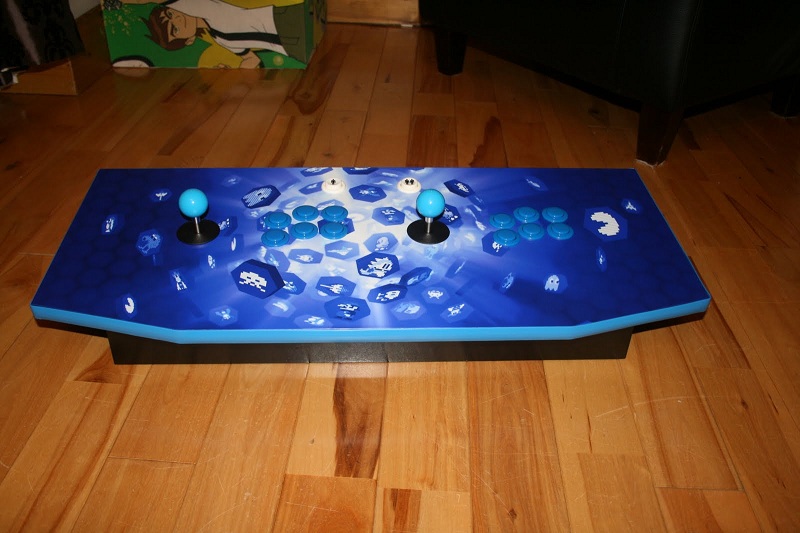
    cheers, is the control panel overlay and marque with adhesive good for sticking to mdf painted already etc?


  • Advertisement
  • Registered Users Posts: 4,146 ✭✭✭CathalDublin


    I've used the Control panel overlays, my control panels were always lightly sprayed in black around the edges to hide any wood which may become visible, but where was being 100% covered was bare wood, I don't know if this makes any difference though. all held up very well and never pealed. I've actually a new one there I haven't used yet in a multiwilliams theme.


  • Registered Users Posts: 63 ✭✭darth conway


    thanks appreciate the help Cathal


  • Moderators, Computer Games Moderators Posts: 5,381 Mod ✭✭✭✭Optimus Prime


    I bought my Control Panel overlay for my mame cab off game on graphics too, very expensive, but the material they print on is top notch. I just sanded down the wood a bit, i had sprayed it, cleaned it off and put it on and it hasnt come off at all. my marquee i got from them i just put between two pieces of plexi as its backlit, yours looks like you are sticking it on wood? if so it should be grand.

    Ive never routed a cab myself, had a friend of the family do it on my mame cab, but it would probably have to be taken apart, not sure if you can do it easily when its put together like your ones is, could be dangerous in places.

    Here is a couple of pics of the control panel when i was putting on the overlay.

    IMG_9726.jpg

    IMG_9728.jpg

    IMG_9734.jpg


  • Registered Users Posts: 63 ✭✭darth conway


    thanks , ill give them a try , probably go with edging since i cant route it , thanks again for your help


  • Registered Users Posts: 195 ✭✭Damien King


    thanks , ill give them a try , probably go with edging since i cant route it , thanks again for your help

    Where are you located?

    You might be glad to hear that I've a router with a bearing guided 2mm slot cutter.

    You might not be so glad to hear that I'm in Mayo, If I remember rightly you are down kildare somewhere....

    Taking it apart could be a bit hairy..

    As it is you should be able to fully slot the side panels, and would be able to slot most of the other stuff but there will be around 3 inches either side where the router wouldnt get to, there are a few ways around this:

    Get a slot right up to the edge with a dremel and 1mm cutting wheel (2 passes), or drill a line of 2mm holes and then knock out a slot with a chisel. both of these ways are going to require patience and a steady hand but could suit if you like living dangerously...

    Or just T slot as much as you can and simply cut away the part from the back of the t molding that wont have a slot to go into, Contact adhesive will hold it there just fine.

    Ive to do a similar job on a cabinet this weekend (weather permitiing) and can throw a few pics up to give an idea.

    Damien


  • Advertisement
  • Registered Users Posts: 195 ✭✭Damien King


    Oh and if you are thinking of using chrome edging get rid of the 3M tape thats already on the back. It raises the edging up leaving a gap and will come away. Instead stick on with good contact adhesive, keep lots of strips of masking tape handy to hold it tighyly in place (especially round the curves) while it dries.


  • Posts: 7,499 ✭✭✭ [Deleted User]


    I'm in naas and cam loan a router if you can get the slot cutter


  • Moderators, Computer Games Moderators Posts: 5,381 Mod ✭✭✭✭Optimus Prime


    Ive a slot cutter here for 3\4 inch tmolding with the attachment needed too, and am also in kildare.. ive no router though.


  • Registered Users Posts: 195 ✭✭Damien King


    And I've got some popcorn ready just in case brownfingers router takes 3/4 inch router bits and optimus's slot cutter is a 1/2 inch bit....

    :pac::pac::pac::pac::pac::pac::pac::pac::pac::pac:


  • Registered Users Posts: 63 ✭✭darth conway


    thanks all, I'm going to give the routing a miss seems I shoud have done the routing first :( , anyway ive been trying to contact Gameongrafix re sizes etc and no reply in a week, anyone know if they are still operating, or if there is any where else I can get a bezel, possibly marquee and control panel overlay work done?

    Thanks again


  • Registered Users Posts: 195 ✭✭Damien King


    Hi, just a follow up regarding cutting the t molding slots into an already constructed cabinet shell as promised...


    First off lets set the router up and see how we are on our centre, Make sure the router is unplugged for now, or you might not be needing all of these buttons.

    342409.jpg

    A gentle push of the router bit will give us a little dent that we can measure from both sides and adjust the plunge depth as required:

    342410.jpg

    Once happy with that, do a cheeky little cut of a few inches and test fit a small section of t molding. When taking a picture be sure that the background is in perfectly in focus while the item you are actually photographing is out of focus, this gives it a nice blurry look....

    342411.jpg

    next picture shows t molding slot cut all around the side panels:

    342414.jpg

    Final picture shows slots cut in cross pieces, we cant get all the way to the edge but you can get away with cutting the rear slot-in part of the t molding away and using contact adhesive on these couple of inches at the end, keep an eye on the router base when making these cuts, it could twist easily and F*&K stuff up, especially when you get near the end.

    342413.jpg


  • Posts: 7,499 ✭✭✭ [Deleted User]


    Good tips.
    One thing I will say tho.
    Next time try Birch ply instead of mdf.
    You'll never go back to the mdf.


  • Registered Users Posts: 195 ✭✭Damien King


    Good tips.
    One thing I will say tho.
    Next time try Birch ply instead of mdf.
    You'll never go back to the mdf.

    Agreed, although this cab is getting a full vinyl wrap after some spray primer and I find mdf better for this.

    I always seem to be chasing air bubbles with ply.


Advertisement