Advertisement
If you have a new account but are having problems posting or verifying your account, please email us on hello@boards.ie for help. Thanks :)
Hello all! Please ensure that you are posting a new thread or question in the appropriate forum. The Feedback forum is overwhelmed with questions that are having to be moved elsewhere. If you need help to verify your account contact hello@boards.ie
Black_Knights 2009 VW CC OEM project
Options
-
01-05-2014 9:49pm#1October 2012 I bought my 2nd VAG car, a lovely 2.0TDI VW passat CC (140BHP). It was quite paddy spec though. Ive since added a number of modifications, with the goal being to bring the spec up to something a bit more befitting of a 2009 car, all the while doing my best to retain the OEM look with subtle stylish modifications.
Ill add in write ups for my existing modifications in the next few posts.
Extras when bought:
RCD510 (dont even think thats an extra)
17" Phoenix Alloys (Standard)
Extras now:
Cruise Control - George Dalton sorted this out for me.
Footwell lights
Door warning lights
Full interior white lights
RNS 510 navigation unit - Simple switch out
Highline CC chrome door sills
Highline window switches
VW badge Rear view camera
65% tinted windows - shades.ie did this for me
Chrome pedals (kinda - accelerator didnt fit)
2nd Boot hook - Very simple to install
Thats about it.
The day I bought it:
After a DA polishing last summer: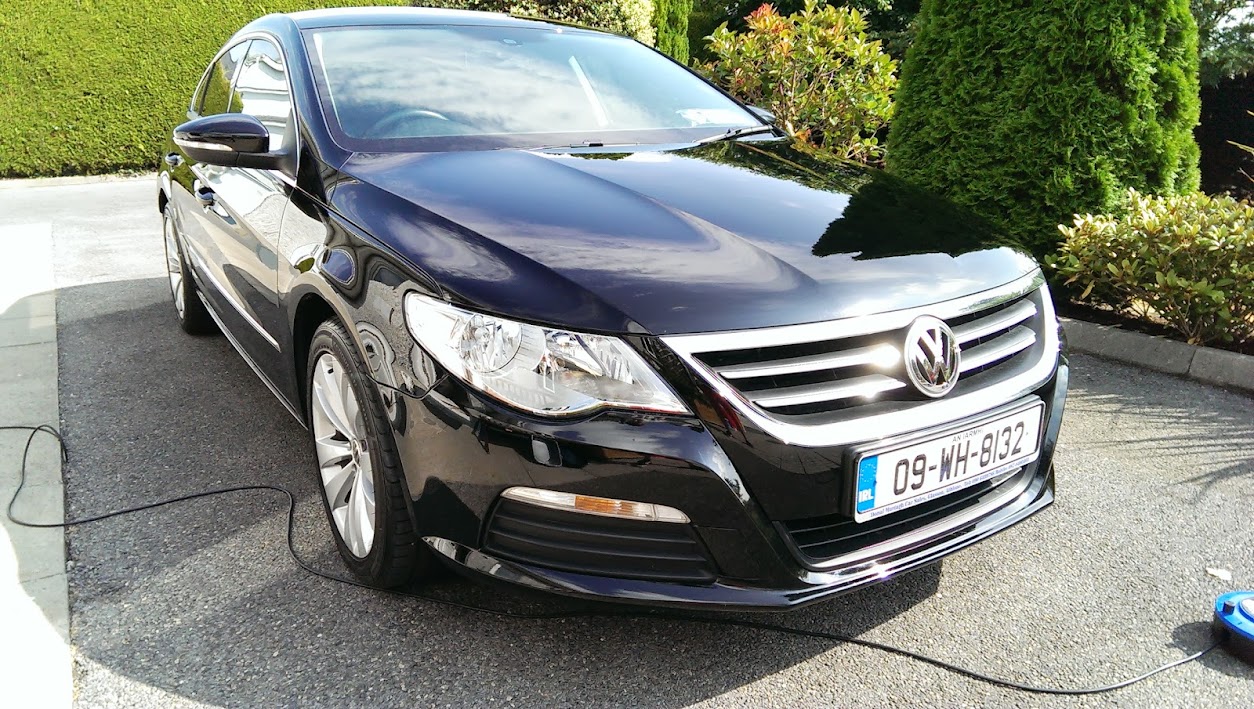 5
5
Comments
-
Door warning lights
These are not to be confused with puddle lights. Puddle lights shine down from underneath your wing mirrors. Door warning lights replace the existing reflection plate and illuminate a new reflection strip, as well as illumination the ground underneath your door. I guess, door warning lights are for lighting up when you get out of the car. Puddle lights are for lighting up near your door when returning.
End product: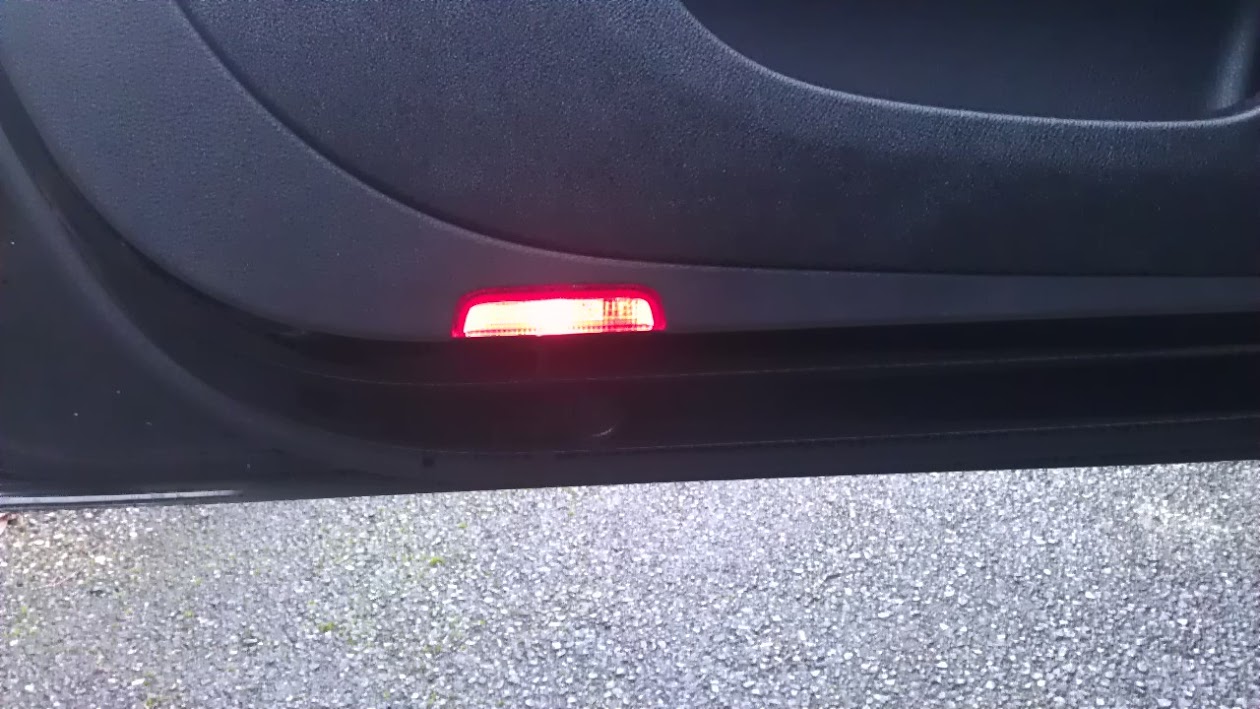
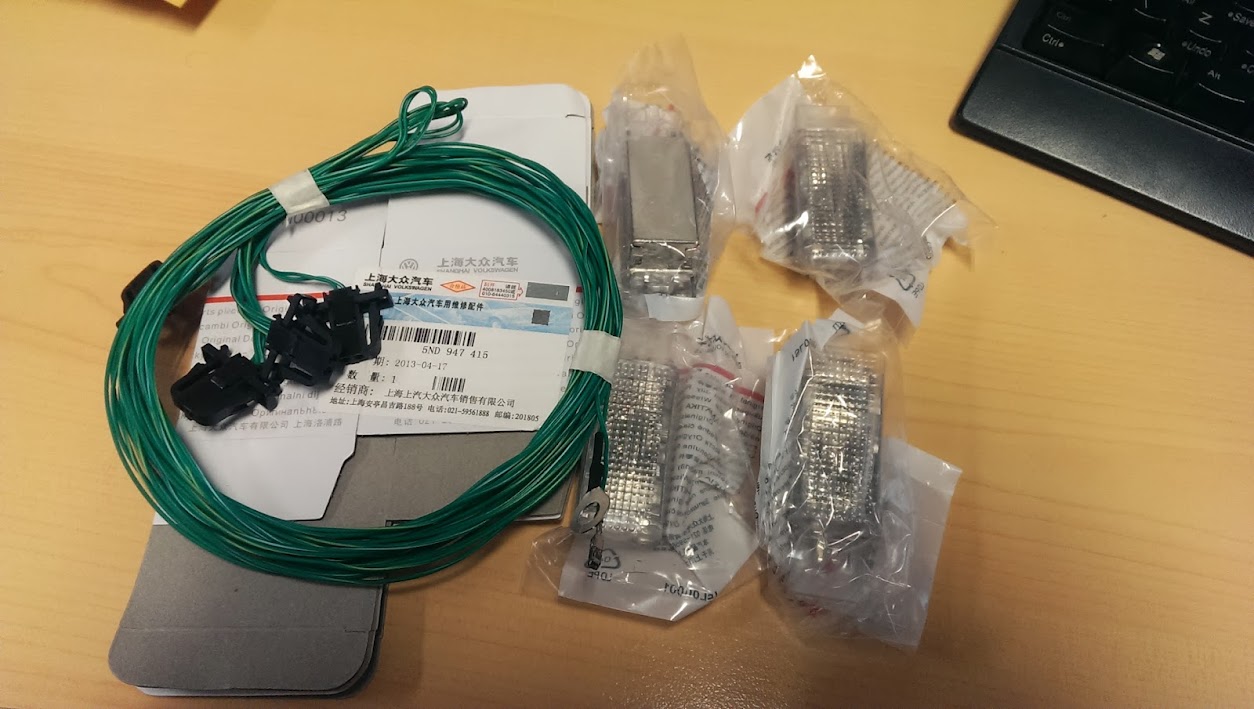
This was the first mod I did to my new (to me) CC. I went as OEM as I could, and stupidly bought all the individual components, wires, connectors, and the lights themselves. All in all, VW charged me about €70 for all this, and I only did the 2 front doors. x_x
If interested, here are some part numbers:
1K0 947 411 A (1K0947411A) - Door Warning Light (1 per door)
1J0 971 972 (1J0971972) - Connector Housing (1 per door)
000 979 019 (000979019) - Repair Wire for Connector Housing
000 979 009 (000979009) - Repair Wire
Alternatively, just buy a kit from China. Much cheaper, less cutting, and tidier.
Tools:
Torx bits
Pry tools
courage
VCDS
If not using a kit:
Wire cutters/stripper
soldering iron
Electrical tape/shrink wrap
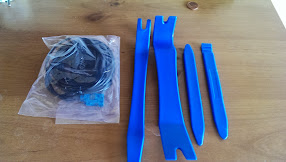
Here are my pry tools:
Note: Some of these pics aren't mine.
New vs Old: The White part of the new one points to the ground.
Step 1 - Remove the door card.
There are 4 bolts if I remember correctly. 3 on the underside of the door. 1 in the handle, and 1 underneath the window controls. Theres also a little tab near the wing mirror. To pop the window control off, use your pry tool (and old credit card works reasonably well)
Bolt under the window switches: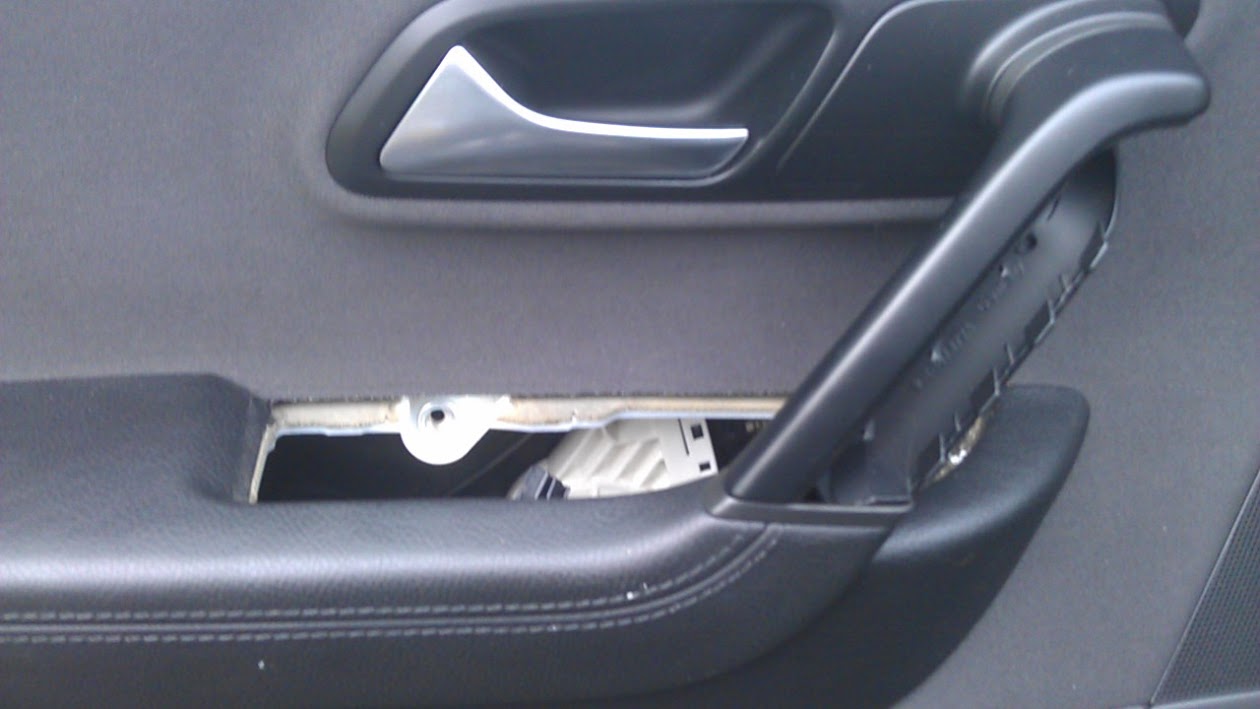
Bolt behind the door handle: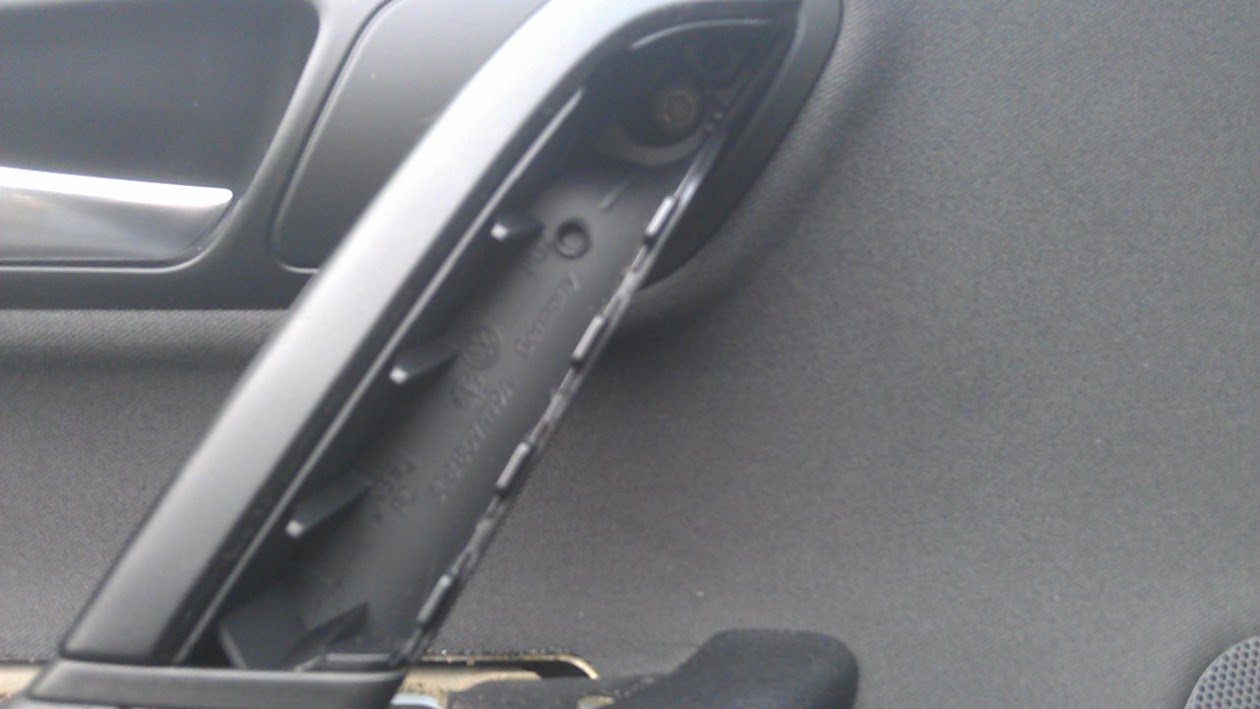
3 Bolts on the bottom of the door:
Tab in the door jam, near the wing mirror: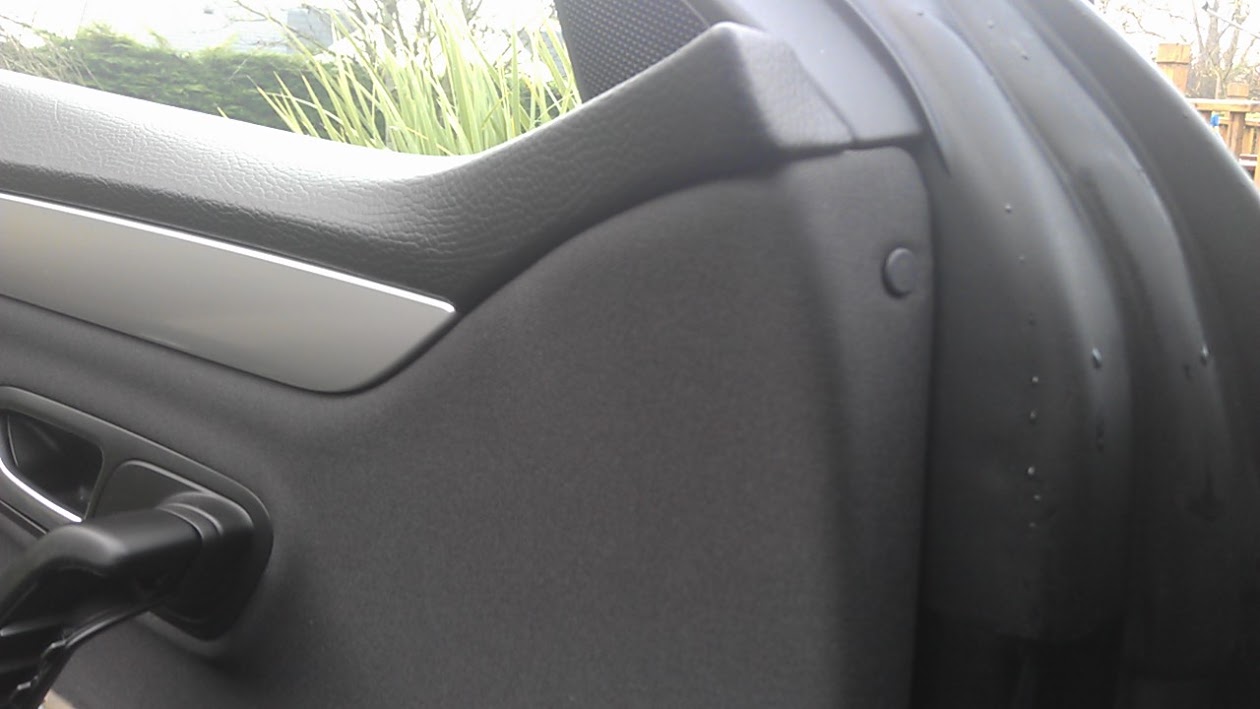
I have no advice on taking the door card off. Google it I guess. Mine was very very difficult, and in the end broke a few clips.
After much swearing and horrible cracking and popping noises, the door card should come off, revealing this: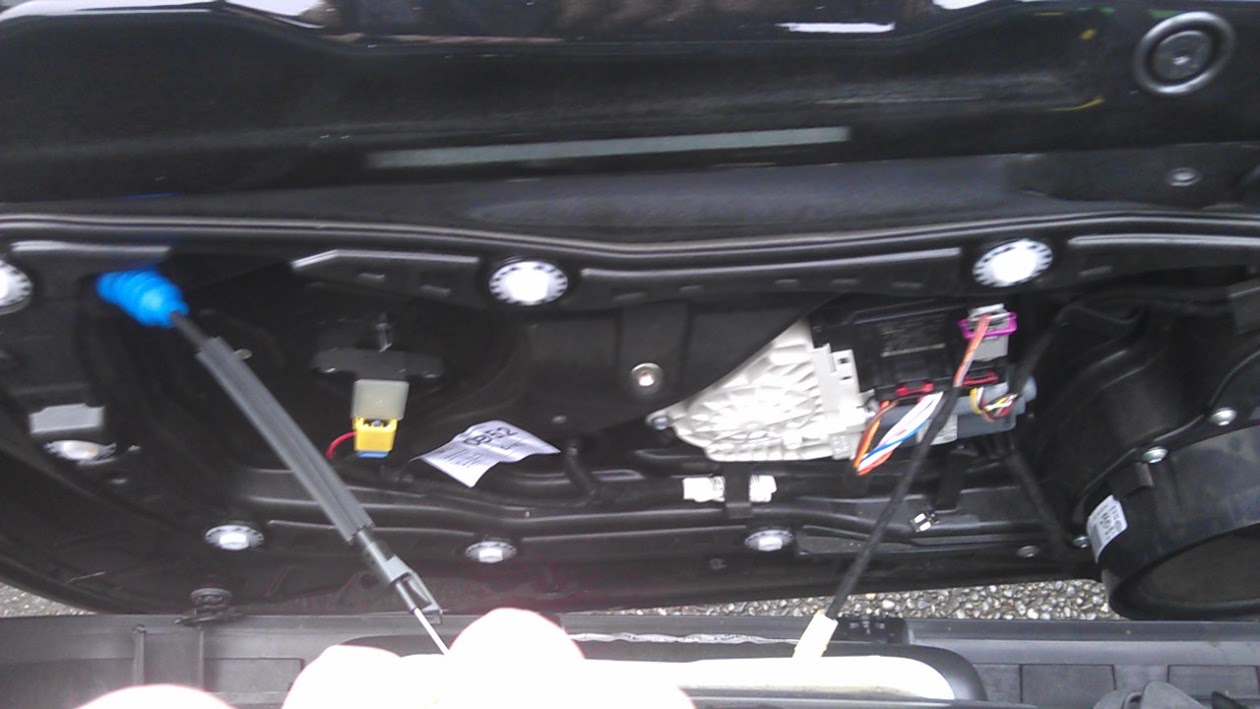
Disconnect the cable block on the right (above) and unhook the door release from the doorcard (below)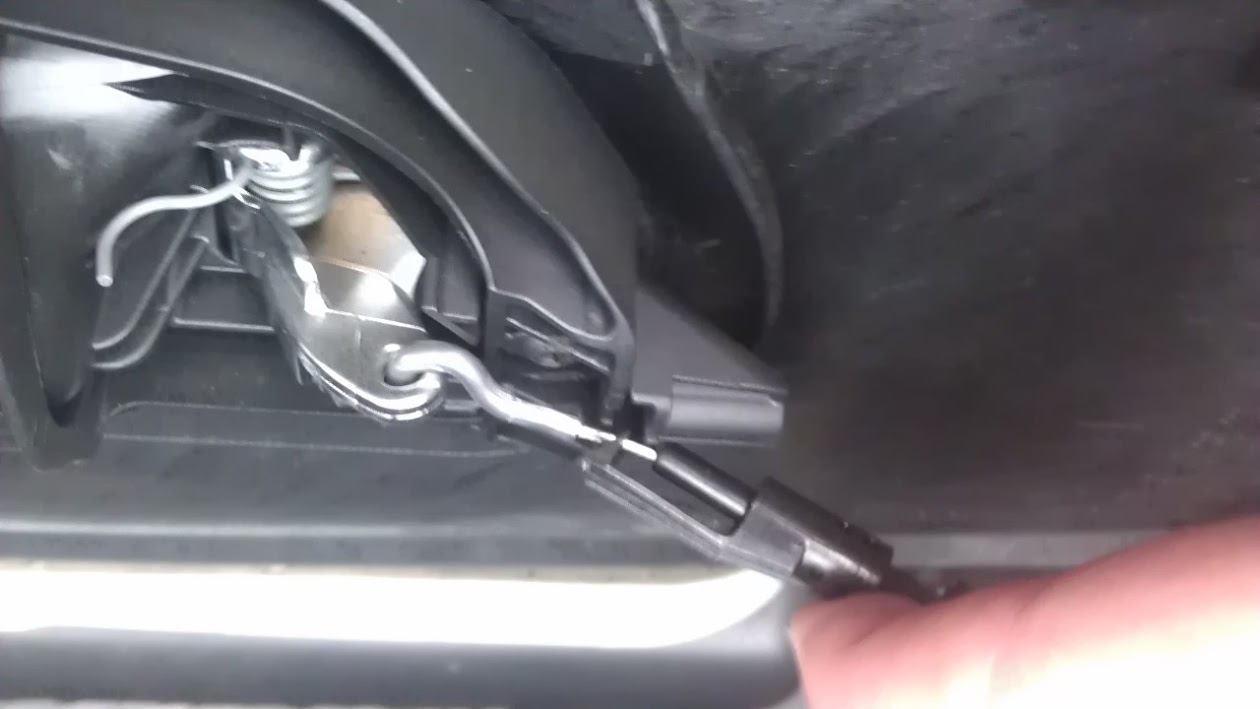
Step 2:
Replace your reflector with the new warning light.
Plug both ends of 000979019 repair wire into the connector housing (black connector - 1J0971972). (we will be cutting this later)
Plug this connector into the warning light. Like this:
Open the connector block what we disconnected from the door car earlier:
Connect one end of 000979009 repair wire to pin 18. You can use pin 19 as ground.
Run the repair wire down the door card towards the other wire:
Pin 1 on the left should be ground - connected to the wire coming from pin 19 on the connector block.
Pin 2 on the right should be power - connected to the wire coming from pin 18 on the connector block.
Solder and wrap there wires.
If, when we code up with vagcom, the lights do not work, there is a zener diode in the warning light which we can just reverse. I had to do this as I got the wires mixed up. (Pretty confident ive it right in this write up though).
Once connected, wrap everything in fabric adhesive tape if you have any.
Connect up the connector block and you should be set:
Load up VCDS and under each door module (Drivers door - 42) select Coding - 07.
A pop up guide should appear.
Note your current code (save this somewhere incase you screw up), and add 64 to it.
"Do it" and close the module.
Repeat for other doors.
Once the door warning lights are working, reattached your door cards.0 -
Chrome CC door sills
Finally, a mod that doesnt require VCDS. My CC came with paddy spec plastic trim door sills, as seen here: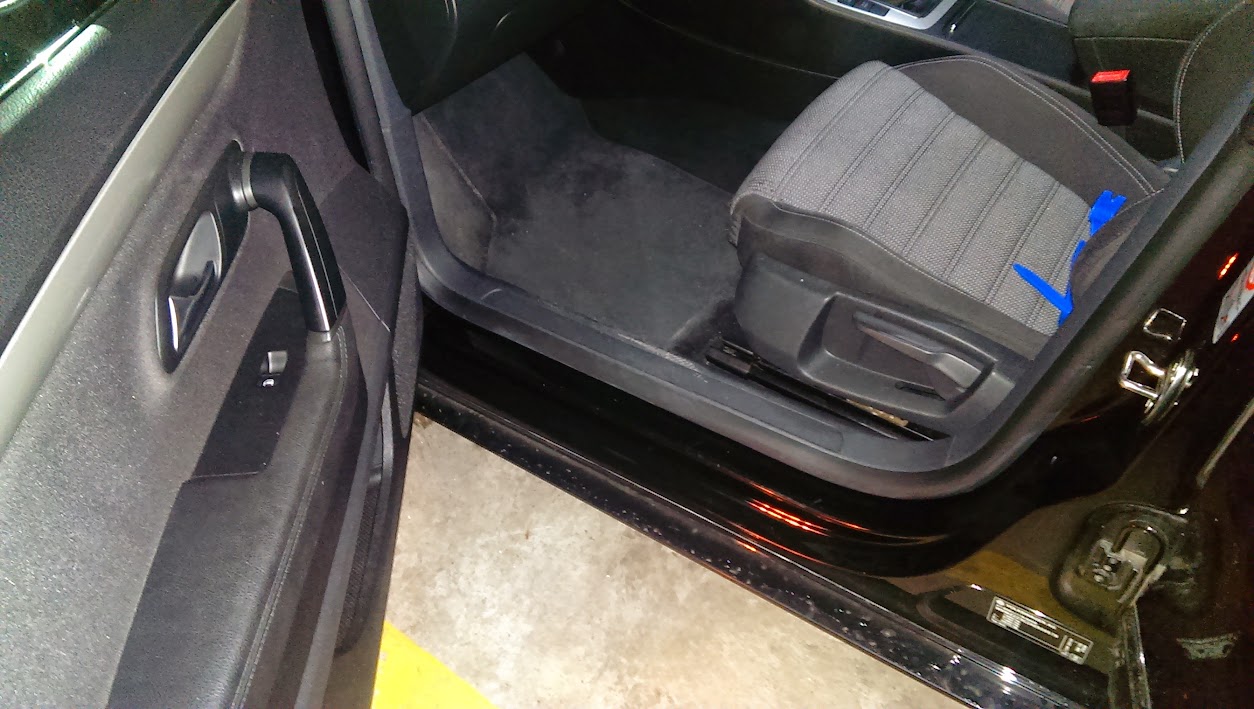
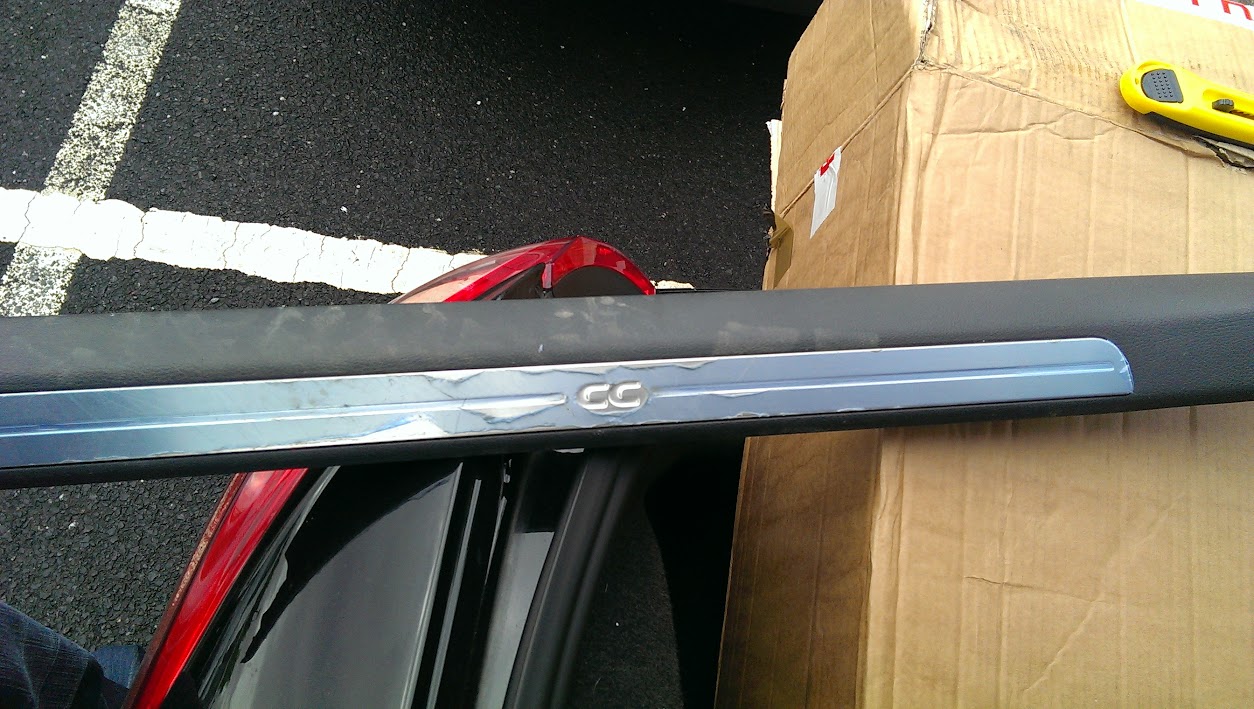
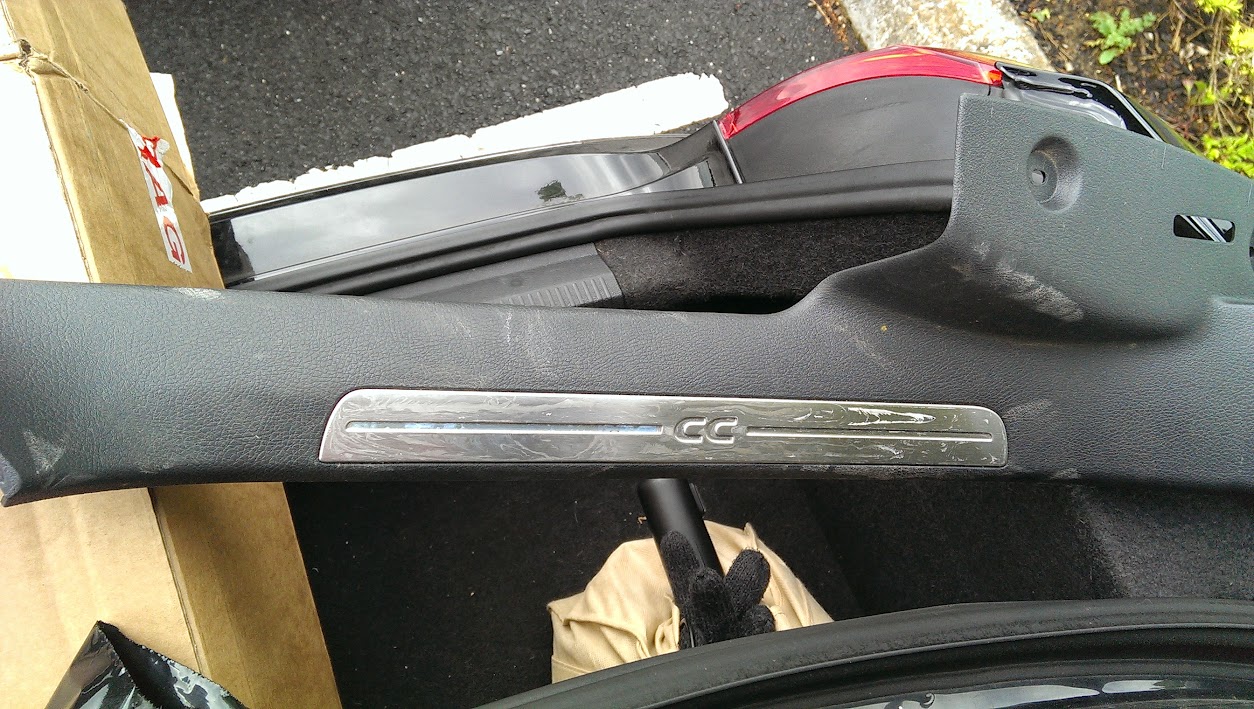
I sourced the OEM chrome ones from a breakers up north. There were in pretty good condition. Some scratches on the drivers side. Some polishing brought them back a bit.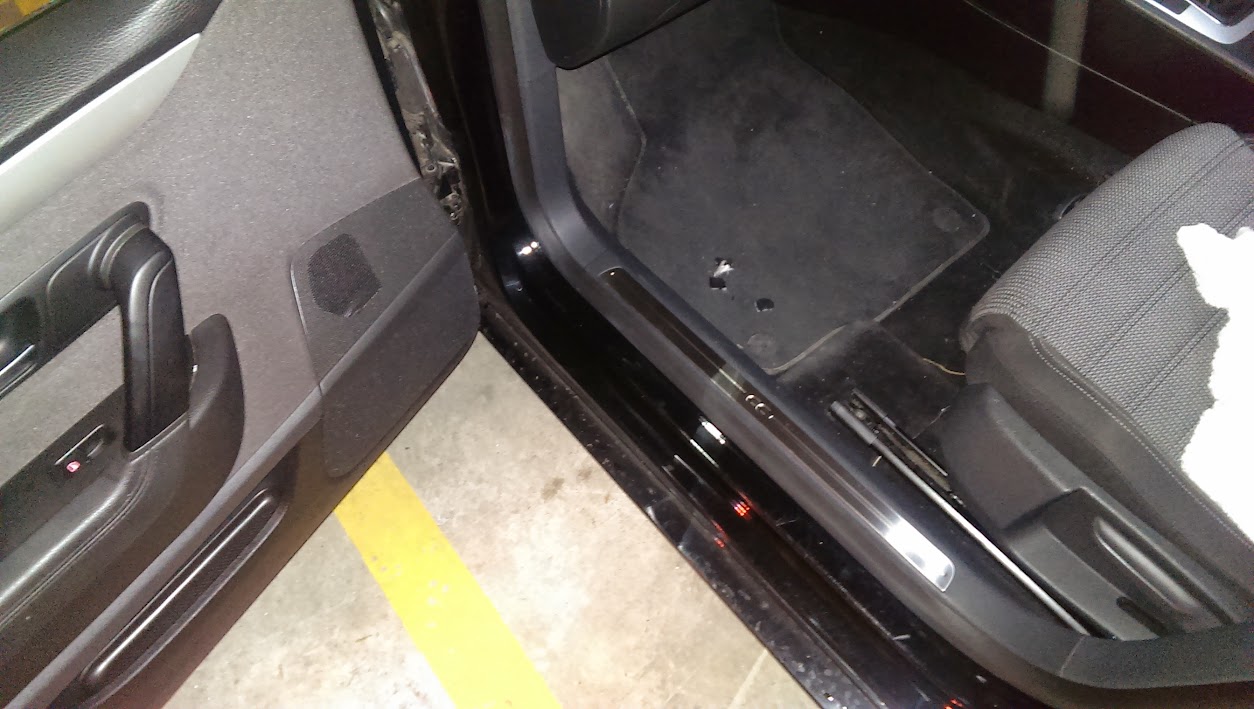
Package arrived, plastic shrink wrap still on them: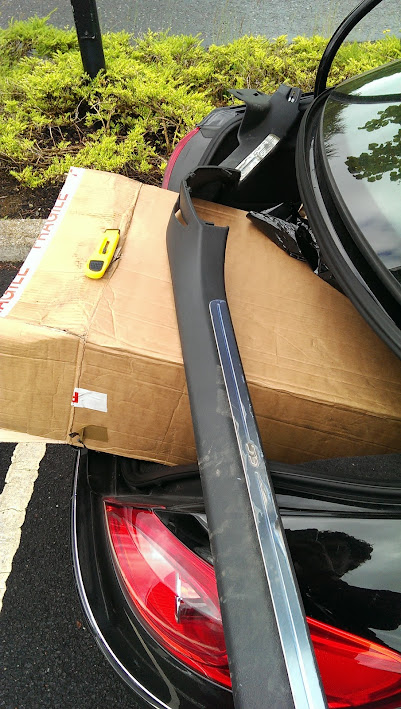
You just need a pry tool at most for this.
Step 1 - Remove the current sills:
Start at the front. Use the pry tool to lift the door sill near the bonnet release and from there pull it up and work your way from A pillar to B pillar.
Once at the B pillar, move to the back of the car.
Remove the rear seat:
-There is a clip in the middle of each rear seat, where your knees would be.
-Grab the seat base at the front middle of one of the rear seats (1/3 the way across) and pull up. It will pop. Do the same the other side.
-There is a hook on both sides of the seat base. To release, pull the seat (from the seats side cushion) horizontally towards the back of the car, and then up.
-Remove the rear seat bench.
You should now see a torx screw. Remove this, and one way or another, work the door sill trim out from the rear. Remove similiar to the front until you get to the B pillar.
Remove the old door sill.
Step 2:
Reverse the process for the new sill.
NOTE: I had to cut out some carpeting to fit the new sills. The carpeting isnt visible, it goes under the door sill, but the new door sills had extra plastics that poked down in the some holes in the sill frame. The carpet blocked these.0 -
Footwell lights
I bought these from China for something like £22 delivered off ebay. Great value.
Tools:
Torx bits
VCDS
Fingers of steel
You'll need to loosen up your seat rack. I cant remember the type of head you need, but its not torx. I had to go out and buy it.
This is relatively simple, though was one of the most frustrating and terrifying mods I did. Somewhat because of inexperience, and somewhat because of a really difficult to remove B block.
The kit I got was for 4 lights. I cant remember what way they were connected up (2 wires with 3 lights on one and 1 on the other or 2 wires with 2 lights on each). Lay out your lights the way you're going to chase them. I think mine went 2X2. 2 across the front, and chased 2 down the drivers door sill, under the carpet and under the seat rack (while still under the carpet) and out an access hole that's under the seat, From there, they go to the seat, and then hidden under the centre console to the passanger seat.
Step 1 - Removing the B Block :ympray:
For this they recommend you disconnect your battery. This will do 2 things to your passat CC. 1) You're dash will light up like Christmas when you reconnect it, but dont worry, driving >15kmph will clear those. 2) Any doors that were open, their windows will drop. To fix this, sit in the car, put the key to position 2, close the offending door and close the window. Then put the key to position 1. DO NOT TAKE THE KEY OUT YET. Open the door now, it should drop as normal. Remove the key. Repeat for any other doors.
Remove the cover above your pedals in the footwell so you can (albeit awkwardly) while lying on your back, look up into the underside of your steering column. You should see the A, B, C, D, E and F blocks. Some will be more obvious than others.
B block for footwell lights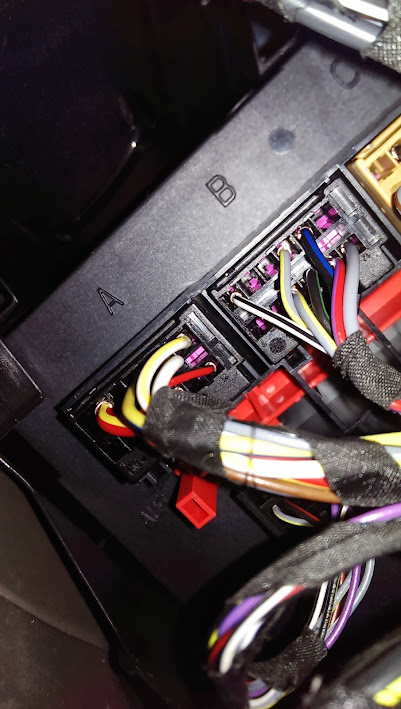
Notice the red tab? I believe I moved this towards the D block (away from "A"), and this allowed me to remove the B block. It was very difficult though. A firm grip and lots of teasing got it out.
Once removed, open up the connector, and connect your live footwell wire to pin 7. My ground came with a ring, and I connected this to an earth point behind the plastic cover that surrounds the bonnet release. We'll do this now.
Step 2 - Chasing wires and installing the footwell lights.
The front 2 footwell lights are pretty easy. Find the hole for them in the cover we removed earlier, and clip them in place. I had to remove some blank tabs to fit them in.
Remove the 2 center console covers in the footwells (they run along the side, from about your seat position to the very front of the footwell). This involves removing the footrest. There should be 1 screw holding it in place, once removed, slide the footrest towards the front of the car. Remove the torx screw in the center console beside the footrest (repeat for the passenger side). Pull the center console panel out and down to release.
Chase the passenger side light behind the center console through the gap you just made, and insert it into its footwell slot.
Remove the door sill plastics. Pry tools can come in handy here, but just pull up and they should come loose.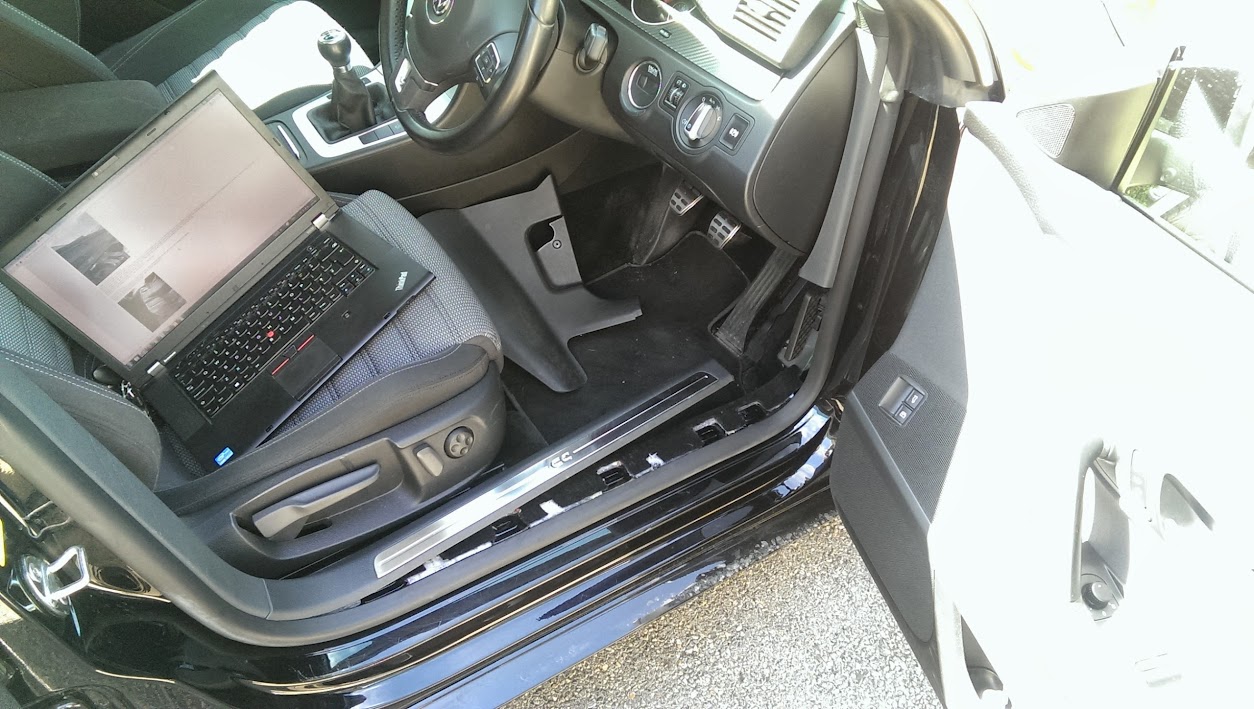
Note ive also removed the plastic cover around the bonnet release. Remove this also, there is one screw holding it in.
Connect up your ground wire to the earth point.
With the door sills removed, chase the 2 remaining footwell lights down it, until you get to a point where you can chase them towards the access hole under the drivers seat. This may prove difficult. I had to loosen the seat, and squeeze the clip under the seat rack.
Hole pictured here. Not my pic:
Once both clips are though, connect up the first light and insert it into the back of the seat.
Under side of seat:
Chase the remaining cable to the passenger seat under the center console, and insert into the seat.
Load up VCDS, and enter the Central Electronics module - 09
Go to coding, and long coding helper
Activate byte 0, bit 2 "footwell lights installed"
Do it.
You should now have footwell lights working.
Before: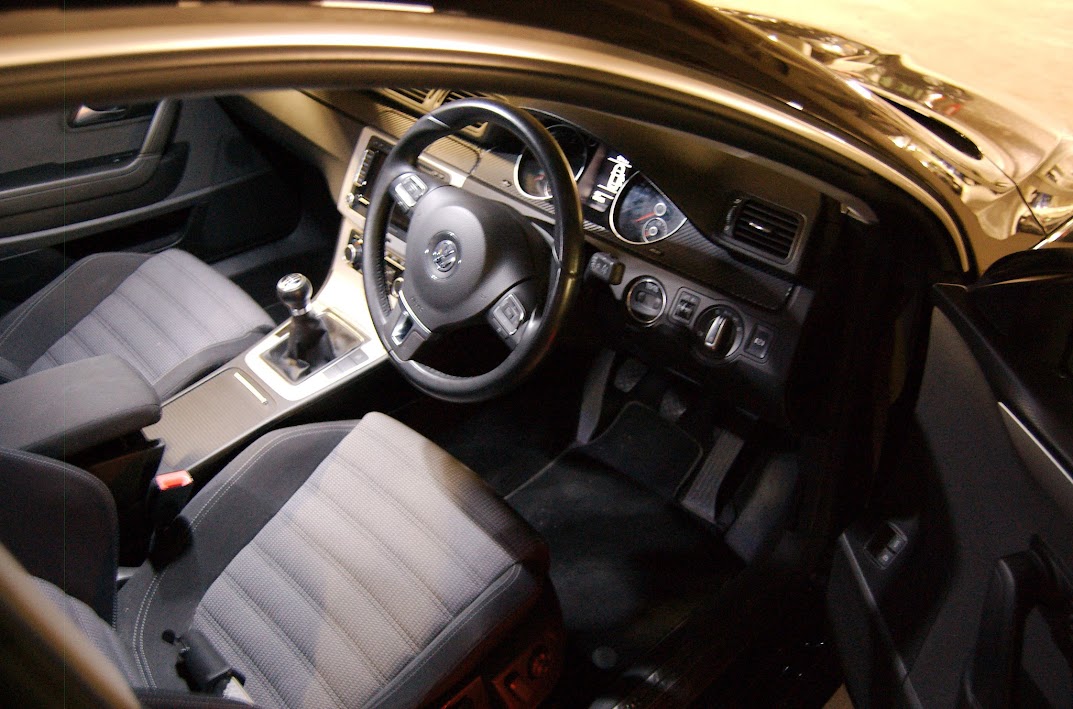
After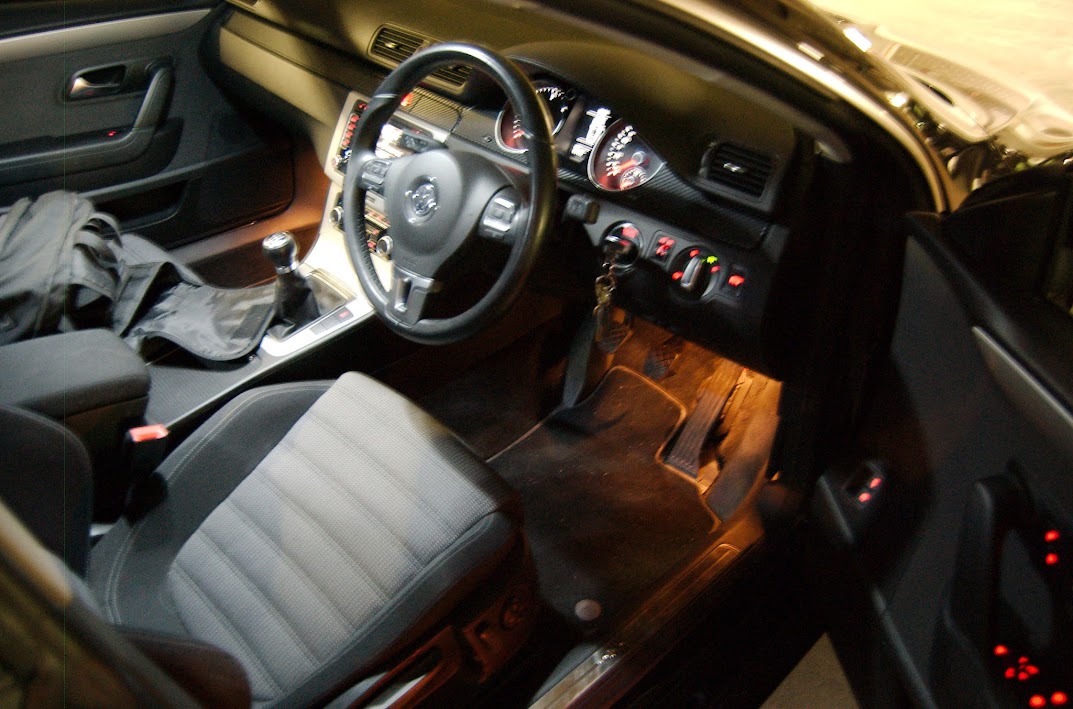 0
0 -
So I finally set about installing my badge reversing camera to my VW Passat CC. Its actually alot easier than you'd think, but certainly need to do your homework before hand.
Parts:
1 X Reversing camera kit (Badge/camera and loom)
1 X add-a-fuse adapter (or else wire it into the back of the fusebox)
1 X 15 amp fuse
And of course, a head unit that can support reversing cameras. RNS 510 & RNS 310 both can from what I know.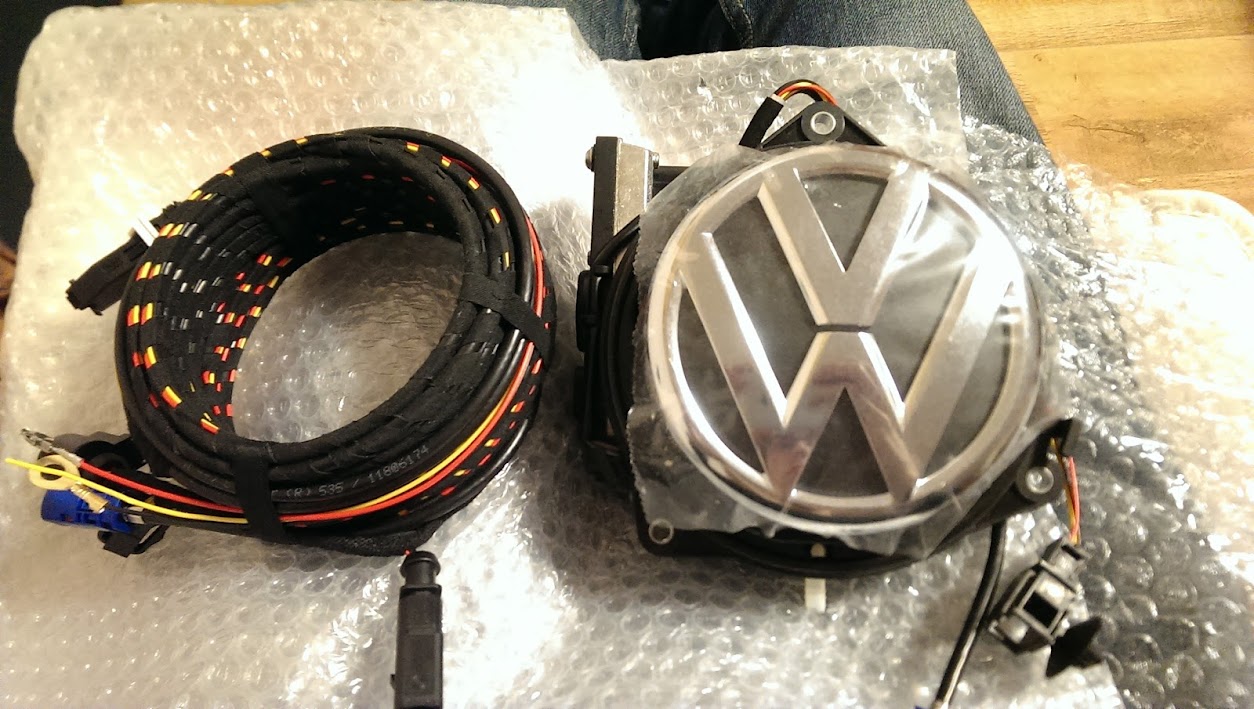
Tools:
Wire strippers
T25 torx screwdriver
T20 torx screwdriver
10mm spanner
Soldering iron
Shrink tubing
Heat gun/hairdryer
VCDS
Most these pics aren't mine btw.
To start you'll need to remove lots of trim.
Cabin removal
-Remove the back seat base. There are 2 clips in the middle of each seat where your knees would be. Just the base and pull up. Both will pop pretty easily. There are 2 other clips under the base near the doors. The best way to remove these is to pull the seat horizontally towards the boot (an inch maybe) and then up. Repeat for the other side.
-Remove the side skirt on the drivers side. There are a few clips holding it down, but a bit of force and it'll start to lift. Pull this up all the way back to the back seats. I actually removed this part for the install.
-Remove the plastic cover that goes around the bonnet release. Its tricky, but it comes off.
After removing the trim in the back, you can also remove the metal shield pictured below.
There's one nut holding the bolster arm in place. Remove that. There's a second clip about half way up the bolster arm. The guide im following managed to break it, and so did I.
Nut:

From here, drop down the back seat and you be able to peal back the boot wall carpeting a bit. Remove the latch harness at the bottom, and from the boot remove 3 screws. One at the boot arm, one at the top of the boot near the drivers side, and the final one requires you to pull out the boot carpet.
From the back seat, peal back the boot wall carpeting and peer through. If you can get someone to lower the boot while you do this, you should see the boot arm opening. There is where you will fed the wires through.
Boot removal
Open your boot and in the lining you'll see a few rubbers and stoppers. Dont lose these.
-Remove the stopper thats underneath the VW badge.
-Remove the 2 rubbers under the boot lid lip (pictured)
-I also advise removing the 4 upholstered buttons (one pictured bottom right)
-Remove the plastic cover for the boot latch
NOTE! If you have a warning triangle, take that out first, a remove the warning triangle holder also. I didnt, and slightly broke it.
-Start removing the boot cover. I started beside the rubbers I removed, and worked my way around, popping it off as I went. there are 2 clips on the top, 2 on both sides, and 2 on the bottom.
-American sites mention an emergency boot release, but mine didnt have it. Europeans must be smart enough to not lock themselves in the boot.
You should be able to see the existing badge boot release now, just behind the boot latch. Disconnect the cable attached, a little pry of the clip pops it open. If you're trying too hard, you're doing it wrong. There are 3 T25 screws holding it in place. Remove them, and remove your old VW badge.
Resist the urge to close your boot, though your drivers door boot release and keys boot release should still work. You can test this at any stage you'd like
Install the new RVC badge
Attach the drain pipe included to your new badge, this pipe will come out the small hole we opened up when we started removing the boot covers.
You may need to loosen up the boot latch to fit the new badge in. I loosed up the 2 nuts holding the boot latch in, and was able to squeeze the badge in, albeit about 5 degrees anti clockwise, but once in you can line it up. The 3 Torx screws will ensure it goes in straight.
Wiring:
Lots say to cut cut cut the wires before chasing them through the car, but this isnt necessary for the most part. I did however wrap up the loose ends in medical bandage to tidy them up. Starting from the drivers seat where we removed the trim around the bonnet release, feed the loom into the hole down through the door sill, following the existing wires. Once you get to the back of the car there are some clips to tidy it all up, but dont do that yet. We need to get the loom into the boot.
This is where I cut. The biggest of the 4 connectors wont fit through the boot arm, and so must be cut. Helpfully, there are 2 red wires :mad:
I cut them at different lengths to distinguish them. I wrapped the remaining wires up again and fed them though the boot arm. These will appear down the very bottom right of the next picture: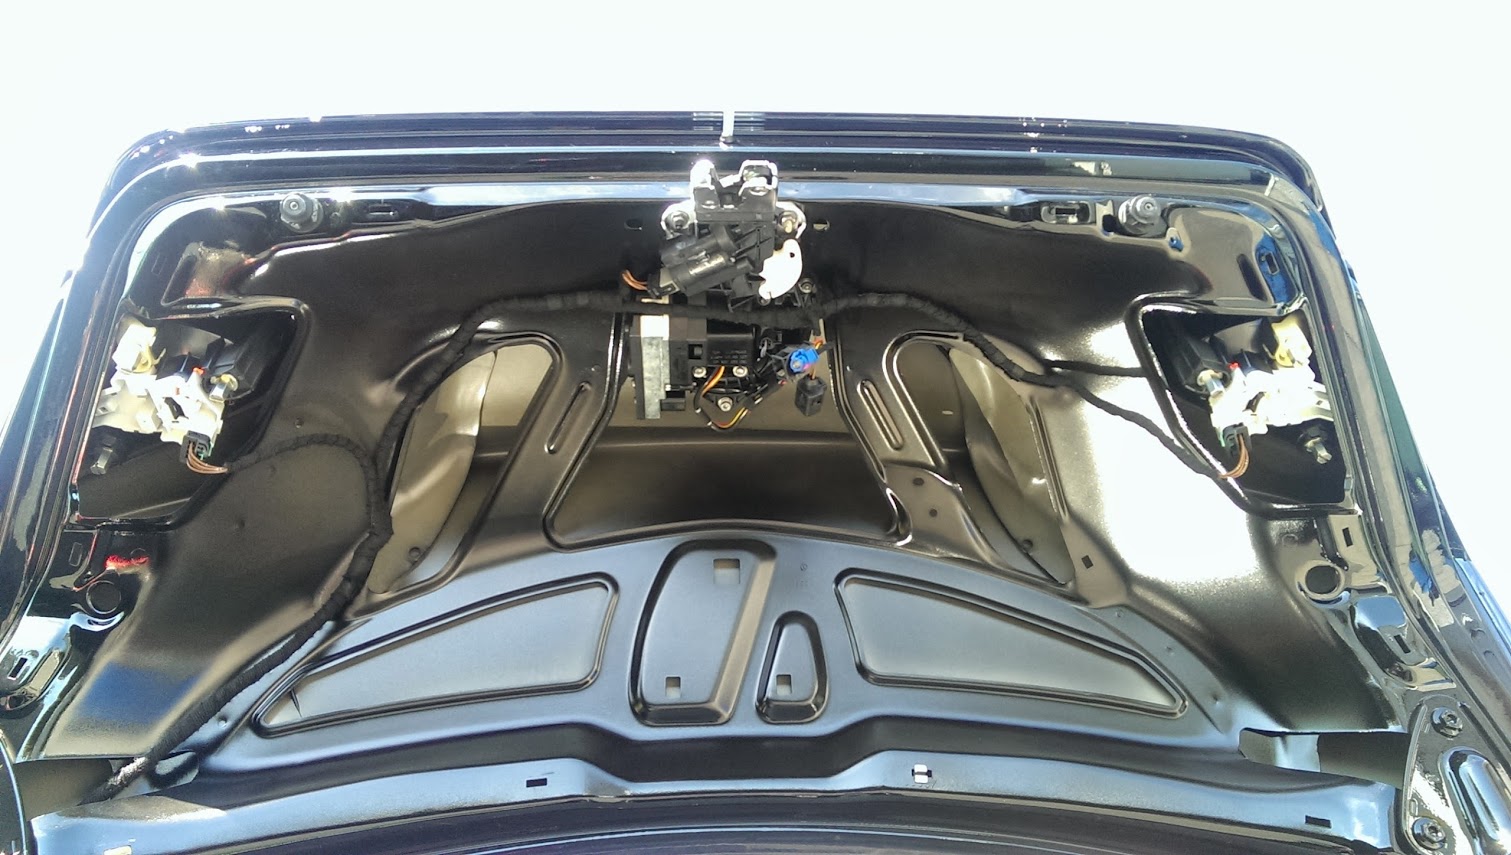
-Pull the loom though the hole at the light cluster, enough to reach the camera. From here we will unwrap the loom from its packaged tape, and cut the yellow wire long enough to reach from the camera to the light cluster (about 2 foot). The remaining yellow wire runs to the front of the car, and is not needed. The reversing light will act as a trigger to start the camera.
Wrap up the other wires (excluding the yellow wire) and feel them to the reversing camera.
-Strip and solder up the previously cut wires.
-Connect the yellow wire to pin 2 of the light cluster (Reverse light power). I just stripped the brown wire to pin 2 enough to wrap and solder the yellow wire.
-Connect up the 4 plugs. (Boot release, camera power, reversing trigger, video)
Disconnect your battery for the next bit (Not 100% sure on this, but leaving the battery disconnected for too long might require your radio code. Mine was disconnected for maybe 5-10 minutes and my radio was unaffected. The only time ive ever needed a radio code is when I changed my radio).
-In the drivers seat, there should be a ground terminal near the bonnet release. Connect the black ground ring to this.
-Connect up your red power cable, to your add-a-fuse connector, add a 15amp fuse and plug in to your fuse board.
Connect up your battery.
Notice how your windows have dropped down, and wont go back up. This happens when the battery is disconnected and the doors are open (and thus dropped down half an inch). To fix this, sit in the car with the ignition on 2. Close the door the needs fixing and hold the window up button. When the window is fully up, put the ignition to 1. Exit the car. Repeat for all windows.
-Remove the plastic above your pedals, there are 3 screws holding it in place, and run the video cable towards your center console.
-Remove the cover around your Radio, it pops over pretty easily, using either a pry tool, or an old credit card. Debit cards work just as well.
-There are 4 screws holding your radio in place, remove them and slide your radio out. you should be able to see daylight in your drivers side footwell. Feed that video cable up, and plug it into your Head unit.
If everything has gone well, you should be nearly there, though at this stage my RVC badge didnt even open my boot. You can check this with the boot open. I ended up taking mine back out, poking about and refitting. It magically worked then.
I also wanted to see did my reversing lights work during this process. NOTE, reversing lights dont work while the boot is opened. you need to close the boot.
Coding:
Now you need to use VCDS to A tell the Car you have a camera system, and B tell the head unit that it has a camera system.
When I had problems with my camera not working, I went ahead with the coding, thinking perhaps this was the issue but could only tell the car I had a camera, but couldnt actually activate the camera (it couldnt be found, probably because it wasnt working at the time). Eventually when I did get it working and went to code it, my VCDS wasnt working.
Non-highline version:
-Load up VCDS
-Go to your modules and select navigation -37
-Coding
-Long Coding helper
-Byte 3, bit 6 should mention the reversing camera. Tick that, close the long coding helper and "do it".
-Remove the key from ignition, reinsert and try reverse gear.
-If you dont see any image, try resetting your head unit
(pressing both arrow buttons on the top left, and the Star or I button on the top right. Hold all 3 down until the radio resets, 5-10 seconds or so). Once reset has finished, try out reverse gear. The camera should be working now.
For highline versions there is some more VCDS coding. You would need to enable the camera in the CAN gateway module (byte 5, bit 6), then assuming you have the module that tracks steering wheel movement you'd need to make sure the navigation - 37, byte 3 bit 6 is unticked. Then open up the camera module, 6C and enter software coding 0000021, and aparently if you dont see any digits in the workshop code, enter in any 5 digits.
Once everything is working, reassemble your car.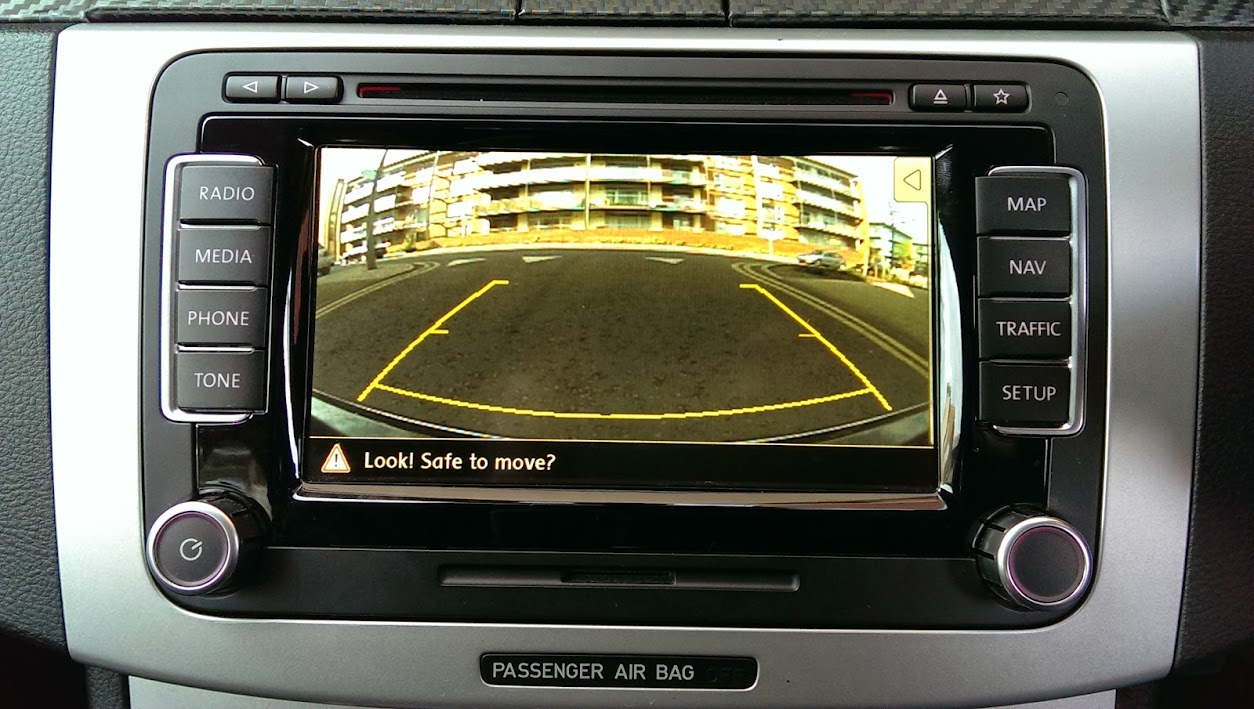

Total time - 6 hours
Total teas - 3
Total biscuits - 30 -
Window switches
Simple mod here.
I wanted to make the interior a bit more highline, to match some of the highline electrical additions I had added, so I bought some chrome trim window switches.
Order from aliexpress.com - delivered after 1 month. I have subsequently ordered the mirror joystick (LHD, hopefully it works) and boot/fuel switches.
Steps:
Remove the window switches housing using your pry tool.
Disconnect the electrical block
You now have to remove the internal block from the external housing.
Swap the new block for the old block and put it back together again.
Old: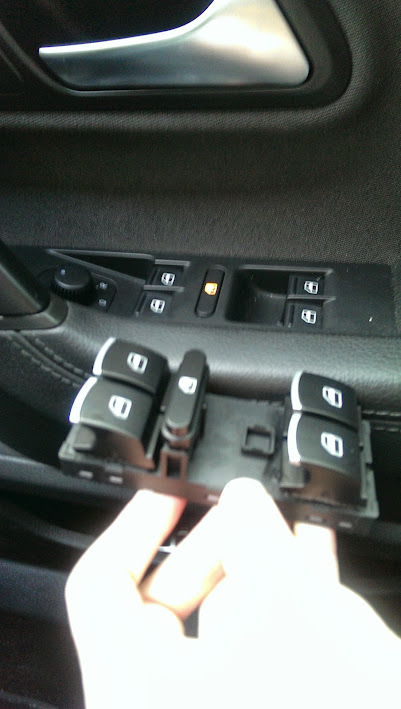
New: 0
0 -
Advertisement
-
Switches part 2
Nice quick arrival from China. The seller told me that it wouldnt work because its LHD, and mines RHD. I took him too seriously.
Ordered off aliexpress. The only one person I could find selling the switch that didnt have the "auto fold" symbol. Pointless as I dont have auto fold.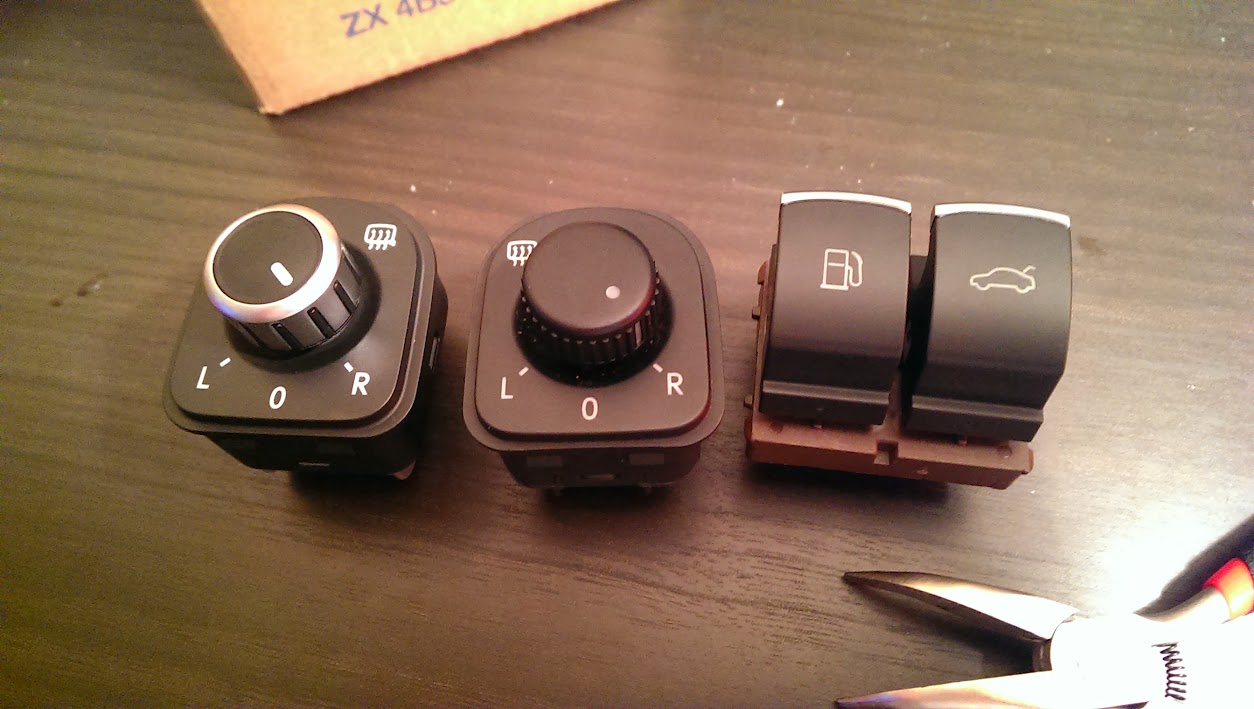
The connector looked a bit different, and didnt pop in straight away so I decided to rip it all apart and see could just swap some parts. Stupid idea. Long story short, the connector blocks are the same fit, just some cosmetic differences, and the wing mirror demister is on the right for the US.
Different internals (Euro on top, US on bottom)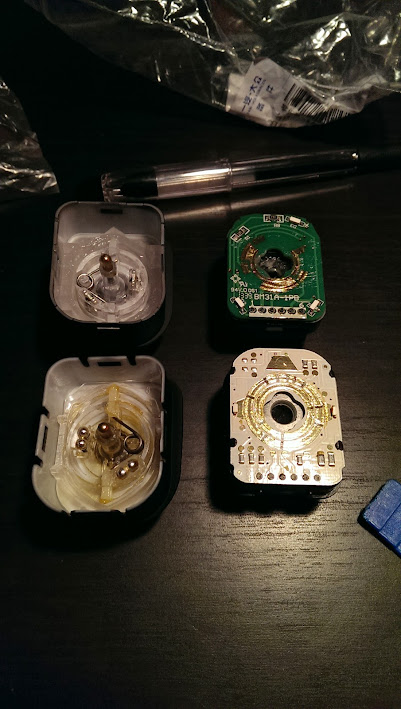
BEFORE: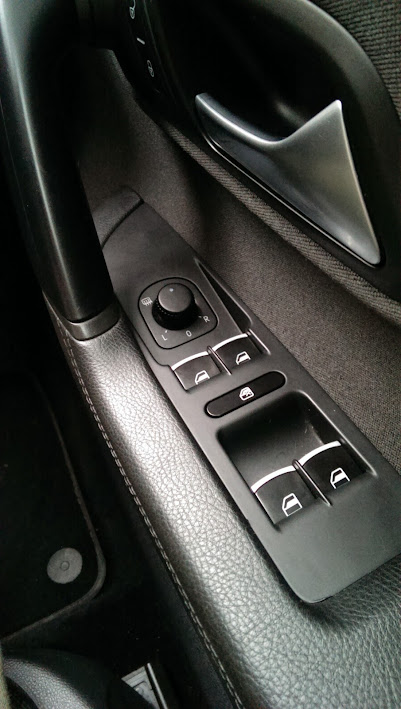
AFTER: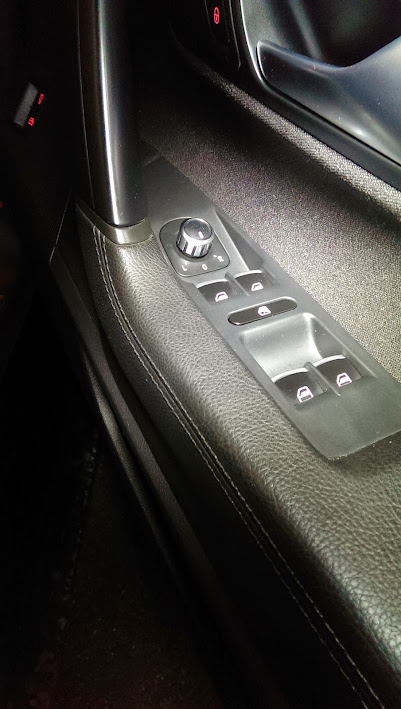
Plug it in, checked the left mirror, checked the right mirror. All good.
Couldnt get the boot and fuel release switches off. May have to remove the door card. Ugh. Certainly not doing that in the tight confines of the underground, and not outside in this weather.0 -
I love the badge camera.0
-
-
Black_Knight wrote: »Its awful handy. Didnt think id use it as much as I am, but even just turning the car around, its great to have a clear view of behind ya.
I fitted a camera to my A5 but it is just a replacement Reg plate light. Not as swish as the flip open badge.
They are a lovely gadget to have though and any car without a rear camera now seems very much lacking.0 -
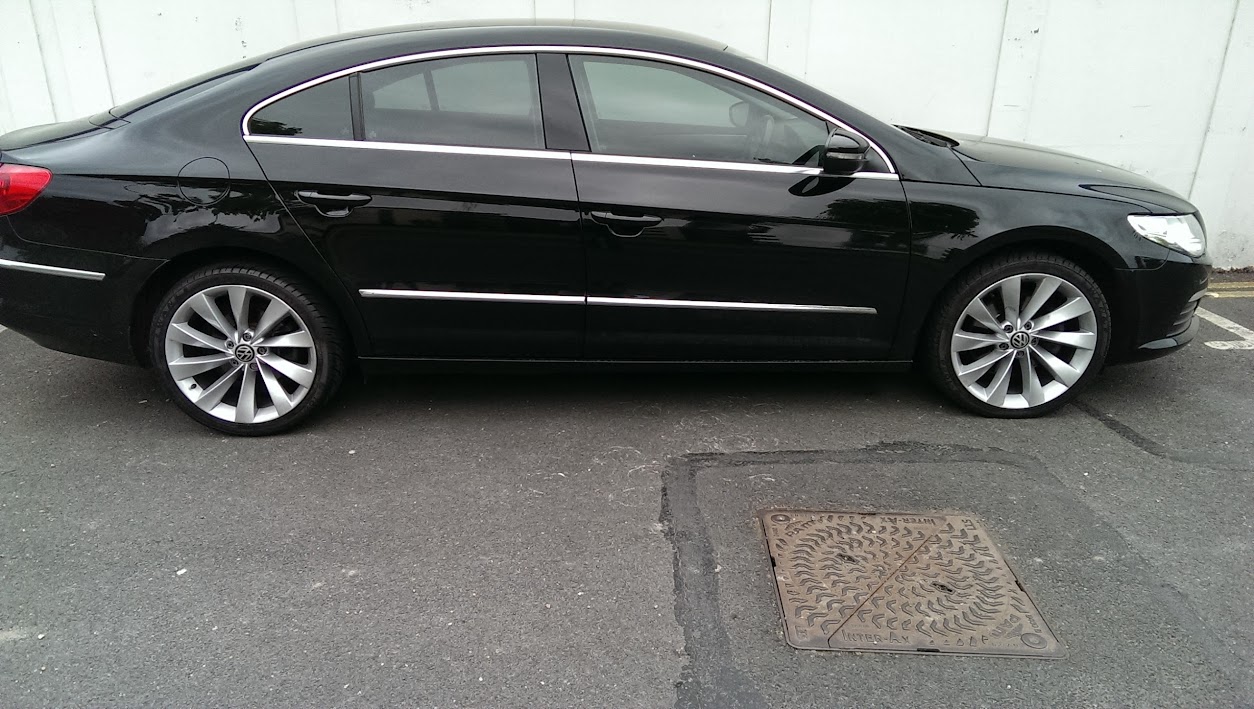
Got a set of Interlagos alloys too!
 0
0 -
Advertisement
-
Good work chief!0
-
Car looks the business with those wheels, I like all the small touches on the interior, especially the sills and the pedals. Really add to the interior. Those seats looks mega comfortable.
It's stock at 140bhp is it? Remap on the cards?0 -
Car looks the business with those wheels, I like all the small touches on the interior, especially the sills and the pedals. Really add to the interior. Those seats looks mega comfortable.
It's stock at 140bhp is it? Remap on the cards?
140bhp stock yeah. The gt version has the same engine, but 170bhp. Remap might be on the cards if I thought it needed more power, but for the moment I'm good. Need to recoup some funds, especially if I come across a leather interior. That'll ruin me0 -
Splashed out on some RHD chrome pedals:
Before: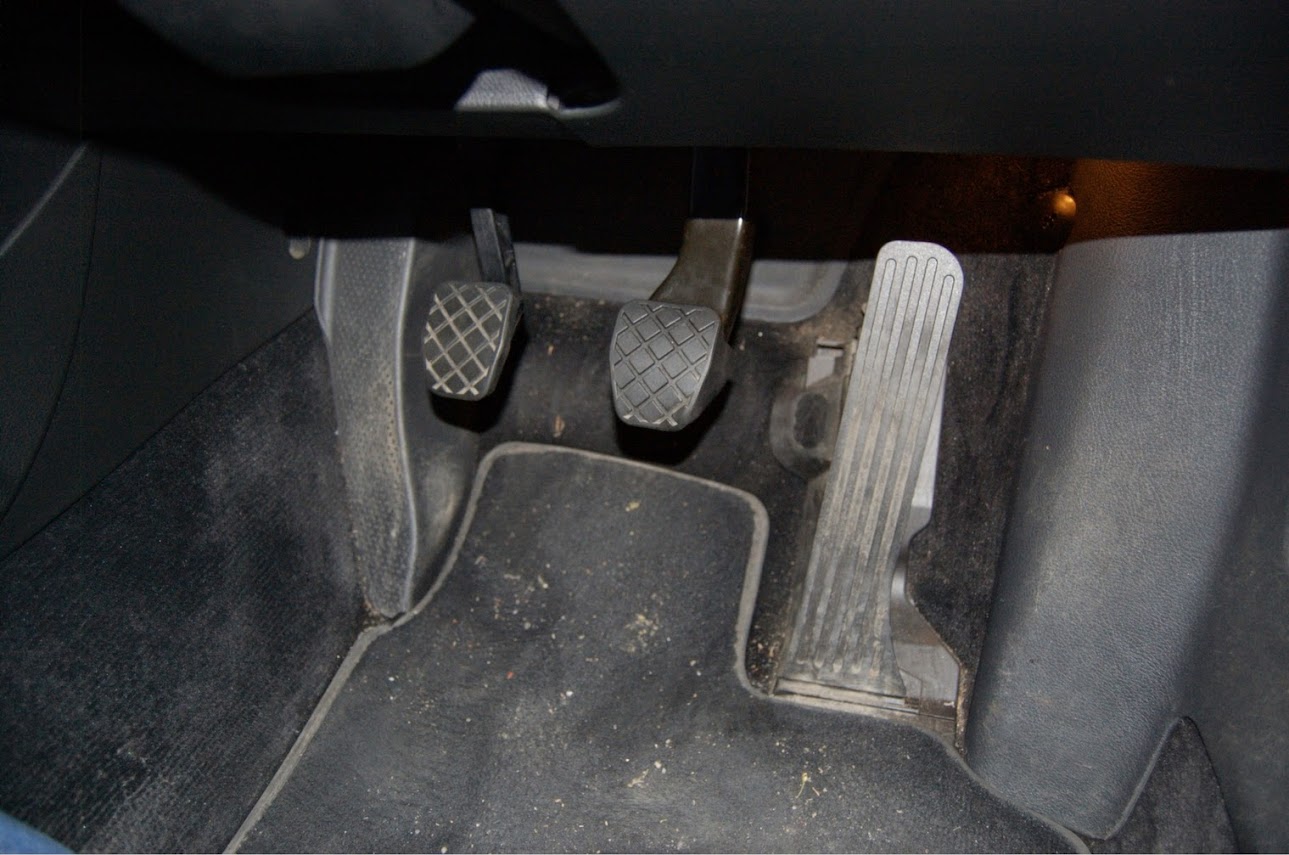
After: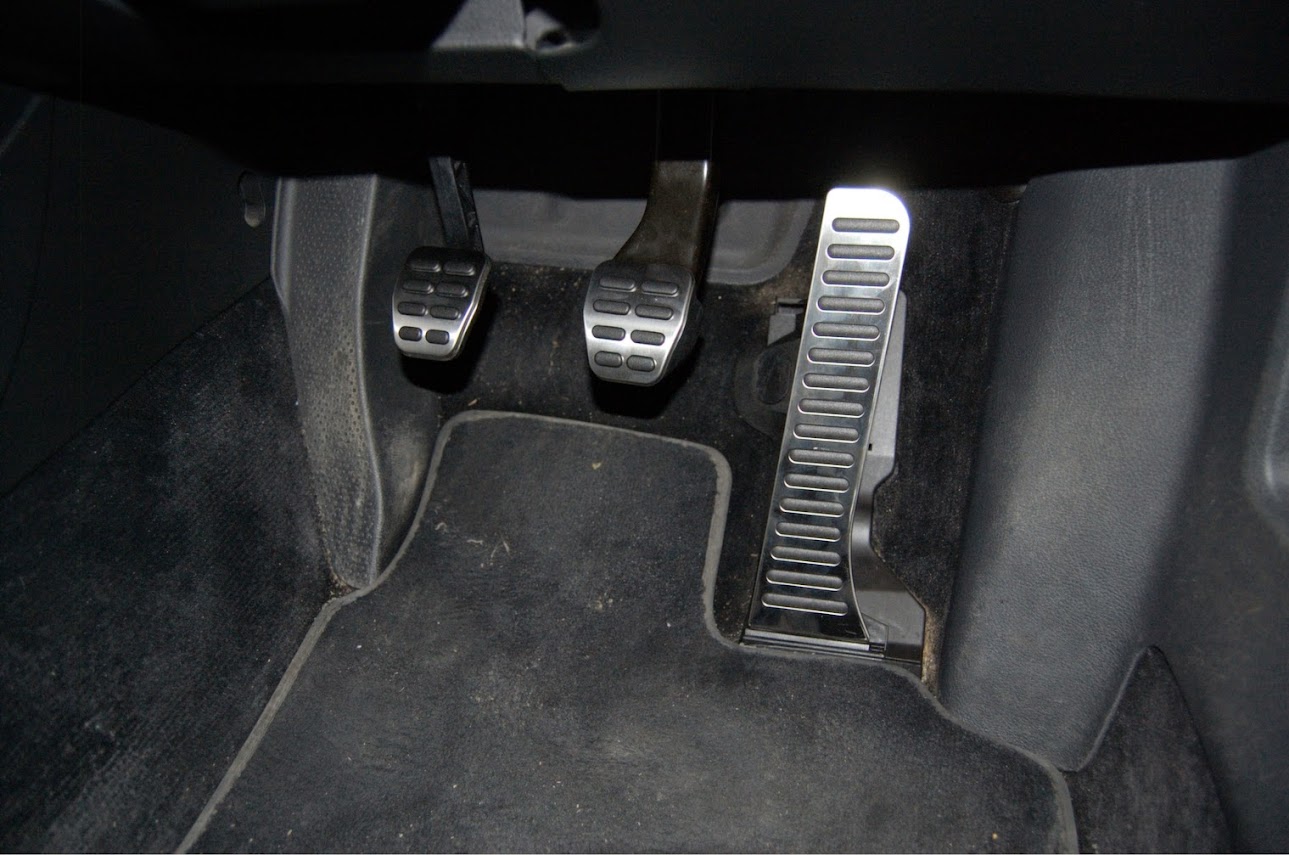
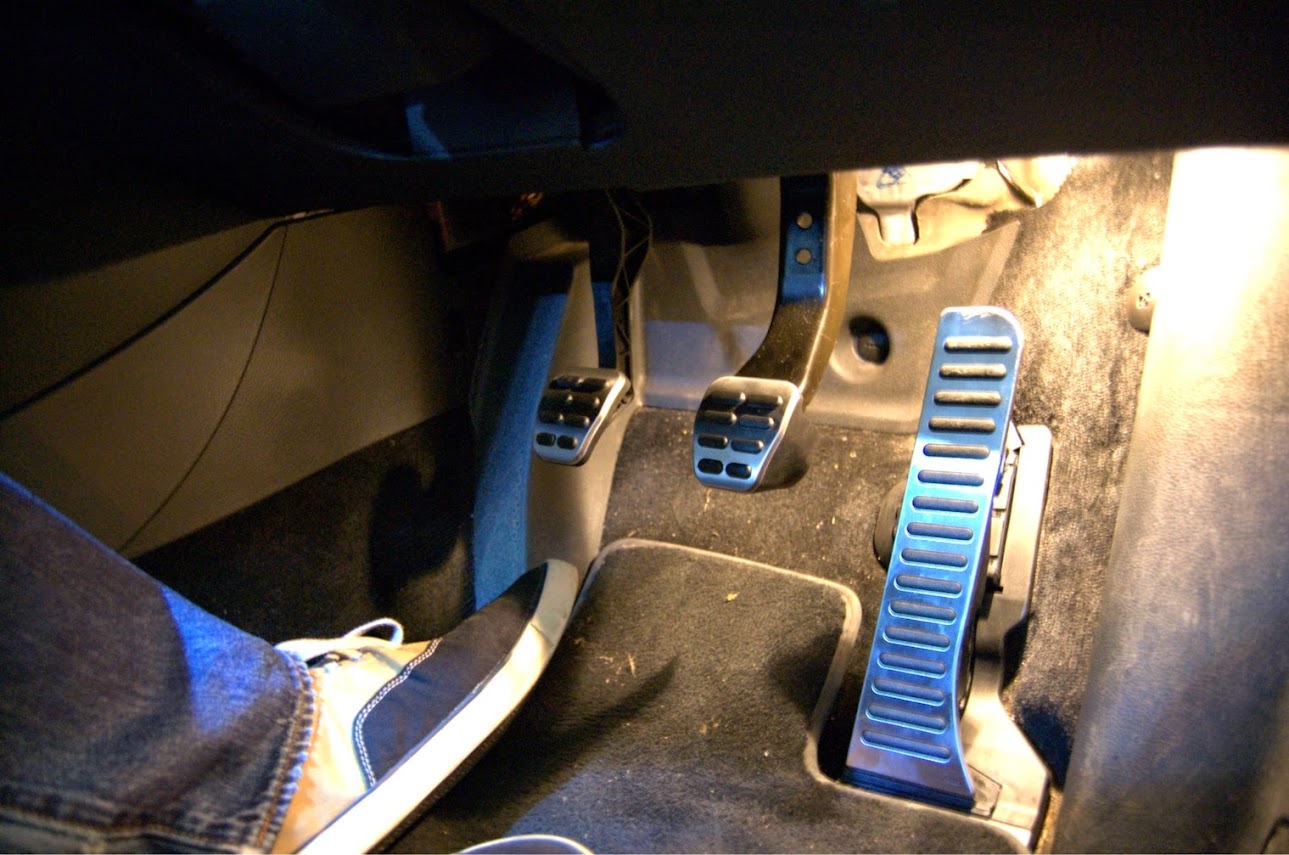
The existing pedal was a bit of a pig to get off. Unclip the wiring at the top of the pedal, unscrew the one screw near the top (theres a cover that you need to pry/lift away to reveal it), and then supposedly you just get your favourite pry tool/flat screw driver, slide it in between carpet and pedal and pop it up. I did not have this experience. Lots of pulling and brave pills got it out. 1 clip looks a bit broken, but it clips back in no problem if ever I wanted to swap back. Pic below kinda shows whats underneath. Those 2 "nipples" at the bottom are what holds it in.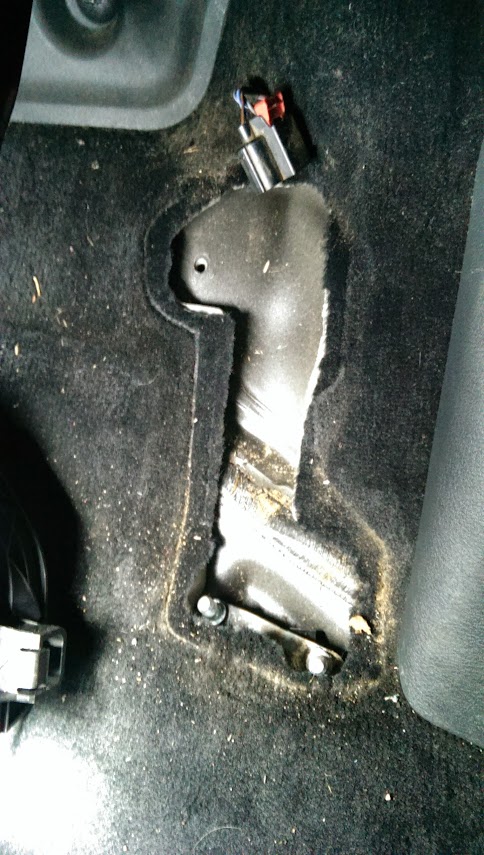
Clip in your new pedal, connect everything back in, and away you go.0 -
Best How to i,ve seen in ages. Thank you. Did you ever get your leather seats? I would be interested in seeing a how to if you did one. Thanks again0
-
Best How to i,ve seen in ages. Thank you. Did you ever get your leather seats? I would be interested in seeing a how to if you did one. Thanks again
Cheers.
Never got them no. Kept an eye out from time to time, but it'd be tough to justify shelling out 1-2k on leather seats at the best of times. If I did, most of it should be plug and play, unless I upgraded the seats along the way (heated/memory seats etc).
Unlikely i'll add anything more to the car at this stage. 8 years old now. I'll keep it a few more years i'd say and then see whats out there for me. Only problem is the high spec i'm used to now.0


Advertisement