Advertisement
If you have a new account but are having problems posting or verifying your account, please email us on hello@boards.ie for help. Thanks :)
Hello all! Please ensure that you are posting a new thread or question in the appropriate forum. The Feedback forum is overwhelmed with questions that are having to be moved elsewhere. If you need help to verify your account contact hello@boards.ie
Hi all,
Vanilla are planning an update to the site on April 24th (next Wednesday). It is a major PHP8 update which is expected to boost performance across the site. The site will be down from 7pm and it is expected to take about an hour to complete. We appreciate your patience during the update.
Thanks all.

Build The Millennium Falcon

1235710

Comments

  • Registered Users Posts: 214 ✭✭saneman


    Looks like a nice kit in it's own right and a good choice as your testing ground. I think the pre-shading worked quite well, wouldn't worry too much about it as it'll all come good with washes/weathering . I'm interested that you'll varnish before weathering, would generally be the last stage for any kits I've done.

    Liking your setup too. What type of spray booth is that in your previous post btw?


  • Closed Accounts Posts: 702 ✭✭✭Xaracatz


    Just stumbled across this thread and read it through. A lot of work going into this - fair play OP!

    Are your boys getting a look in at all? :pac:


  • Closed Accounts Posts: 8,333 ✭✭✭brinty


    Stumbled into this thread too and amazed at the details that you guys are getting into on it. I've always wanted to do a kit and the falcon is a childhood favourite but I missed it last year.

    I have the falcon puzz 3d kit too but obviously it's totally undetailed. Maybe you guys could provide a link for the other 1 foot kits or using fur airbrush practice??

    Deagostini started the mustang 1:8 scale kit this year (100 episodes) and that's what I'm starting with. All episodes are still unopened as I'm moving house this week. Can't wait to get started into it. Been following the deagostini forums and guys are modding and airbrushing too so will be fun to follow. Also get what you say about mixing episodes, I subscribed through eason's and missing two already. Think I'll go direct once settled into new house.

    Anyways looking forward to your progress in this build. It will likely be my second project 😋


  • Moderators, Computer Games Moderators Posts: 5,380 Mod ✭✭✭✭Optimus Prime


    saneman wrote: »
    I'm interested that you'll varnish before weathering, would generally be the last stage for any kits I've done.

    Liking your setup too. What type of spray booth is that in your previous post btw?

    Hi, thanks a lot, This is literally the first kit ive ever built so im playing it safe i guess. The reason im putting on the varnish before weathering is that the guy im watching on youtube to learn how to do this stuff does it, his reasoning is you can roll back if you mess up and in case the two different types of paint dont go together well. Ill be using oils now for most of the weathering on top of the paints ive used so far. I dunno if its needed, but im just doing it that way because of the vids to be honest.

    The spray booth i bought on ebay, think it was about 70 quid. it folds up in a suitcase size thing, minus the long extractor pipe. you stick that out the window when using it, im sure your familiar with them its pretty cool. they take up a lot of room though on your table or wherever and are awkward because of the pipe out the back.
    Xaracatz wrote: »
    Just stumbled across this thread and read it through. A lot of work going into this - fair play OP!

    Are your boys getting a look in at all? :pac:

    Thanks a lot! So far not really haha, to be honest they have kind of lost interest because it took so long to get going. now that the attic is sorted they might come back on board. They like watching the Airbrush spraying on the paint though.
    brinty wrote: »
    Stumbled into this thread too and amazed at the details that you guys are getting into on it. I've always wanted to do a kit and the falcon is a childhood favorite but I missed it last year.

    I have the falcon puzz 3d kit too but obviously it's totally undetailed. Maybe you guys could provide a link for the other 1 foot kits or using fur airbrush practice??

    Deagostini started the mustang 1:8 scale kit this year (100 episodes) and that's what I'm starting with. All episodes are still unopened as I'm moving house this week. Can't wait to get started into it. Been following the deagostini forums and guys are modding and airbrushing too so will be fun to follow. Also get what you say about mixing episodes, I subscribed through eason's and missing two already. Think I'll go direct once settled into new house.

    Anyways looking forward to your progress in this build. It will likely be my second project 😋

    Thanks! The practice kits i bought i got from Hobbie link japan, but they no longer sell to Europe because of copyright stuff with the star wars licensing, but you can still get them on ebay, just search for "bandai star wars" and you will see all the kits. revel have the star wars kit rights in Europe.

    I think you can still sign up for the falcon on the deagostini website and get all the back issues. I think we are about 4/5ths of the way through, there is A LOT of parts, ive a few box fulls of them now.

    I went to do a bit more on the ATST last night, the inside of the cockpit, but i appear to be missing some paint and ive no idea where it is from when i packed up getting the attic done. so im stuck now until i order some more.


  • Registered Users Posts: 214 ✭✭saneman


    Hi, thanks a lot, This is literally the first kit ive ever built so im playing it safe i guess. The reason im putting on the varnish before weathering is that the guy im watching on youtube to learn how to do this stuff does it, his reasoning is you can roll back if you mess up and in case the two different types of paint dont go together well. Ill be using oils now for most of the weathering on top of the paints ive used so far. I dunno if its needed, but im just doing it that way because of the vids to be honest.

    That's a good tip and one I'll use. Starting off a lot of the methods I picked up were cobbled together from different magazines or through trial & (a lot of) error. I'm still learning and i often forget what a great resource youtube can be (rather than trawling through my stack of "bibles"). One thing I have learned, if you're happy with the final result it doesn't matter how you get there.

    Keep up the good work, really appreciate the posts.


  • Advertisement
  • Moderators, Computer Games Moderators Posts: 5,380 Mod ✭✭✭✭Optimus Prime


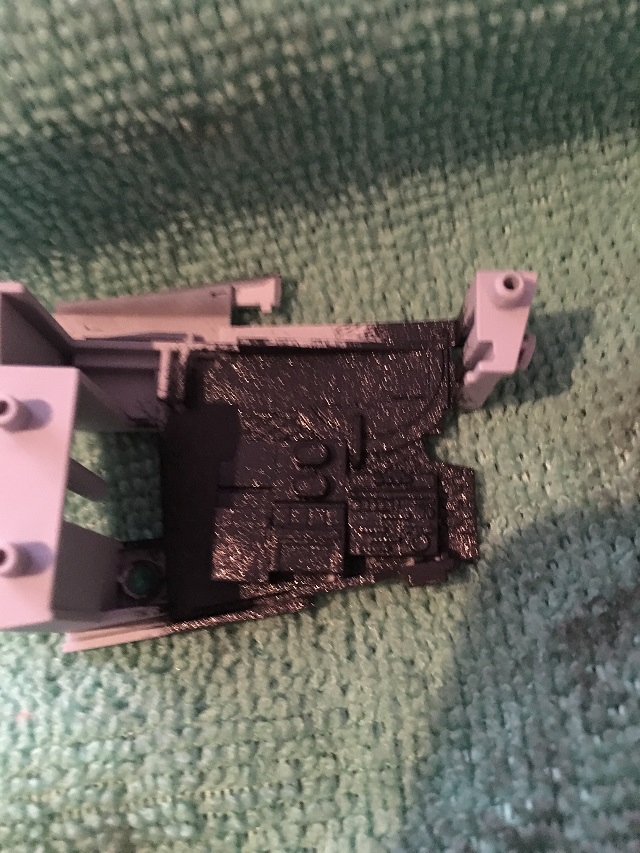
    Had a go at painting the cockpit insides over the weekend. this thing is tiny, and to be honest you will hardly see any of it once the model is built, except in the windows. I think it turned out ..ok... i could probably do better if i had another go at it, i got better as i went on. Ill do some dry brushing and detailing on it next then put an oil paint gunk wash on it and wipe it off, it will tone it down and hide some of the dodgy parts, the whole model will be getting that next.

    IMG_2327.jpg

    I gave everything a couple of coats of satin varnish too before i start with the oils.

    IMG_2324.jpg


  • Moderators, Computer Games Moderators Posts: 5,380 Mod ✭✭✭✭Optimus Prime


    Got a bit more of this done over the last two weeks.

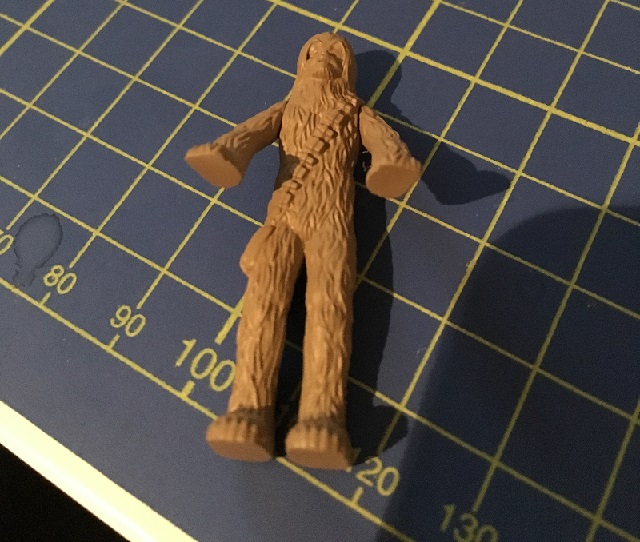
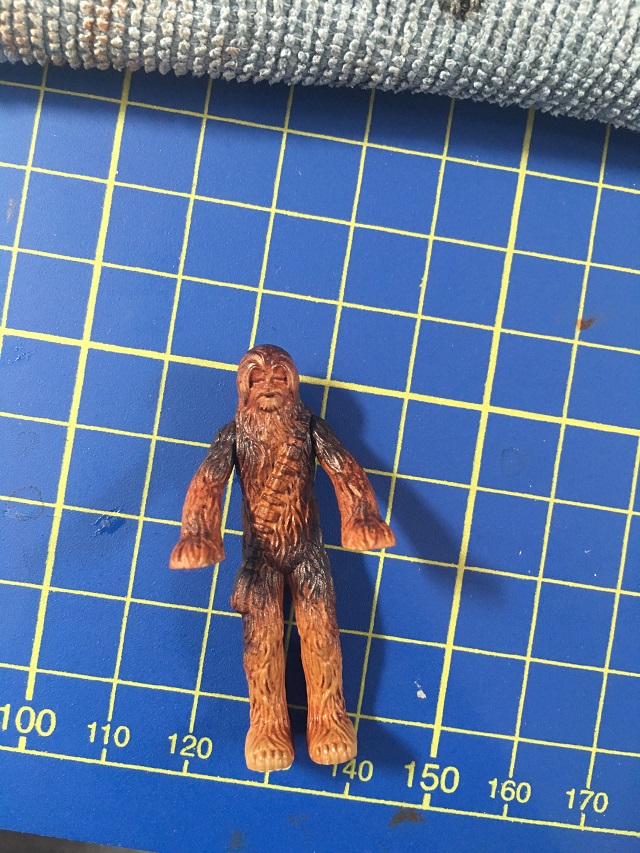
    First up, Chewie, he sits in the hatch on top of the ATST. I gave him a base coat then sprayed him a kaki brown colour.

    Chewie-1-1.jpg

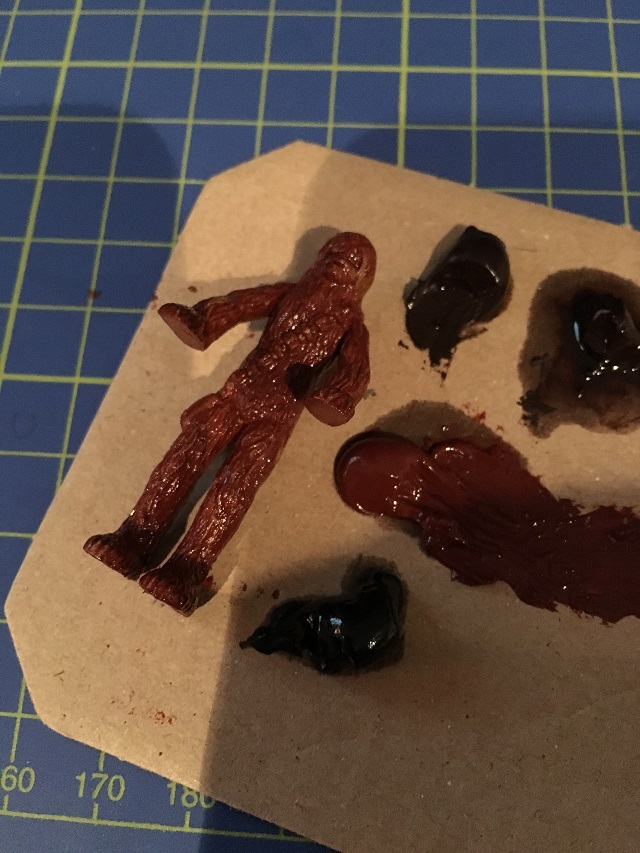
    Once that dried i used oils on him. gave him a mid brown first think it was burnt sienna or something.

    Chewie-3-1.jpg

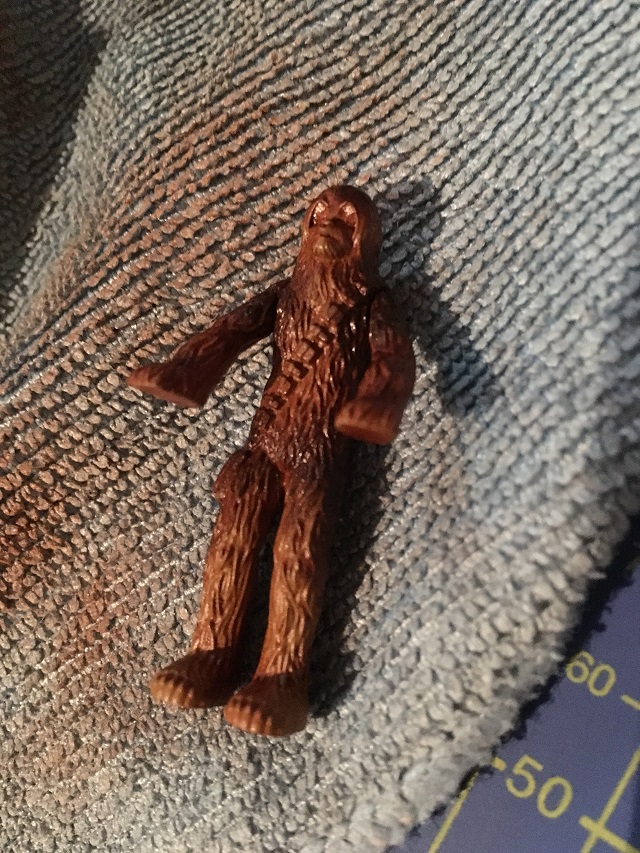
    i let that sit for 30 minutes then wiped it off with a cloth, this allowed the kaki brown colour underneath to come through in places.

    Chewie-4-1.jpg

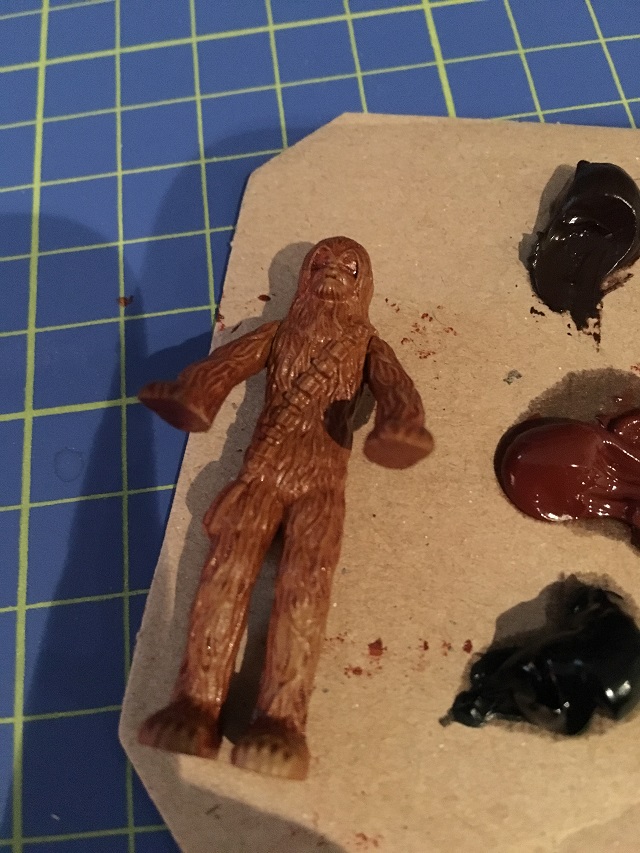
    Then around the shoulders and waist i gave him some dark brown, i wiped most off the brush before applying so i kinda dry brushed it on.

    Chewie-5-1.jpg

    I left that overnight to dry but i wasnt really happy with it so i gave him some darker patches and i think it looks better.. i used oil again "mig abtulung starship filth"..

    Chewie-6-1.jpg

    Ill let that dry for a week now.

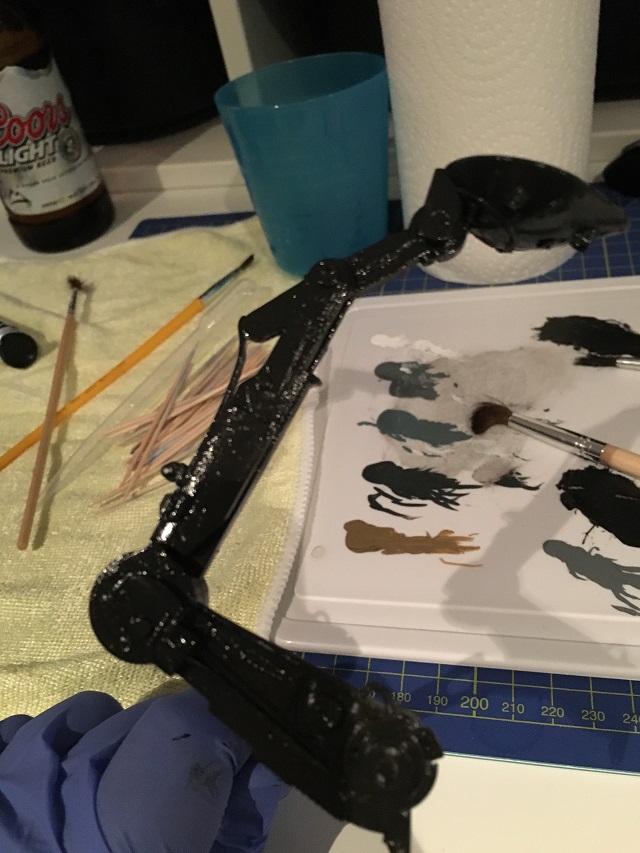
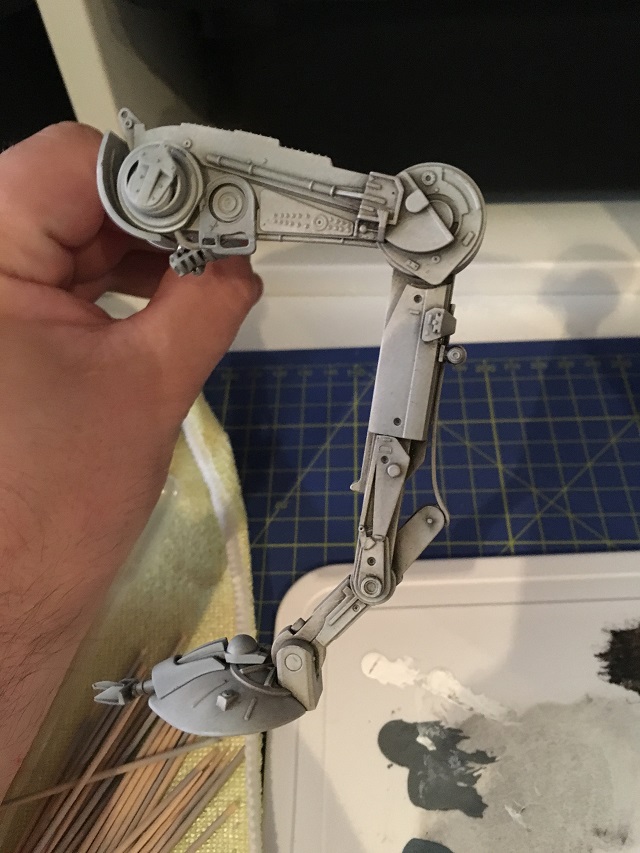
    Once the legs where dry from airbrushing the colour on last time, i sealed them with some varnish, let that dry, then gave them a gunk wash using oil paint. again using starship filth. you basically smear it all over them then wipe it off with a cloth.

    With the paint on..

    Legs-1-1.jpg

    and rubbed off..

    Legs-2-1.jpg

    The legs and body after the gunk wash..

    Legs-4-1.jpg

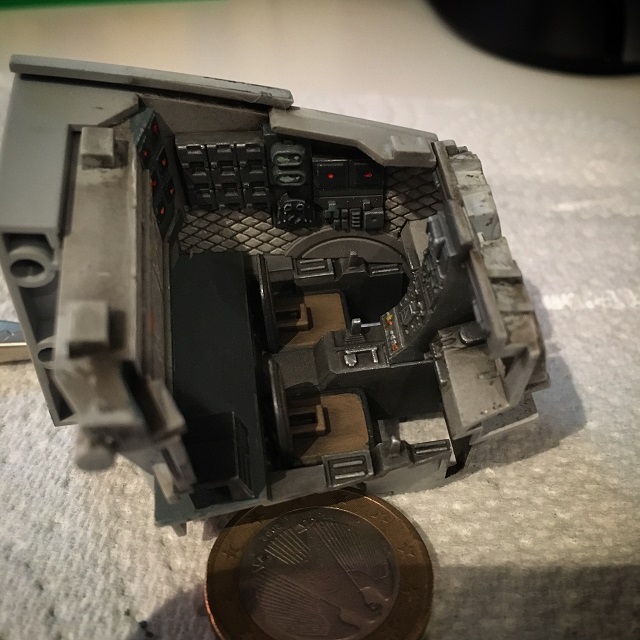
    I done the same gunk wash on the cockpit, its great because it acts as a wash and a filter to the work you have done so far.

    Cockpit-1.jpg

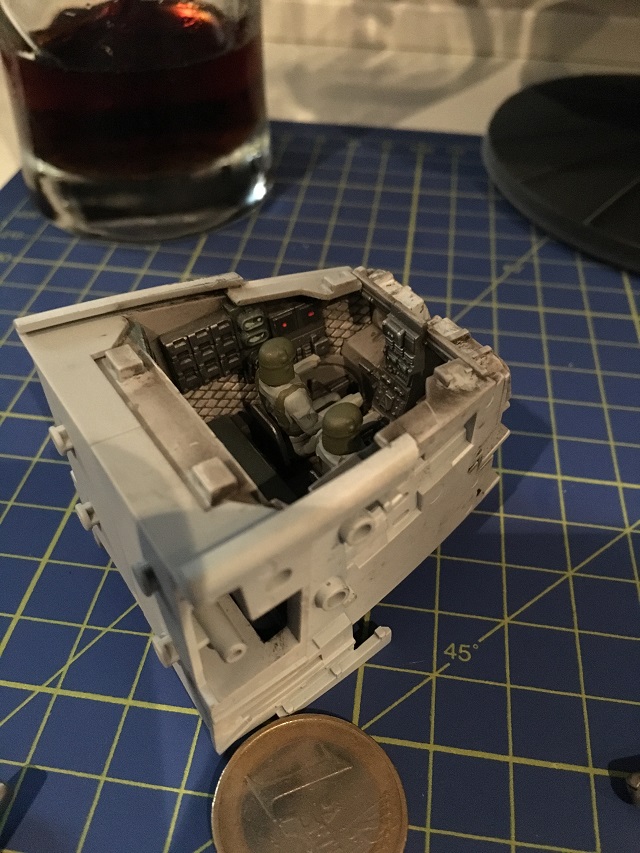
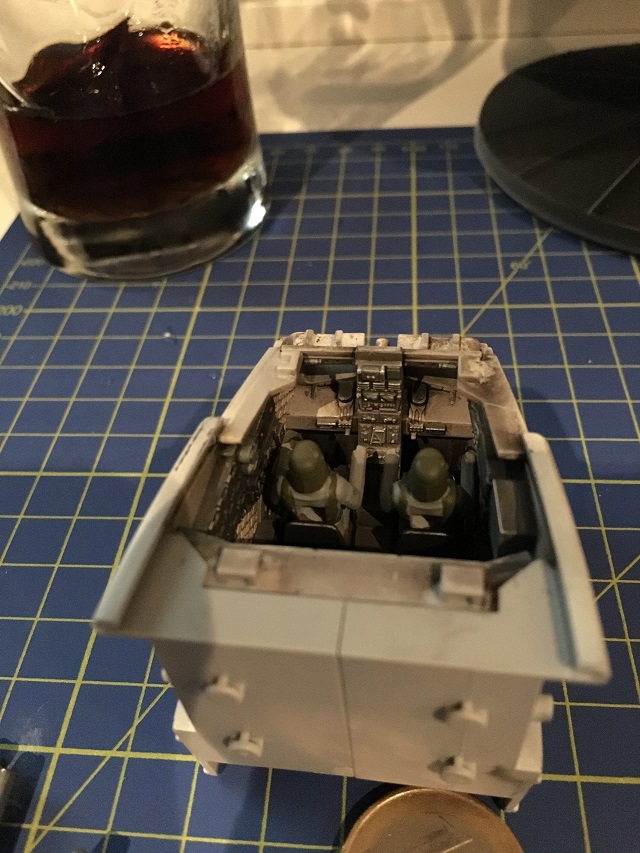
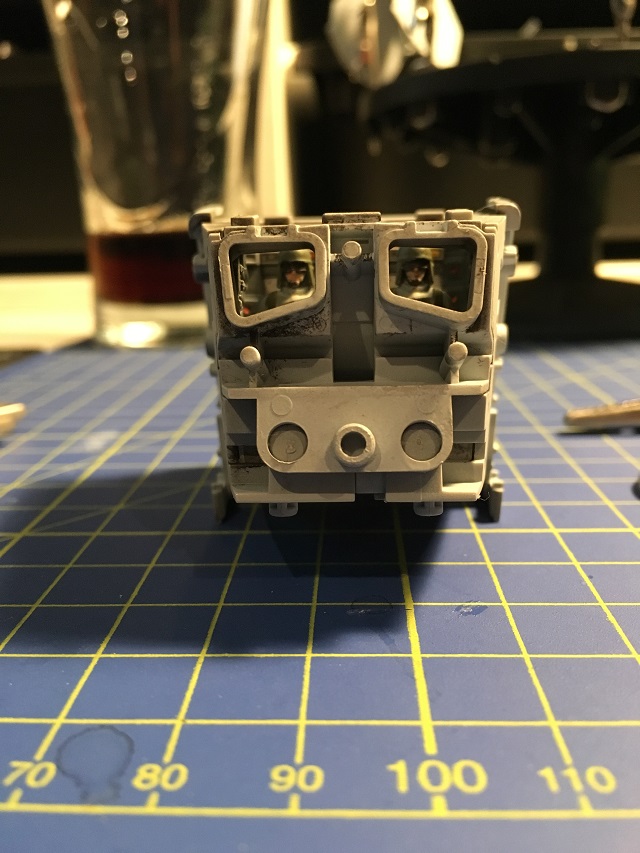
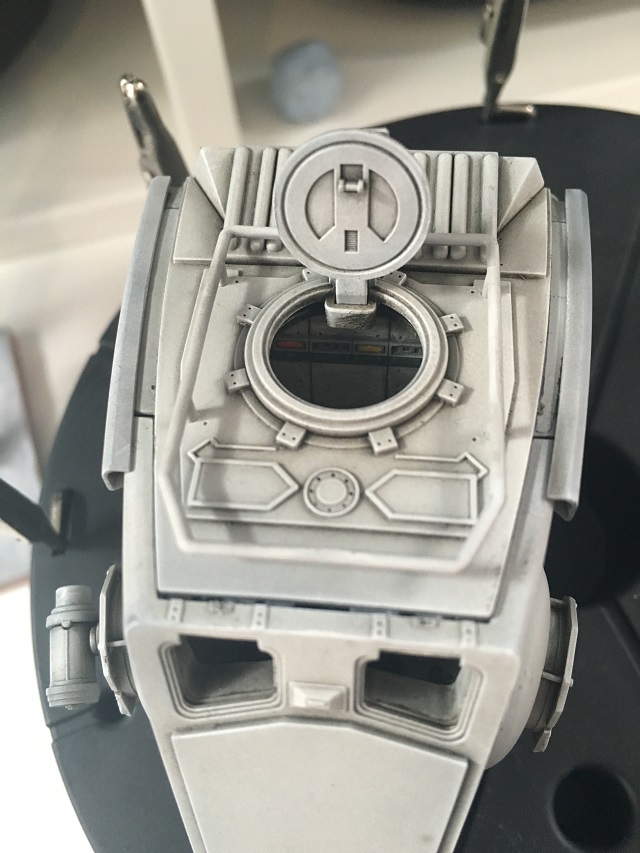
    Once that was cleaned off all cockpit pieces, i let them dry for a week then sealed with varnish. i then added some high lights, buttons, lights, wear and screens etc. then sealed again. cockpit inside is now finished, the crazy thing is once the ATST is complete you will see hardly any of this, only a small bit through the front windows and top hatch.

    Cockpit-2-1.jpg

    Imperial pilots added.. forgot to take photos of painting them!

    Cockpit-5-1.jpg

    Cockpit-6-1.jpg

    Cockpit-11-1.jpg


  • Moderators, Computer Games Moderators Posts: 5,380 Mod ✭✭✭✭Optimus Prime


    Continued, couldnt post all the pics in one post..


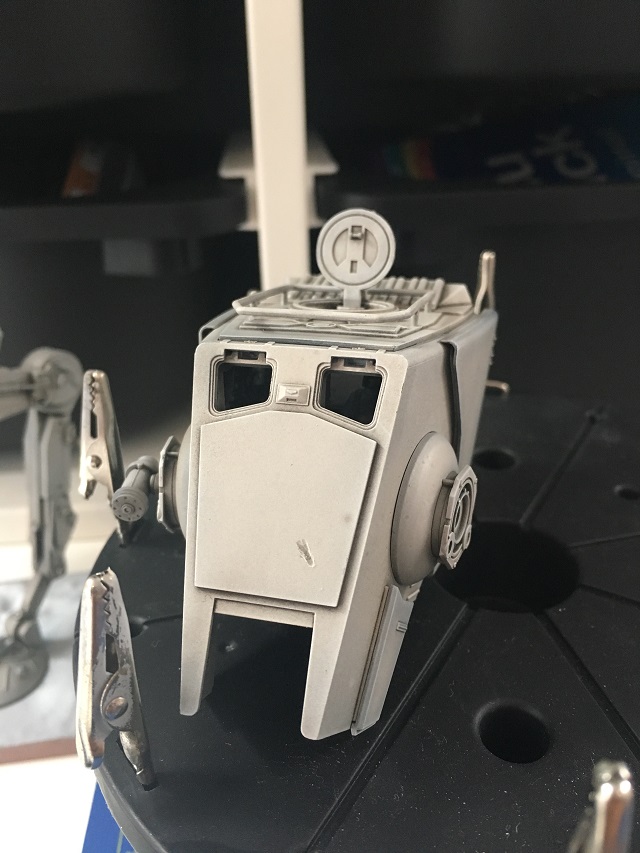
    Here is a couple of picks of the main head, ive given it a gunk wash, waiting for it to dry now and need to add some other parts to it.

    Head-1-1.jpg

    Head-2-1.jpg

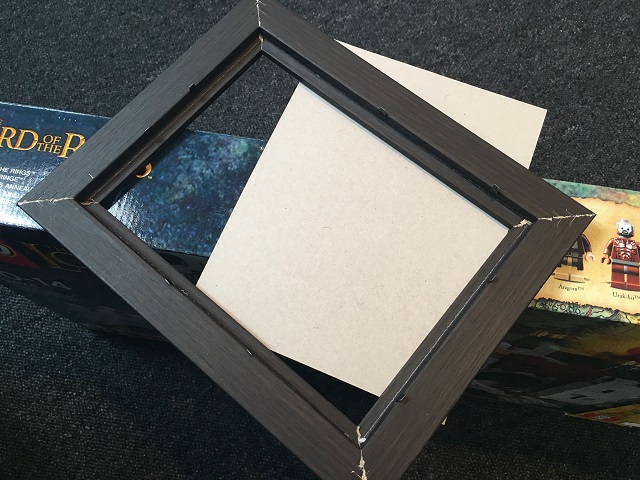
    While waiting for that to dry im going to start the base, because the one that comes with it is a horrible piece of brown plastic. im building it in a photo frame, here it is with the back out.

    Base-1-1.jpg

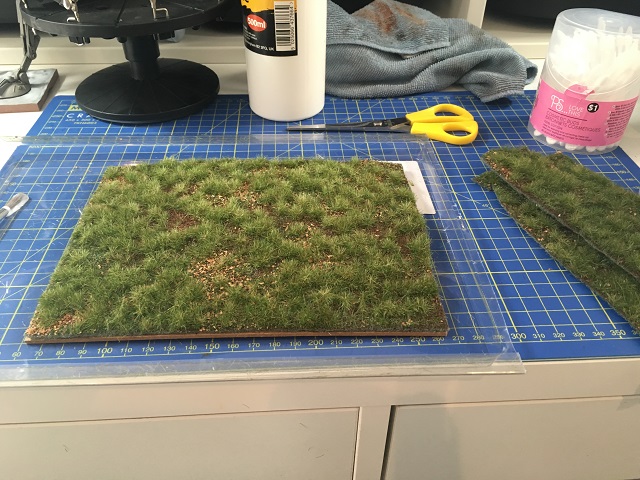
    This is where i am now, glueing the grass to back of the frame. once the glue is dried i put it back in the frame and it makes a good surround for it.

    Base-2-1.jpg

    Thats where im at now, its been a good learning experience so far before i start the falcon!


  • Registered Users Posts: 214 ✭✭saneman


    Wonderful work, that varnish-wash-wipe process gives some impressive results. Love that you went full-on with the cockpit. And that photo frame idea, I'll be nicking that!


  • Banned (with Prison Access) Posts: 7,611 ✭✭✭david75


    OP your work on the walker is so brilliant! Looks amazing!


  • Advertisement
  • Moderators, Computer Games Moderators Posts: 5,380 Mod ✭✭✭✭Optimus Prime


    Thanks a lot guys, im mostly happy with it, there are one or two spots on it i could have done better but i guess thats the point of practicing on these first. dont want to ruin the falcon model! haha


  • Moderators, Computer Games Moderators Posts: 5,380 Mod ✭✭✭✭Optimus Prime


    Just a quick update while i wait for all that oil paint to dry. Put the base inside the frame so you can see what it looks like. much better than the plastic base that came with it. i need to figure out how to stand the atst on it as ive never done this before. i seen brass rods you can buy that might fit into the holes in the feet but i dont know what size to get. going to add a few more bits of foileage and a a log or something that looks like a fallen tree.

    IMG_2808.jpg


  • Moderators, Computer Games Moderators Posts: 5,380 Mod ✭✭✭✭Optimus Prime


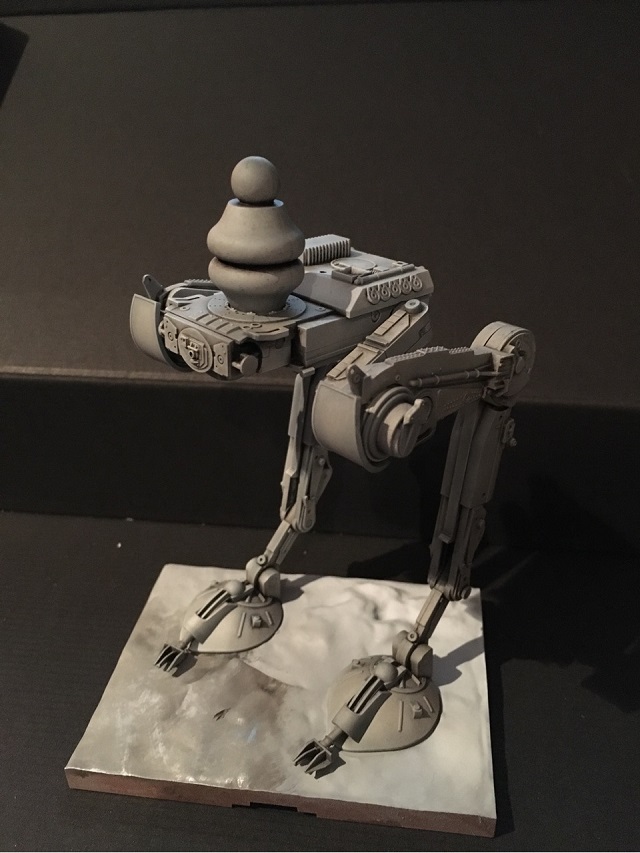
    Long time no update! I finally finished my ATST Bandai model, took me ages to finish the base as i needed to find a piece of wood to act as a fallen tree, i finally settled on the one below. Anyways, i think it turned out ok for my first kit. Here are some images below.

    IMG_2625.JPG

    IMG_2626.JPG

    IMG_2631.JPG

    IMG_2637.JPG

    IMG_2641.JPG

    IMG_2627.JPG

    Im going to build and paint a Battlestar Galactica Viper MkII next before i get stuck into the falcon, i want to wait now until i have all the issues before i begin, here are the parts now up to and including issue 86.. only 14 issues left to go...

    IMG_2647.JPG


  • Closed Accounts Posts: 8,333 ✭✭✭brinty


    Long time no update! I finally finished my ATST Bandai model, took me ages to finish the base as i needed to find a piece of wood to act as a fallen tree, i finally settled on the one below. Anyways, i think it turned out ok for my first kit. Here are some images below.

    IMG_2625.JPG

    IMG_2626.JPG

    IMG_2631.JPG

    IMG_2637.JPG

    IMG_2641.JPG

    IMG_2627.JPG

    Im going to build and paint a Battlestar Galactica Viper MkII next before i get stuck into the falcon, i want to wait now until i have all the issues before i begin, here are the parts now up to and including issue 86.. only 14 issues left to go...

    IMG_2647.JPG

    Great work mate, puts me to shame. I'm in same boat as you with the Shelby Mustang, waiting on all episodes to arrive and start it then. It'll be my first model build so will be interesting. I might go with the falcon afterwards if i enjoy the Mustang.

    Keep the progress updates going they're great fun. And there's a MF forum on the d'agostini site, lots of great ideas etc.


  • Moderators, Computer Games Moderators Posts: 5,380 Mod ✭✭✭✭Optimus Prime


    Cheers, yeh ive been on the falcon forum and got some tips on there alright, ive been building up my collection of paints, brushes, etc that im going to need over the last year (or two!) as im planning on repainting the whole thing, figured i better try my hand at a practice kit or two first which is why i started the ATST. learned a lot on it that could have messed up my falcon had i not.

    So ill try the viper next and then get started on the falcon, well ive already started the cockpit in the start of the thread but didnt have a clue about painting back when i did that and still only learning!

    Good luck with the mustang!


  • Registered Users Posts: 2,271 ✭✭✭TireeTerror


    When are you starting to finish the Falcon? Dying to see it finished!


  • Moderators, Computer Games Moderators Posts: 5,380 Mod ✭✭✭✭Optimus Prime


    I havent started it yet! Last four issues are due this month! then ill be beginning and logging it here. at the minute im doing a viper from battlestar galactia. ive been building all the bits i need to completely repaint and weather it for the last 2 years..


  • Banned (with Prison Access) Posts: 7,611 ✭✭✭david75


    OP

    Same company just started a build your own R2 series. And once again no indication of how many issues or what kind of financial commitment is involved.

    You have any idea?


  • Moderators, Computer Games Moderators Posts: 5,380 Mod ✭✭✭✭Optimus Prime


    Yeh i seen that, 1:2 scale, its looks pretty cool but i just cant commit to it ive a falcon to build that will probably take me 2 years at least, you can always order the whole lot in one go down the road off the website. they are saying its 100 issues "right now".. could be more.


    Some FAQ here.

    https://www.deagostini.com/uk/collections/build-your-own-R2-D2/info.html


  • Banned (with Prison Access) Posts: 7,611 ✭✭✭david75


    So again, over €1000 for a miniature R2?

    I went back n forth on the falcon cos it's worth that IMO.

    But not for R2. As much as I love the little guy.


  • Advertisement
  • Registered Users Posts: 10,532 ✭✭✭✭OwaynOTT


    david75 wrote: »
    So again, over €1000 for a miniature R2?

    I went back n forth on the falcon cos it's worth that IMO.

    But not for R2. As much as I love the little guy.

    There's a decent sized Lego model that can be gotten for cheap enough compared to that price.


  • Moderators, Computer Games Moderators Posts: 5,380 Mod ✭✭✭✭Optimus Prime


    david75 wrote: »
    So again, over €1000 for a miniature R2?

    I went back n forth on the falcon cos it's worth that IMO.

    But not for R2. As much as I love the little guy.

    Yeh 10.99 and issue at 100 issues. It does look decent and probably easier to do than the falcon because I don't think you will have to paint it. Unless you are weathering. Though they did say you wouldn't have to paint the falcon at the start and that turned out not to be the case.


  • Registered Users Posts: 3,205 ✭✭✭cruizer101


    Have you made any more progress on this Optimus, enjoyed the updates


  • Moderators, Computer Games Moderators Posts: 5,380 Mod ✭✭✭✭Optimus Prime


    Hi,

    Thanks a lot and sorry for taking ages to reply. its funny you should ask because i was holding out until i had all parts and issues, and the final 3 just arrived yesterday. along with the bracket to mount it on a wall when finished.

    So im going to make a start on it soon, try to base coat all parts during the summer while the weather is good because ill be using Tamiya rattle can primer.

    In the meantime ive been practicising on a Battlestar Galactica Viper. currently painting it in layers. some images below.

    Ill update the thread again on the falcon when im starting.

    last.jpg

    1.jpg


    2.jpg


    3.jpg


    4.jpg


  • Moderators, Computer Games Moderators Posts: 5,380 Mod ✭✭✭✭Optimus Prime


    Its been a while! Life got in the way, but im starting this proper next month. Just finishing off the viper first. Ive built the cockpit, put the ship together, filled seam lines a bit, primed, and put a coat of german grey on it. i wasnt happy with the seam line on the nose so i filled it and sanded it down again after that, annoying but had to be done.

    Ill put some maskol on it next over the grey in some places, then cover it with tamiya white. remove the maskol to give it some chipping showing the grey underneath, add the decal and then the fun part starts, making it dirty. Some images attached.

    Apologies i know its not star wars related, but it will be all falcon starting next month! These are just my practice kits before i start as im not a model maker. The ATST earlier in the thread and this Viper are the only models ive ever made, so had to try something before diving into the falcon.

    YouTube is great for teaching you new things!

    1.JPG

    2.JPG

    4.JPG

    5.JPG

    6.JPG

    7.JPG

    8.JPG

    9.JPG

    10.JPG

    11.JPG


  • Registered Users Posts: 1,086 ✭✭✭soups05


    This is amazing op, you have great skill and dedication. best of luck with the build and please keep us updated


  • Moderators, Computer Games Moderators Posts: 5,380 Mod ✭✭✭✭Optimus Prime


    Thanks a lot, dunno about that though im just trying my hand at what i see online and learning as i go. the hardest part is finding the time, it can be annoying being patient.. a lot of times you do something for half an hour then have to wait over night for stuff to dry before doing something else. i just want to get a lot done quickly!


  • Registered Users Posts: 5,953 ✭✭✭TheIrishGrover


    Jesus Christ folks. I don't know how ye have the patience and dedication and obsession to do that. Fair play to ye. Amazing work! Please, keep us updated.


  • Moderators, Computer Games Moderators Posts: 5,380 Mod ✭✭✭✭Optimus Prime


    A quick update on this..

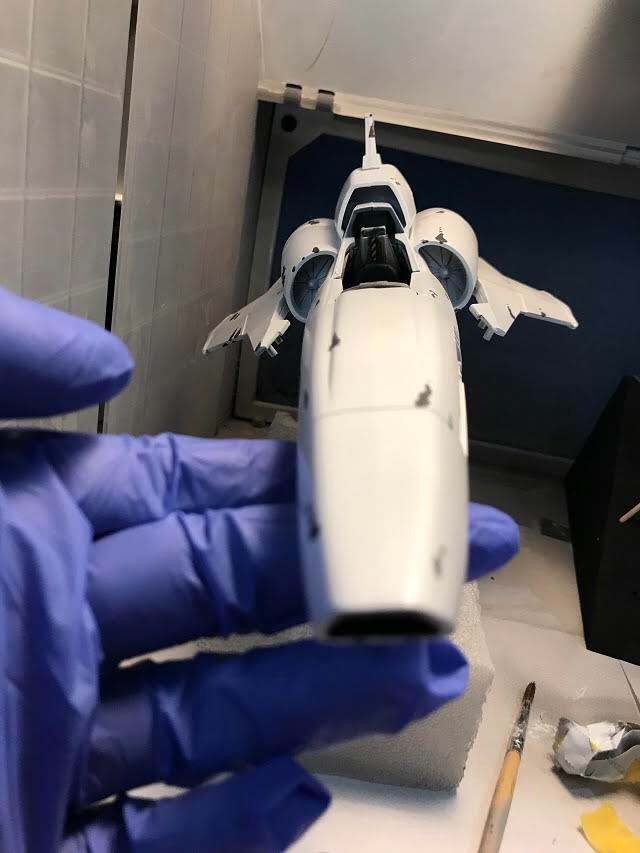
    I added some "maskol" to the viper here and there to simulate damage to the ship. You can see this in the first image. it drys like a silicone\plastic type thing.

    Once it was dried i gave it a couple of coats of flat white, the base colour of the viper.

    When this dried i then used a tooth pick to remove the maskol, the darker coat underneath gives the illusion of damage. it will look better once its weathered fully. I took the tape off the cockpit too which i had on to protect it during spraying.

    Then i gave it a coat of Matt Varnish just to take the shine of it.

    A1.jpg

    A2.jpg

    A3.jpg

    A4.jpg

    A5.jpg


  • Advertisement
  • Moderators, Computer Games Moderators Posts: 5,380 Mod ✭✭✭✭Optimus Prime


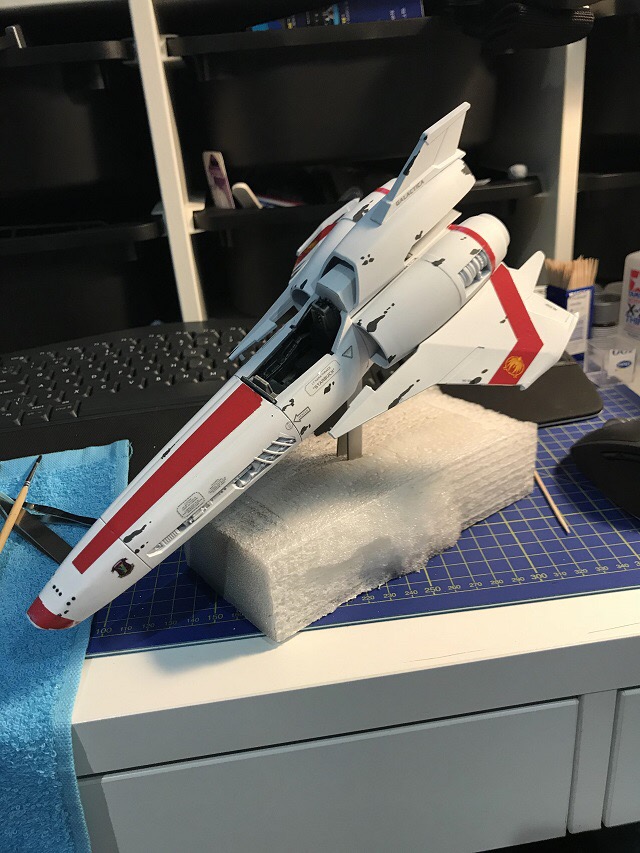
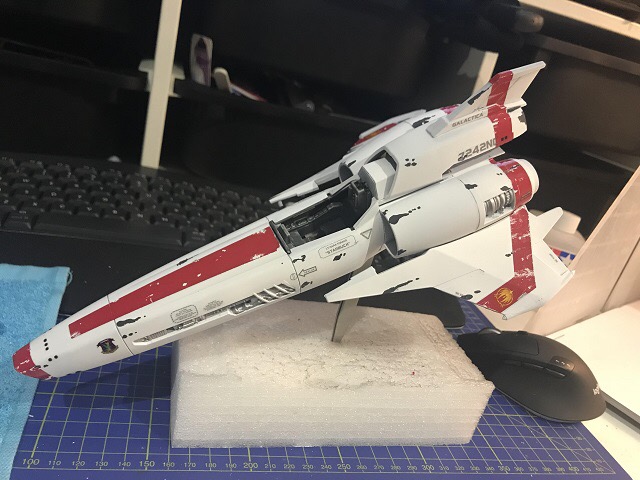
    Quick update, this week I added the decals. id never done this before and to be honest it was a pain, the decals are very hard to get on without breaking them, luckily I was going for a damaged look so I could sort out the ones that broke anyways by just making them look like natural damage.

    First image is when I just had most decals on, few on the back are missing, second one is after I added some damage.

    Ill let these sit now for a week, put a coat of matt varnish on then do the fun part, the weathering.

    b1.jpeg

    b.jpeg


Advertisement