Advertisement
If you have a new account but are having problems posting or verifying your account, please email us on hello@boards.ie for help. Thanks :)
Hello all! Please ensure that you are posting a new thread or question in the appropriate forum. The Feedback forum is overwhelmed with questions that are having to be moved elsewhere. If you need help to verify your account contact hello@boards.ie
Hi all,
Vanilla are planning an update to the site on April 24th (next Wednesday). It is a major PHP8 update which is expected to boost performance across the site. The site will be down from 7pm and it is expected to take about an hour to complete. We appreciate your patience during the update.
Thanks all.

Build The Millennium Falcon

2456710

Comments

  • Moderators, Computer Games Moderators Posts: 5,380 Mod ✭✭✭✭Optimus Prime


    Had a go at the gun turrets today. they come as basic metal with no paint! and they say you dont have to paint this!! anyways.. here is a before image of some of the turret pieces to give you an idea what they look like.

    before1.jpg

    Horrible and the finished model would look terrible with a big metal gun on it.

    So i had a crack at painting and here is the result. took me the day on and off doing bits here and there and waiting for paint to dry, again made some mistakes on it, but with the chairs above, its the first model ive painted.

    after1.jpg


  • Moderators, Computer Games Moderators Posts: 5,380 Mod ✭✭✭✭Optimus Prime


    May as well keep updating this thread, quick one this week.

    I painted and weathered the frame for the door in the cockpit, painted the middle control panel a bit, and added a custom floor since i didnt like the way the floor was just plastic.

    Ive decided im going to dirty those chairs a bit as they are too clean.

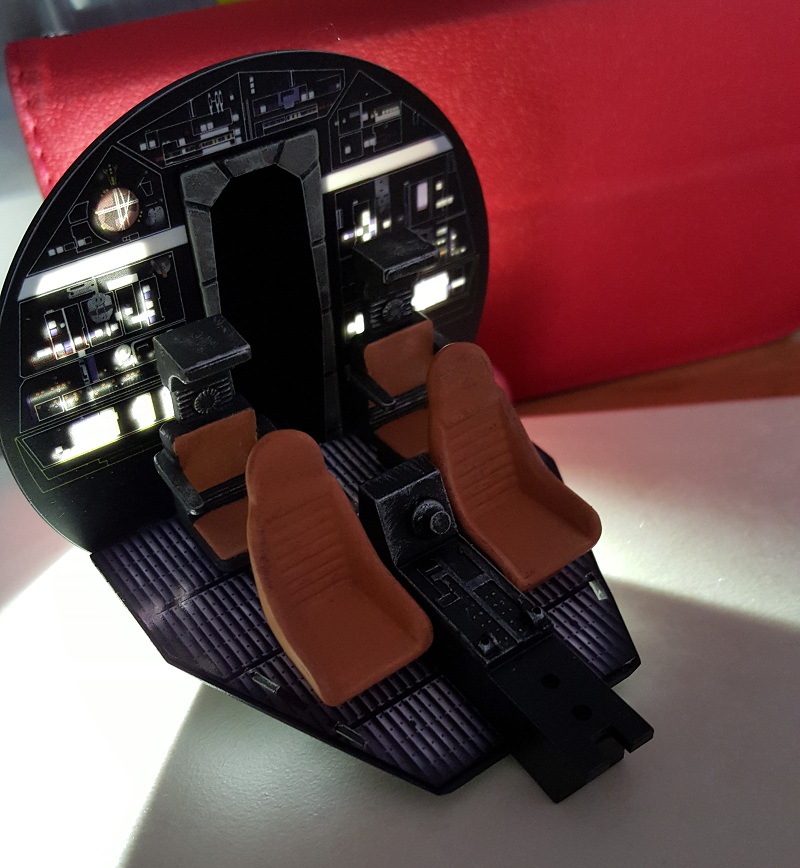
    I put a torch behind the back panel to give an idea of it lit up. im going to be modifying this by painting colours on the back of sticker to make the light different colours simulating buttons etc.. ive to wire up fibres to the front control panel before i put it in. and i think im going to put an led behind the door before i put that in, to make it look like the corridor is lit up.

    There is two side panels that go into the floor beside the chairs too ive yet to ad.


    falconcockpit1.jpg


  • Closed Accounts Posts: 33,733 ✭✭✭✭Myrddin


    That looks class! Keep updating the thread Keith it's very nice seeing it all come together & how you're learning skills as you go. I may have to get some painting/detailing/weathering lessons off you some day :o


  • Moderators, Computer Games Moderators Posts: 5,380 Mod ✭✭✭✭Optimus Prime


    Will do, its all new to me, youtube is great for this stuff plus its not as difficult as it seems once you have all the right paint etc.

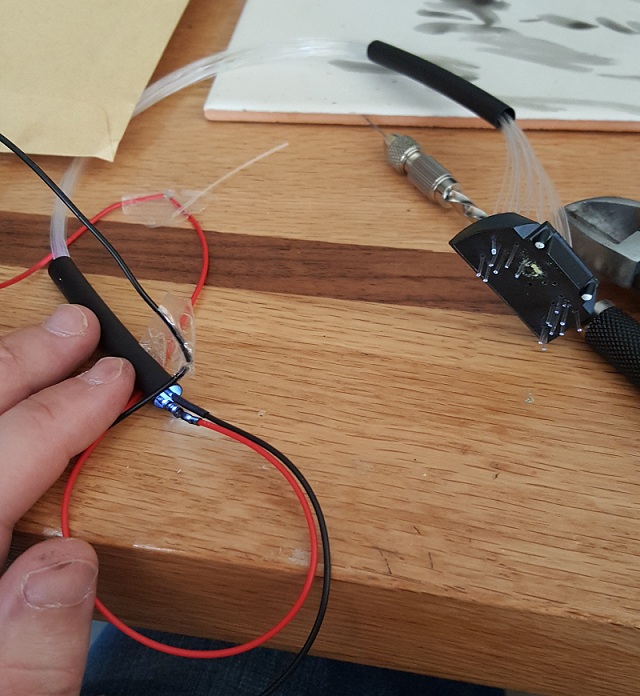
    The fibre optics is another area new to me, didnt just want to stick a sticker on the control panel in the cockpit, so ive drilled a load of tiny holes in it to put fibre in so the buttons light up. thats whats supposed to happen anyways, we will so how it goes!

    Ill keep updating when i make bits of progress on it.


  • Registered Users Posts: 3,841 ✭✭✭ozmo


    so ive drilled a load of tiny holes in it to put fibre in so the buttons light up...


    I used thick optic fibre for one project years ago - touched one end briefly off a Clothes Iron to slightly melt the end - and it went into a nice conical shape with a flat end that lit brightly at any angle and held the fiber nicely in its drilled hole.
    Probably not bright enough to show through any sticker placed over it though...

    ps. nice painting there :)

    “Roll it back”


  • Advertisement
  • Moderators, Computer Games Moderators Posts: 5,380 Mod ✭✭✭✭Optimus Prime


    Thanks Ozmo, i was happy with it considering i never painted anything before that wasnt a wall or ceiling! ive since added some dirt to the chairs using nulin oil i think its called, a black wash because i thought they where TOO clean.

    Ill give the iron trick a go, im not convinced myself the light will come through the sticker, but one of the lads on the falcon build forum said his does so ill test it out first.

    Ive some "glass paint" on the way that im going to paint the on the back of the sticker at the back of the cockpit to give the light coming through some colour too.

    I didnt get anything done this weekend as i was away, but ill update again when i make some progress. here is a quick pic i took of the fibres ive put in the front control panel.

    fibres.jpg


  • Moderators, Computer Games Moderators Posts: 5,380 Mod ✭✭✭✭Optimus Prime


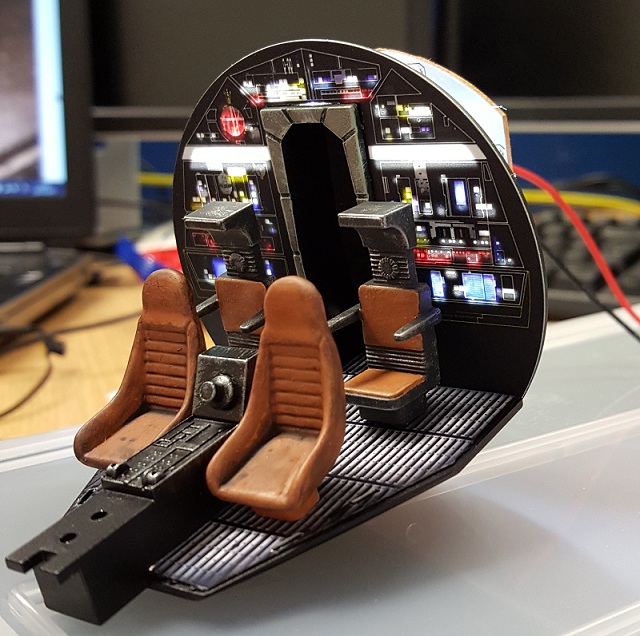
    Quick update, i got some glass paint and painted behind the back cockpit wall in the holes for the different buttons etc.

    I think it looks ok, but i have a spare back wall and sticker they sent me by mistake so i might have a go at it again and do something different.

    I also weathered the chairs a bit.

    cockpitlights.jpg


  • Registered Users Posts: 531 ✭✭✭biketard


    Wow, that looks fantastic.


  • Closed Accounts Posts: 33,733 ✭✭✭✭Myrddin


    I think it looks ok

    Ok? Looks fecking class Keith, seriously well done.


  • Moderators, Computer Games Moderators Posts: 5,380 Mod ✭✭✭✭Optimus Prime


    Myrddin wrote: »
    Ok? Looks fecking class Keith, seriously well done.

    Yeh, if im being picky i think i put too much glass paint on the back of the sticker and its bled a bit so the light is illuminating too much around the buttons etc. ill give it another go with the other back panel and take it handy on the paint!

    Also its kinda frustrating because even though ive aligned the sticker perfectly to the back plate, the printed lights on the sticker are slightly below the holes in the backing plate so the light shining through isnt perfect either! dont know what i can do about that though unless i got a bad sticker in that one.


  • Advertisement
  • Moderators, Computer Games Moderators Posts: 5,380 Mod ✭✭✭✭Optimus Prime


    So my ocd kicked in about the colour bleed and the way those bar lights are not lined up right.

    So i used my spare cockpit panel and sticker and did it again. i lined it up correctly this time to holes in the back panel for the light bars on each side, but when you do this the sticker is not positioned correctly, so i had to trim one side with a blade and trim the top of the sticker where it meets the door.

    I then painted in the glass paint using a tooth pick! it meant paint wasnt bleeding every where like with the brush and could pick out the buttons more accurately. i think it looks better, but the photo here isnt great. ill be adding the door next but im going to stick an led behind it so a couple of bits light up on it.

    20150429_215350.jpg


  • Closed Accounts Posts: 5,361 ✭✭✭Boskowski


    If you keep going in this fashion I'm sure it'll be worth that grand in the end if not more. Nice work Sir.


  • Moderators, Computer Games Moderators Posts: 5,380 Mod ✭✭✭✭Optimus Prime


    Cheers, im actually enjoying doing it, to be honest this stuff like the glass lighting paint, fibres, painting the seats, the floor i added, none of that is in the instructions or provided as parts, most if it ive just seen other lads doing themselves and had a go at it. may as well do it as best i can.


  • Moderators, Computer Games Moderators Posts: 5,380 Mod ✭✭✭✭Optimus Prime


    Quick update, didn't get much done over the weekend

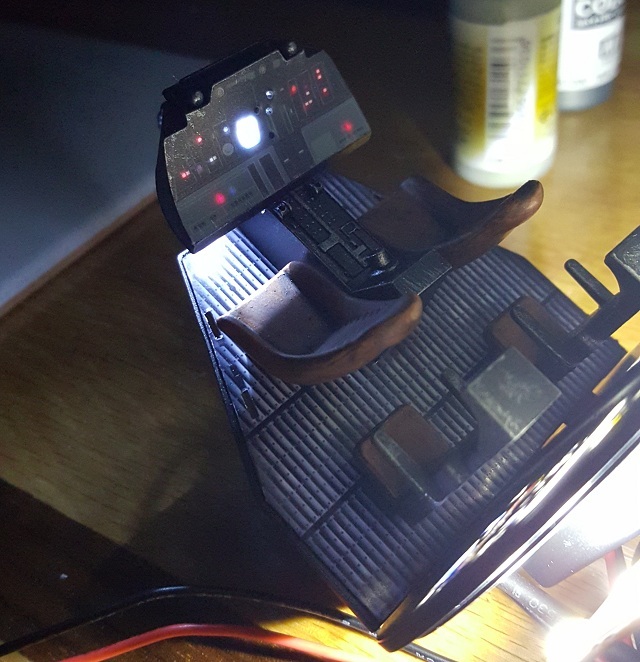
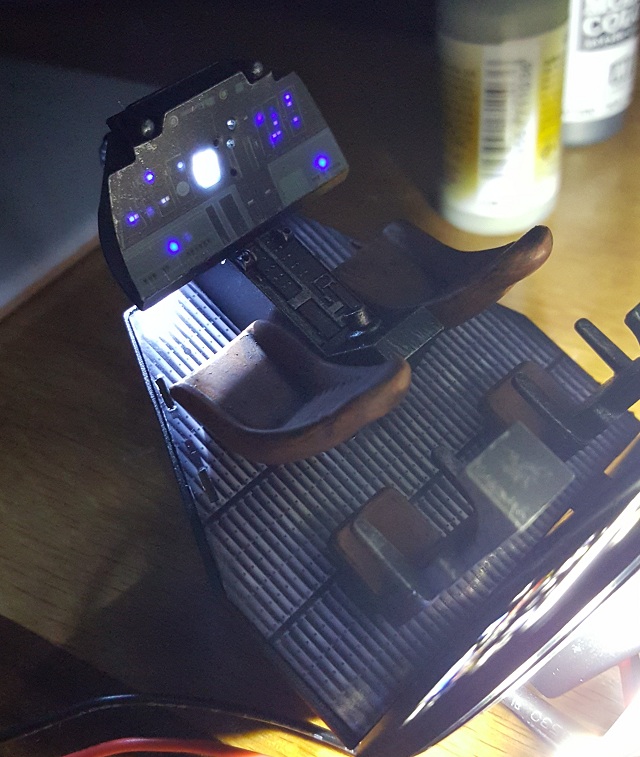
    I trimmed the fibers to the control panel and put the supplied sticker over it. I first cut a hole in the control panel plastic behind the sticker and stuck a white led in there to light up the screen on the sticker. I will also be covering under the control panel with something so the led doesn't shine out underneath as much.

    The fibers are flashing red\blue in these images as i only had a red\blue flashing led to hand but they will be mostly white with probably 2 flashing red\blue when im finished. ive to order some more leds.

    The Fiber light comes through the sticker anyways so happy days! I was thinking id have to cut tiny holes in the sticker.

    The holes in the control panel are for the levers ive yet to stick into it.

    cpo1.jpg

    cpo2.jpg

    I also added the door sticker, but instead of putting it into the door like the magazine describes. i used pieces of Styrofoam cut to size so the door is flush with the boarder around it as opposed to inset into it, which isnt the way it is in the films anyways, i then cut a piece of card the same size as the door but made 2 square holes in it to match the white lights on the door and one small hole to match the red button on the door. I stuck the door sticker to this card, glued the Styrofoam in the door section around the edges then put in a white led in there too through a hole i drilled in the back of the door section and finally glued the door\card onto the Styrofoam. so now the light from the LED shines through the holes in the card and lights up the lights and red button on the door sticker.

    door.jpg

    Ill add the levers to the control panel next, and paint and add the side pieces. there is also an archway that goes over the top at the door\back section that has a sticker on it and im thinking of drilling it out in 2 sections to add the long white light to the sides. ill update the thread again when ive done some more on it.


  • Moderators, Computer Games Moderators Posts: 5,380 Mod ✭✭✭✭Optimus Prime


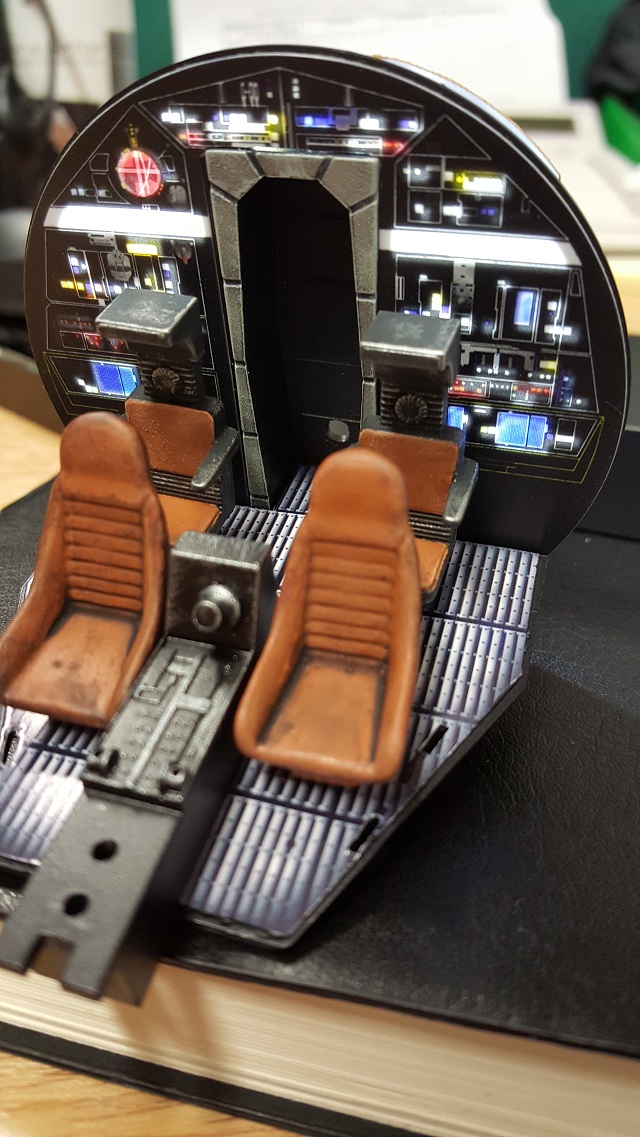
    Nearly finished the cockpit insides now.

    Today i added fibres to the side panels and installed them, painted them too. Installed panel that goes in front of the control panel. glued everything together. and sorted out all the fibre optic cables as best i could! added a bit of rust here and there to the side panels and front panel too.

    Also added all the controls and levers as well. 4 levers on the control panel, two in the middle thing and the controls in front of each seat. (after i weathered them a bit to make them look old and used)

    Randon lights flash red blue and the white ones are just constant white.

    1.jpg

    2.jpg

    3.jpg

    4.jpg

    This is what it would look like if you just built it without painting or adding lights\fibres etc.

    original.jpg


  • Closed Accounts Posts: 33,733 ✭✭✭✭Myrddin


    Looks amazing Keith. This thing will be the envy of the forum when done


  • Registered Users Posts: 5,962 ✭✭✭GhostInTheRuins


    That's a massive improvement with all that texturing. Fair play. It looks class.


  • Moderators, Computer Games Moderators Posts: 5,380 Mod ✭✭✭✭Optimus Prime


    Thanks guys, im happy with how its turned out so far. i couldnt resist temporarily adding the tunnel hull pieces to get a better idea of how it will look..

    5.jpg

    With the cockpit i just have to put two stickers on the archway above the back chairs, but first im gonna drill through the plastic arch and put a light in behind the sticker so the long white light continues across the back wall and around the side.

    After that, the big job, priming and re-painting every hull piece. ill weather it at the end when its all together.


  • Closed Accounts Posts: 16,391 ✭✭✭✭mikom


    Great thread so far.
    The improvements you've made are excellent, OP.


  • Registered Users Posts: 531 ✭✭✭biketard


    How are you getting on, OP?


  • Advertisement
  • Moderators, Computer Games Moderators Posts: 5,380 Mod ✭✭✭✭Optimus Prime


    Haven't done anything else yet other than gather parts. I've bought enough paint to respray the entire model, bought the required colours for the weathering etc and an airbrush. I need to get a compressor for the air brush though and they are expensive.

    I'm also holding off on doing too much because I'm planning on getting the attic converted soon so ill have a proper space to build it. I do have the lights now to finish the cockpit, so I'll do that this week. Though the company are releasing a new cockpit nose because they where not happy with the accuracy of the original.

    I'll update when I've made some progress, I haven't abandoned the thread, just haven't done anything new yet. Thanks.


  • Moderators, Computer Games Moderators Posts: 5,380 Mod ✭✭✭✭Optimus Prime


    Boring update.. but an update all the same.

    I couldnt do the side lights this weekend in the end, because the tiny leds i bought need 3v to power them and i only have a 9v battery case. So ive bought one off ebay and its on the way.

    In the meantime, i wired up 2 sets of 4 leds. these things are tiny, im talking grain of sugar size...

    7.jpg

    I cut two holes in the cockpit archway that corresponds to where the long light is.

    3.jpg

    4.jpg

    I cut and painted two bits of card, that im going to stick 4 leds on each one. these bits will then be stuck to the back of that archway, so the leds are facing into the back of the sticker (when its applied) to light up the bar light.

    5.jpg

    The idea is, the part red boxed here will be lit up when im done, with the stock cockpit only the back part is lit up. we will see what happens!

    8.jpg

    Ive also painted the inside of the hull pieces black. if you look back to my previous post with images of the cockpit lit up, you can see some light bleeding through the plastic at the top of the hull. these two coats of black inside should stop that, combined with the outside primer and base coats every panel is going to get.

    6.jpg

    Ive also decided im going to try to improve this "asteroid hit" mark on the underside of the cockpit hull piece. its looks brutal. im sure i can fix it using some milliput and simply push a stone out of my back garden garden into it while its soft, to give a more realistic look.

    2.jpg

    Sorry for the boring update, ill post back when i get the 3v battery holder for the side lights.


  • Registered Users Posts: 531 ✭✭✭biketard


    Not boring at all, op.


  • Moderators, Computer Games Moderators Posts: 5,380 Mod ✭✭✭✭Optimus Prime


    Made some progress, sort of.

    I filled in the "asteroid hit" hole with milliput.

    1.jpg

    I smoothed it out and put the hull lines in it with a knife after that photo.

    I then went out my back garden and found an appropriate sized "asteroid"

    21.jpg

    I then smashed that asteroid into the falcon.

    31.jpg

    Once thats dry ill sand it down on the edges to blend in with the hull, then once i prime and base coat that piece, ill add dirt and burn weathering and stuff to it. i think it will look a lot better than the original hole in the hull.

    Next i had a go at the side light. I think i got it, with a couple of issues i have to sort out.

    First issue, i cut out the slot in the arch too low on one piece. the bar light on the sticker didnt line up.

    So i filled it a bit using milliput and a blade. then sanded it when it was dry.

    41.jpg

    Next i put the supplied sticker on the archway. see that white line, the side of the sticker? I painted that black too after this photo just to match it up.

    51.jpg

    Then i stuck the little leds to a piece of card using blue tack as i was afraid using glue might damage them.

    61.jpg

    Making sure they work..

    71.jpg

    Put some cello tape over them to hold them in place

    11.jpg

    The i taped them to the back of the archway...

    At this point i noticed two small issues.

    1. The colour is warm white, it should be cool white to match the one at the back.

    2. The card is too thick, i cant close the hull correctly. Ill have to use something thinner like paper.

    So .. ill order some cool white leds, and use paper the next time and i should be sorted.

    Here is a quick pic of it lit up. you can see the hull isnt together right, the difference in colour doesn't really come across fully in this photo. Also i didnt really have the back panel light in properly so the back panel isnt lit up fully.

    9.jpg


  • Closed Accounts Posts: 33,733 ✭✭✭✭Myrddin


    Fantastic stuff, love this thread :)


  • Moderators, Computer Games Moderators Posts: 5,380 Mod ✭✭✭✭Optimus Prime


    Quick non update! I havent given up on this, im just at the stage where ive no room to do anything with the falcon in the house. My attic conversion is due to start in two weeks, so after that the updates will be flying in!

    Ive purchased a bunch of Bandai kits to practice painting.

    AT-ST
    R2D2 and R5D4
    C3P0
    Speeder Bike and Scout Trooper
    Y-Wing
    Stormtrooper
    Xwing

    Ill be doing the AT-ST first, i dont want to jump straight into the Falcon as its the biggest and most expensive. Ill show a few pics of how i get on with these here. at the same time ill be finishing off the lights in the falcon cockpit as ive purchased some more tiny leds.


  • Registered Users Posts: 2,853 ✭✭✭Brief_Lives


    Where do you load your images to,?? they seem to be blocked from my work.
    I will try and catch this thread at home, but with a baby, there's never the time...


  • Moderators, Computer Games Moderators Posts: 5,380 Mod ✭✭✭✭Optimus Prime


    They are hosted on a domain and web hosting i have, its just easier for me to upload them there and they dont expire. its actually blocked in my job too.


  • Banned (with Prison Access) Posts: 7,611 ✭✭✭david75


    Great work OP.

    Not to knock this kit but one of the reasons I didn't subscribe was you can get about three fine molds Falcons for the same price and that's the most accurate kit out there(depending on your stance on the mandible toe in issue)

    Anyways there's a guy building the FM falcon and he has an Instagram account.
    Worth a look for anyone making a Falcon
    http://instagram.com/modelkitstarwars


  • Advertisement
  • Moderators, Computer Games Moderators Posts: 5,380 Mod ✭✭✭✭Optimus Prime


    Thanks a lot I'm enjoying making it. The fine molds is great but it's way smaller than this which I guess is where the cost is. Plus the inside details on this are better I think. I see people arguing on the forums about how long a blast mark is or how wide a piece of detail on the hull is, but to be honest im not bothered by that, If it looks like the Falcon and my painting and weathering turns out ok,, then I'll be happy with it.


    david75 wrote: »
    Great work OP.

    Not to knock this kit but one of the reasons I didn't subscribe was you can get about three fine molds Falcons for the same price and that's the most accurate kit out there(depending on your stance on the mandible toe in issue)

    Anyways there's a guy building the FM falcon and he has an Instagram account.
    Worth a look for anyone making a Falcon
    http://instagram.com/modelkitstarwars


Advertisement