Advertisement
If you have a new account but are having problems posting or verifying your account, please email us on hello@boards.ie for help. Thanks :)
Hello all! Please ensure that you are posting a new thread or question in the appropriate forum. The Feedback forum is overwhelmed with questions that are having to be moved elsewhere. If you need help to verify your account contact hello@boards.ie
Please note that it is not permitted to have referral links posted in your signature. Keep these links contained in the appropriate forum. Thank you.

https://www.boards.ie/discussion/2055940817/signature-rules
Hi all,
Vanilla are planning an update to the site on April 24th (next Wednesday). It is a major PHP8 update which is expected to boost performance across the site. The site will be down from 7pm and it is expected to take about an hour to complete. We appreciate your patience during the update.
Thanks all.

Today I did something to my car (volume 2)

1313314316318319326

Comments

  • Registered Users Posts: 982 ✭✭✭BlakeS94


    I got onto Ford they won't have them untill start of January, hopefully I have the wrong parts it would all make sense then


  • Registered Users Posts: 982 ✭✭✭BlakeS94


    This is the bushing I have inside the bracket . I know there's a bit of space between the top of the bushing and the bracket, but even with that gap closed I don't think it would be flush with the bottom of the bracket, as you've stated Cass.

    So must be the wrong one? Will know for sure when I get the OEM ones from Ford. Maybe for bushings it's just best to go to main dealer and get them.


  • Moderators, Sports Moderators Posts: 28,453 Mod ✭✭✭✭Cass


    Thats a front bushing. Guaranteed. Its the same problem I had as described above.

    You say you have the right parts, just check that. My first attempt ended with disappointment but I got renewed hope when I realised I was trying the front bushing on the rear. As the front ARB is bigger and longer than the rear ARB, the clamp simply "slide" off the bushing meaning my attempts to hold it in place were not only futile, but would have ended in my taking it off.

    I only mention this because, exactly like you described above, I had the exact same problem in that the clamp kept coming off, of its own accord, and due to the front bushing being about 1/4"+ longer than the rear this "discrepancy" meant the bolts could not seat enough to make contact with the threads so I couldn't get the bolts started.

    Switch them to the proper rear ones and your fitment problems will disappear.

    Forum Charter - Useful Information - Photo thread: Hardware - Ranges by County - Hunting Laws/Important threads - Upcoming Events - RFDs by County

    If you see a problem post use the report post function. Click on the three dots on the post, select "FLAG" & let a Moderator deal with it.

    Moderators - Cass otmmyboy2 , CatMod - Shamboc , Admins - Beasty , mickeroo


  • Moderators, Sports Moderators Posts: 28,453 Mod ✭✭✭✭Cass


    Full list of suppliers and their codes for the rear bushes. Same but for the front. See if you can find the brand or code. Could be someone fitted, somehow, front bushes to the rear in the past or the code for Ford is unique and aftermarket bushes, while matching codes, are not the same part.

    Forum Charter - Useful Information - Photo thread: Hardware - Ranges by County - Hunting Laws/Important threads - Upcoming Events - RFDs by County

    If you see a problem post use the report post function. Click on the three dots on the post, select "FLAG" & let a Moderator deal with it.

    Moderators - Cass otmmyboy2 , CatMod - Shamboc , Admins - Beasty , mickeroo


  • Registered Users Posts: 982 ✭✭✭BlakeS94


    It does look like it's sticking out a fair bit. Even if you make up the difference in the gap between bushing and bracket it's still not flush if you try to visualise it.

    Really can't go by your reg on online parts sites. Even though part number matched up. It gives me renewed hope that I'm not completely useless at DIY.

    I reckon the bushes I removed were there from day 1, they were absolutely knackered, falling apart in my hands, no strength in them. I'll have a look at those links


  • Advertisement
  • Registered Users Posts: 982 ✭✭✭BlakeS94


    Neither the ford number 1581670

    Or the Moog number FD SB 13681

    are in the list of suppliers and numbers. They must be wrong.

    Listed Moog part is FD SB 10177, which is a 17mm bush


  • Moderators, Sports Moderators Posts: 28,453 Mod ✭✭✭✭Cass


    Regardless of part number the bit sticking out is exactly what I had when I tried the front on the rear. I ended using the chassis number to get the exact ones for my yoke because even the proper standard rear bushes don't work on mine. The guy in Ford said he never seen mine. They come with an Orange dot to mark my model. He only found it using the chassis number.


    Get the proper ones from Ford. The couple of extra Euro is worth the stress free fitment of them, as you can attest to.

    Forum Charter - Useful Information - Photo thread: Hardware - Ranges by County - Hunting Laws/Important threads - Upcoming Events - RFDs by County

    If you see a problem post use the report post function. Click on the three dots on the post, select "FLAG" & let a Moderator deal with it.

    Moderators - Cass otmmyboy2 , CatMod - Shamboc , Admins - Beasty , mickeroo


  • Registered Users Posts: 982 ✭✭✭BlakeS94


    When I rang they just asked for my Reg number and said they'll be in around 4th January, I presume a main dealer has a much more accurate parts system. I'll find out soon


  • Registered Users Posts: 982 ✭✭✭BlakeS94


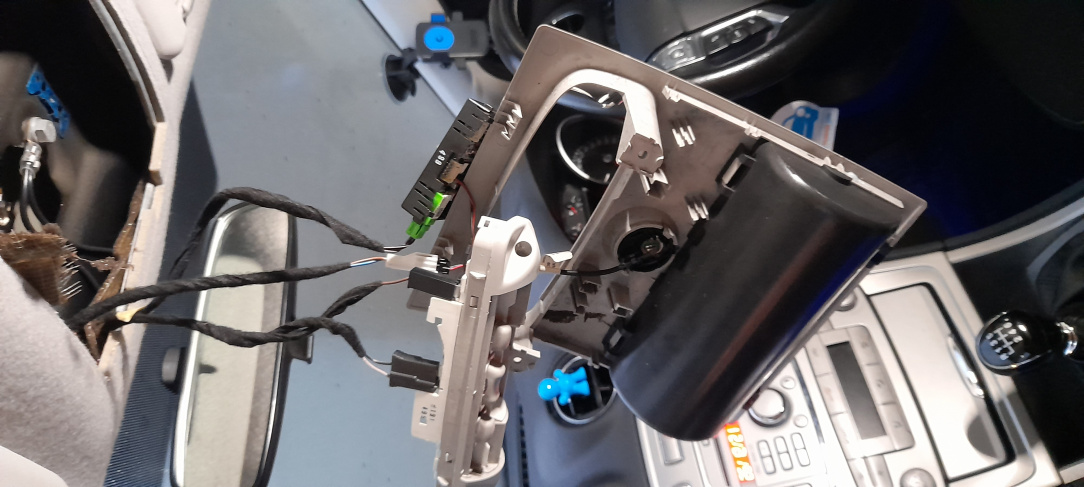
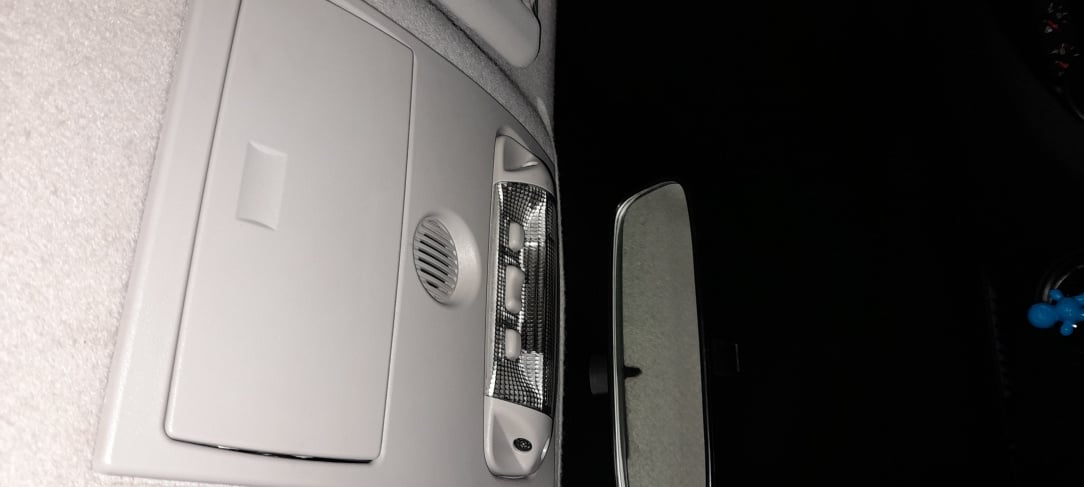
    A couple months ago I tried removing the sunglasses holder on my Mondeo, but the whole lot popped out.

    Some research showed that I'd have to remove the entire unit to put them back together as the spring had removed itself also. Knowing this was going a pain in the hole as there's a couple of layers that need to be aligned, including a razor sharp piece of metal sandwiched in between.

    The sunglasses holder has been left in my glovebox for a last few months so said I'd get around to it.

    Wasn't too bad of a job, just had to familiarise myself with all the clips and connectors, hardest part was getting the spring in properly and there's another circle piece with a short pin that goes through the holder and rides along a groove in the holder as its opened and closed.

    I didn't have to do much to get it back in because I removed it carefully enough that the different sections stayed where they were. So just ran the 2 torx bolts back up and all is well again.


  • Registered Users Posts: 1,803 ✭✭✭passatman86


    Done that job myself recently, just as much satisfaction to changing an engine lol


  • Advertisement
  • Registered Users Posts: 982 ✭✭✭BlakeS94


    There's a bit going on behind the sunglasses holder alright, I must have missed something because while it all works, when you press on the sunglasses holder it doesn't pop down. Kind of have to encourage and then it comes down fine. But I'm not going at it again so it can stay like that, I'll keep my sunglasses in the centre console lol


  • Registered Users Posts: 1,803 ✭✭✭passatman86


    Probably a spring ?

    The fact its closed is a win


  • Registered Users Posts: 982 ✭✭✭BlakeS94


    There's only one way the spring can go as there's a hook shape on one end of it that fits into the end of the glasses holder and won't go in any other way, then it slots out of a hole at the other end which keeps it under tension I believe. Maybe I just have the other circle bit not set up properly, either way. It's not coming apart again


  • Registered Users Posts: 2,525 ✭✭✭wandererz


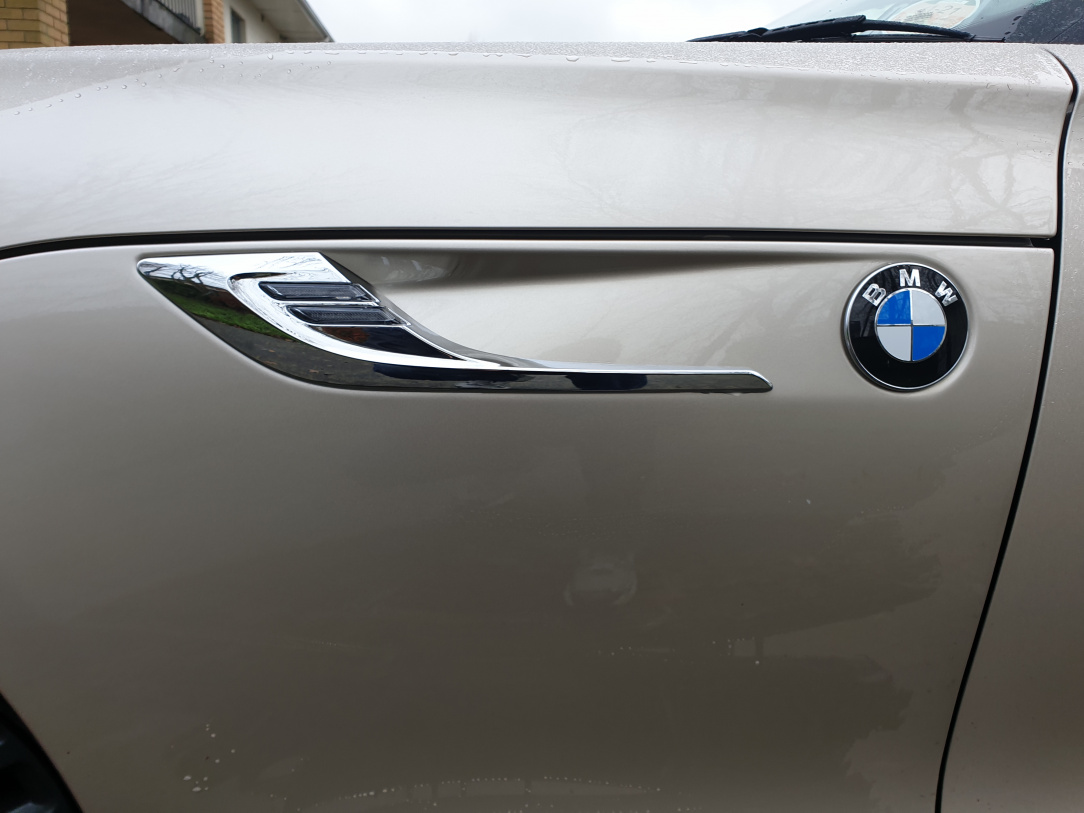
    Changed the side indicator lights from the standard milky white plastic type to LCI silver ones.

    Debadged by removing the S-Drive & engine size badges.


    Also installed a GPS tracker while I was at (Xmas gift).

    Can do vehicle tracking, geo fencing alerts, ignition on/off alert and a bunch more.


  • Registered Users Posts: 2,486 ✭✭✭Titzon Toast


    I cut a rotten section out my rear cill, just have to weld it now and I can start to WaxOyl all cavities next.


  • Registered Users Posts: 14,309 ✭✭✭✭wotzgoingon


    Wow that's a good fit. Never welded in my life but afaik the thinner the metal the harder it is especially if you are starting out.


  • Registered Users Posts: 2,486 ✭✭✭Titzon Toast


    So I've been told alright. I have a loads of bits of that metal that I'm gonna mess around with before I go near the car.

    It's something I've always wanted to learn how to do.


  • Registered Users Posts: 14,721 ✭✭✭✭CianRyan


    Are you use MMA, MIG or TIG?

    If you only have stick available, don't be tempted to use really thin rods because it's thin material, the smaller rods heat up very quickly and burn holes as a result, also much harder to keep a right arc with as they burn quicker.


    Loads of practice first, small sections and let them cool.


  • Registered Users Posts: 2,486 ✭✭✭Titzon Toast


    I'll be using a mig welder with flux core wire. They're pretty much idiot proof.


  • Registered Users Posts: 14,721 ✭✭✭✭CianRyan


    "Pretty much"!

    I haven't definitely seen some bad work done with MIG but yeah, it's the easiest to use by a long way.

    Again, small section and let it cool and you'll be fine.


  • Advertisement
  • Registered Users Posts: 2,486 ✭✭✭Titzon Toast


    I decided to delve a little deeper into the cills and rear arches.

    There was no point in doing half measures, I need to cut out all the rot and get it perfect or there's no point really.

    I'm going to cut the whole lip off and refab a piece for it as I go.

    All of the rust is on the rear quarters.


  • Registered Users Posts: 1,803 ✭✭✭passatman86


    @Titzon Toast a relation of mine has your exact car but in an auto. Do you think the auto would be an interesting drive at all - you hear anything about them


  • Registered Users Posts: 2,486 ✭✭✭Titzon Toast


    I've heard they can be a bit troublesome tbh.

    There seems to be loads of auto ones about though for some reason. Maybe that says a lot about the people that bought them new, lots of older people bought them at the time.


  • Registered Users Posts: 1,030 ✭✭✭nogoodnamesleft


    Visited home for the Christmas period. The first car was belonging to a family member who hit debris after storm Barra on the nearside damaging the wing mirror and cracking the alloy wheel. Subsequently found out after fitting the replacement wheel (which took some sourcing to match the other 3) the wing mirror arm was also damaged.

    Wing mirror cast alloy mounting frame was cracked. So also sourced a replacement for that. The colour coded mirror cap and mirror glass were undamaged.

    The job itself was simple enough to do and took only around 35mins to sort out. The door card had to be removed to allow access to the door module to allow the replacement to plug and play into it whilst the wing mirror was secured with 3 torx bolts (under the tweeter). Tested the mirror and indicator after and everything was working as it should before reattaching the door card.


  • Registered Users Posts: 1,030 ✭✭✭nogoodnamesleft


    The second car I was given between Christmas and new year was my fathers RAV4 Mk4 AWD (which I had imported a few years ago) as he wanted new disks and pads fitted all round. Toyota seem to have their OEM pads and their "value line", they both seem to be genuine Toyota parts but I couldn't establish as to why there was a cost difference between Toyota OEM and Toyota "value line" and to why the OEM is presumably better than the value line.

    When I did the rear disks and pads on my F10 with genuine BMW parts I noticed that they were Textar pads in the BMW box. Since its also a reputable brand I decided on that basis to get Textar disks and pads all round for the Toyota. Mister Auto were very efficient. Front and Rear disks and pads came in at approx 240EUR.

    The rear disks also have an inner brake shoe for the handbrake. Very little wear on those shoes and the mechanism was perfectly serviceable. Cleaned off the inner face with some brake cleaner and sandpaper to prevent run out. I also applied some specialist brake grease on the hub flange to make sure that disk doesnt bond to it for the next time they are changed.

    The Toyota disks also have a neat design feature in that the rear disks have a threaded hole to allow a bolt to be inserted to assist in removing a disk without the need of beating the hell out of it so it will push the disk off the hub as the threaded bolt is inserted. I also used some brake grease on the back of the pads and on the clips of the pads to prevent brake squeal. Proslip have a small set (which has 3 different brake greases for different applications which as pad, clip and pin).


    Front was pretty much the same although there was 3 shims on the front pads, 2 of which were reused as the inner most was replaced as it was included with the new pads.


  • Registered Users Posts: 2,486 ✭✭✭Titzon Toast


    I lucked out completely and managed to find complete patch panels made by a company in Poland for very reasonable money.

    They'll save me so much hassle instead trying to make them up myself.


    They're due to land in a week or two.


  • Registered Users Posts: 4,861 ✭✭✭fancy pigeon


    Well, here's a blast from the past... Directly related to all the way from the first post of this very thread, is the car that started my love of budget sleepers


    The 2 titans facing each other


    Magical. We'd spent a bit of time digging it out and cleaning it up. Still puts a huge smile on my face this car does, still started on the button, still intact with no rust.


    And since sold, for the 2nd time, for as some of you know I straight swapped an E39 535i to get this back. And still have no regrets about doing that


    I'll be working with the new owner who was absolutely thrilled with the car, priority is it's homebrew pump hasn't turned in over 6 years so I'll be pulling it apart and refurbishing it. Currently has a more street friendly pump with a 404 dizzy head, mated to an engine I found in a skip years ago


  • Registered Users Posts: 14,309 ✭✭✭✭wotzgoingon


    You swapped a 535i for that?


  • Registered Users Posts: 1,803 ✭✭✭passatman86


    Im sure some will think the same as you , but the temptation to get an old car back that you previously owned can big. Fancy pigeon had the bug it seems. I can appreciate the deal possibly favours the new bmw owner. But im guessing fancy pigeon is more happy than a pig in sh1t


  • Advertisement
  • Registered Users Posts: 982 ✭✭✭BlakeS94


    Hi Cass, I got the rear bushings from Ford today, they also have that orange mark on them but I thought that was only for the TXS model, mine is a basic Zetec, they look identical to the aftermarket ones I have, only difference being the ford ones are slightly softer rubber than the Moog ones I have, any thoughts?


Advertisement