Advertisement
If you have a new account but are having problems posting or verifying your account, please email us on hello@boards.ie for help. Thanks :)
Hello all! Please ensure that you are posting a new thread or question in the appropriate forum. The Feedback forum is overwhelmed with questions that are having to be moved elsewhere. If you need help to verify your account contact hello@boards.ie
Please note that it is not permitted to have referral links posted in your signature. Keep these links contained in the appropriate forum. Thank you.

https://www.boards.ie/discussion/2055940817/signature-rules
Hi there,
There is an issue with role permissions that is being worked on at the moment.
If you are having trouble with access or permissions on regional forums please post here to get access: https://www.boards.ie/discussion/2058365403/you-do-not-have-permission-for-that#latest

sanding headlight??

  • 19-09-2010 4:30pm
    #1
    Registered Users, Registered Users 2 Posts: 4,088 ✭✭✭


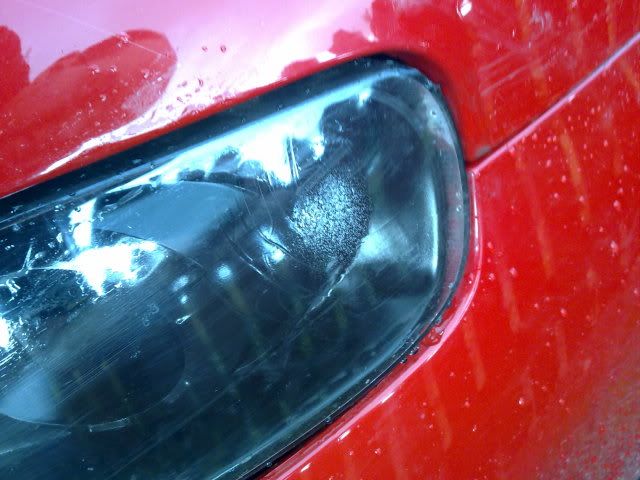
    ok so i had condinsation in my headlight the other day. i went about drying it with a heat gun but i kind of melted the plastic lens a little bit. could i use some really fine wet/dry sand paper to sand out where it rippled a little from the heat??


Comments

  • Registered Users, Registered Users 2 Posts: 1,014 ✭✭✭high horse


    Don't forget that it will have the same ripple on the inside of the lens so the light will be distorted even if the outside looks fine after sanding


  • Registered Users, Registered Users 2 Posts: 4,088 ✭✭✭sean1141


    i had the lights apart today and there is no ripple on the inside


  • Registered Users, Registered Users 2 Posts: 12,683 ✭✭✭✭Owen


    Snap a photo, post it up.


  • Registered Users, Registered Users 2 Posts: 1,611 ✭✭✭cgarrad


    Sand it flat, use 800 grit to get it smooth then use a mop on a drill to polish with t-cut. Loads of water and slow speed.

    I did it with a police light bar, it came up new.

    Great for headlights that have plastic lenses which have dulled due to uv light.


  • Registered Users, Registered Users 2 Posts: 4,088 ✭✭✭sean1141


    will get a pic 2moro.

    would 800 not be a bit rough??


  • Advertisement
  • Registered Users, Registered Users 2 Posts: 9,594 ✭✭✭tossy


    Sean recently sanded out a little scratch in one of my headlights on the new bus,i was with Neil who had a pad on a cordless drill and and some plastic compound from his magic box of tricks,i used wet and dry 1000 grit in between and we got the worst of the scratch out,i would have preferred 1200 grit but we had none handy.

    I miss glass headlights!


  • Registered Users, Registered Users 2 Posts: 1,160 ✭✭✭bmw535d


    this is what you need to do.


  • Registered Users, Registered Users 2 Posts: 4,088 ✭✭✭sean1141


    tossy wrote: »
    Sean recently sanded out a little scratch in one of my headlights on the new bus,i was with Neil who had a pad on a cordless drill and and some plastic compound from his magic box of tricks,i used wet and dry 1000 grit in between and we got the worst of the scratch out,i would have preferred 1200 grit but we had none handy.

    I miss glass headlights!

    sound shane. i might give it a try!
    i havent had glass headlights in a long time....:(


  • Registered Users, Registered Users 2 Posts: 8,720 ✭✭✭Hal1


    A combo of wet & dry followed by some T cutting should help rid any scratches.


  • Registered Users, Registered Users 2 Posts: 8,718 ✭✭✭Matt Simis


    Got to wonder on the recommendations of 800 and 1000 grit sandpaper! I was trying to get my old headlight looking as "fresh" as a new one on the opp side. Spent about 5hrs over a period of days working on this.

    I had upto 1500 W&D grit paper followed by Cutting Compound (actual "sandpaper in a tube" type cutting compound, not T Cut) and I would say that to get it right, you need 2000 grit minimum, others online who have done it were recommending 3000 grit. I couldnt find 2000, 3000 or Mequiers Plastic Care/Headlight in Halfords and doubt a motorfactors has any of it either. If you use 1000 grit as a max on your headlight you are going to be left with a cloudy mess.

    I did find Aluminium Polish though, which despite the name is whats also recommended.

    Finally, if you sand part of the headlight you will likely leave a different mark that still stands out. Does your headlight have a plastic protective layer over it (look real close, dont assume it doesnt)?


  • Advertisement
  • Registered Users, Registered Users 2 Posts: 4,088 ✭✭✭sean1141


    thanks for the replys guys. its more than a scratch im trying to get rid of..
    no protective layer...


  • Moderators, Science, Health & Environment Moderators, Society & Culture Moderators Posts: 60,217 Mod ✭✭✭✭Wibbs


    bmw535d wrote: »
    this is what you need to do.
    Cheaper option again is good oul fashioned Brasso metal polish. Same job, a fraction of the price.

    If it's beyond fine sandpaper and t-cut/meguiars/brasso and actual rippling has occurred then TBH I'd say head for a scrapyard sorry to say.

    Rejoice in the awareness of feeling stupid, for that’s how you end up learning new things. If you’re not aware you’re stupid, you probably are.


  • Closed Accounts Posts: 3,309 ✭✭✭VolvoMan


    I just use conventional T-Cut on plastic lens headlamps and find it works fine.


  • Registered Users, Registered Users 2 Posts: 9,661 ✭✭✭Voodoomelon


    Where's the best place to get one of those pads above that you can attach to a drill?


  • Registered Users, Registered Users 2 Posts: 19,885 ✭✭✭✭MetzgerMeister


    Where's the best place to get one of those pads above that you can attach to a drill?

    www.detailer.ie

    Or contact Seperate on here.


  • Closed Accounts Posts: 18 frans crash repairs


    I'd try 2000 paper wet, then a good cutting compound like G6, for headlamps I wouldn't bother with a buffing head if you haven't got one, just rub it by hand.


  • Registered Users, Registered Users 2 Posts: 4,088 ✭✭✭sean1141


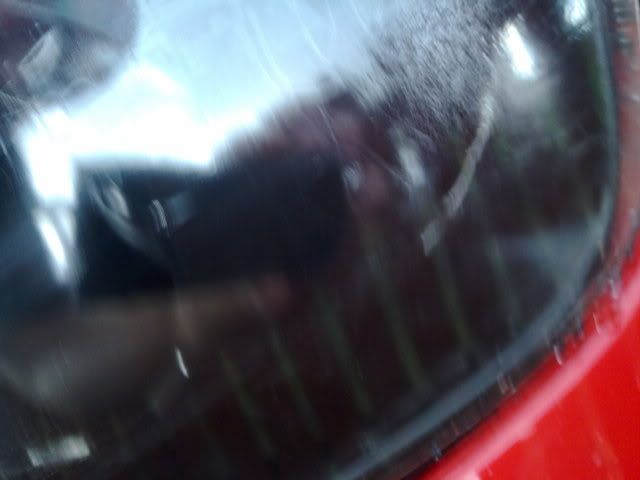
    ok here 8is the damage. cam phone pics so not the best..
    22092010012.jpg
    22092010011.jpg


Advertisement