Advertisement
If you have a new account but are having problems posting or verifying your account, please email us on hello@boards.ie for help. Thanks :)
Hello all! Please ensure that you are posting a new thread or question in the appropriate forum. The Feedback forum is overwhelmed with questions that are having to be moved elsewhere. If you need help to verify your account contact hello@boards.ie
Hi all,
Vanilla are planning an update to the site on April 24th (next Wednesday). It is a major PHP8 update which is expected to boost performance across the site. The site will be down from 7pm and it is expected to take about an hour to complete. We appreciate your patience during the update.
Thanks all.

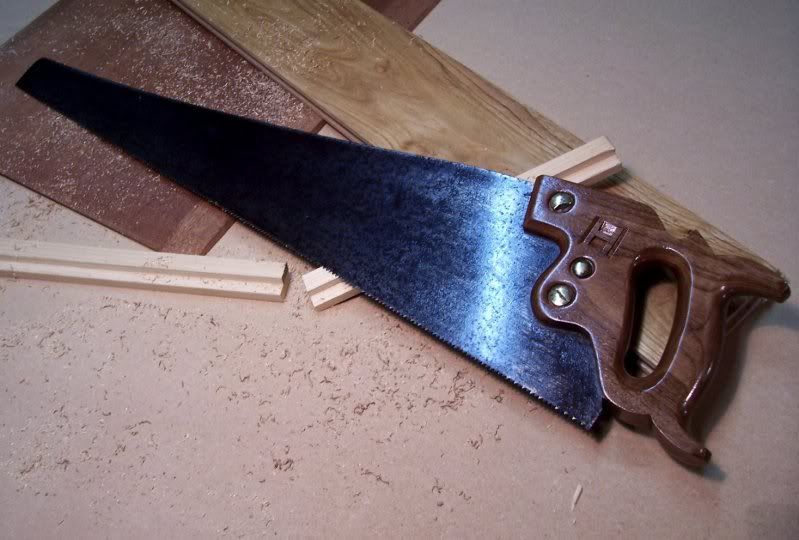
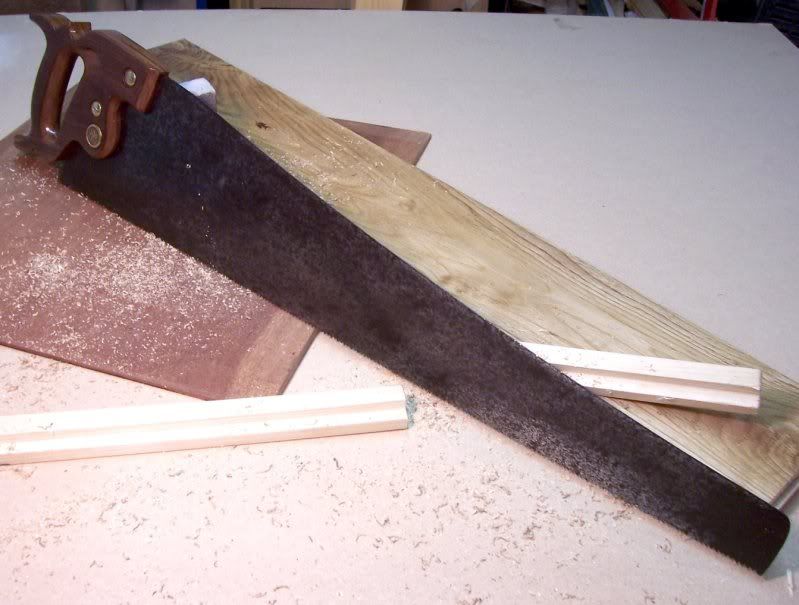
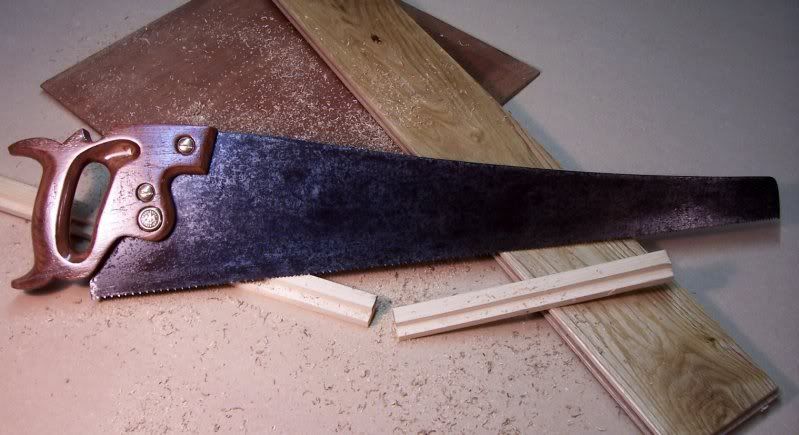
A labour of love - bringing an old saw back to life.

  • 18-03-2010 1:05am
    #1
    Registered Users Posts: 4,504 ✭✭✭


    Posted this over on another woodwork forum but thought I'd throw it in here too to let you guys have a gawk! Dont worry, I love ye all equally! :p


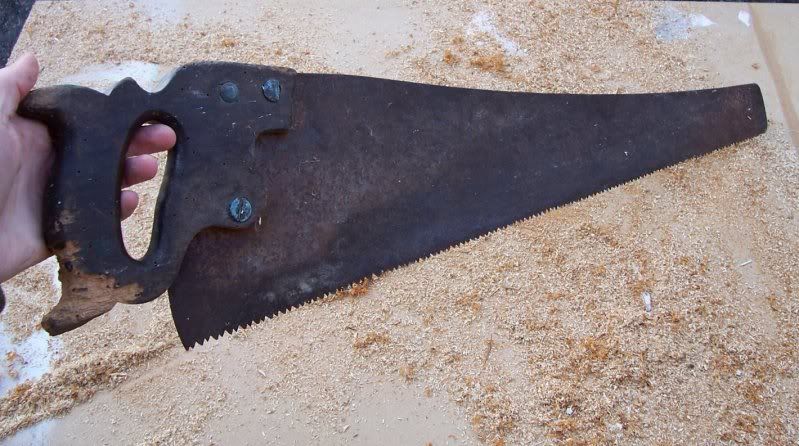
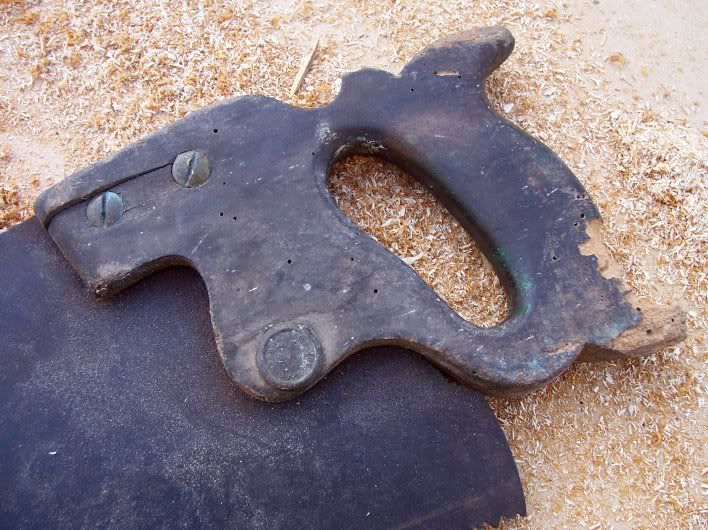
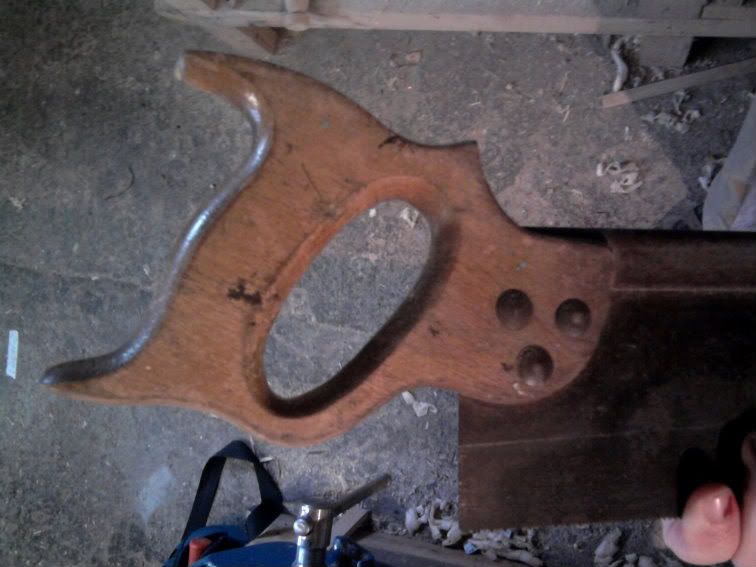
    Ok, so I recieved an old 'Warranted Superior' handsaw (26" blade, approx 7tpi) off a rahter elderly neighbour of mine some years back. The saw belonged to her father who died many many years back, meaning that this saw is at least a good 80 year old, at least!

    The saw had been hanging in the shop for years purely as an ornament, I'd never considered doing anything with it, only on the odd occassion, but just one look at it; the badly cut and shaped teeth, the small crack in the blade, the rust and the woodworm infested handle were enough to ensure the saw went back up on the wall fairly promptly!

    Recently however with my new found interest in old handsaws and sharpening I began to look at this saw in a different light, and instead of thinking why, I thought 'why not!!' :P.

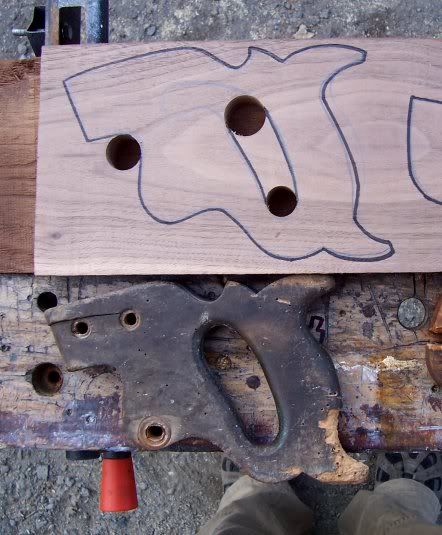
    ns15.jpg

    ns13.jpg

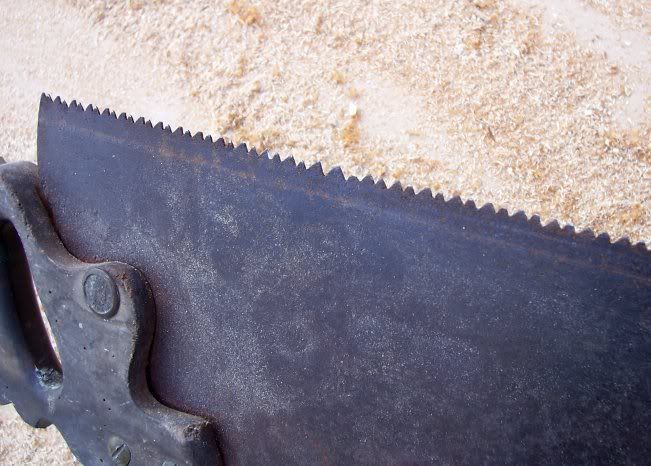
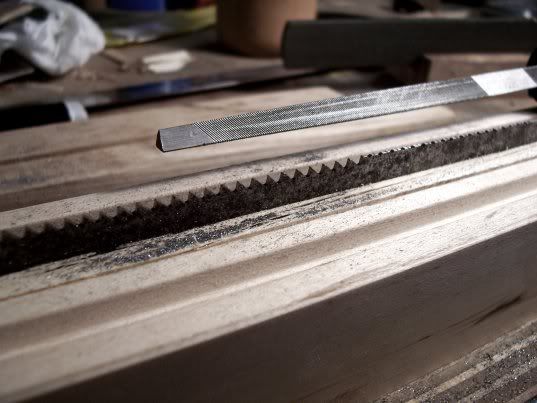
    As mentioned the teeth were in a fair ol' state from years of poor sharpening. They were different sizes, different angles, different height.....this, combined with a small crack in the blade meant that they'd have to go! 'Go' as in, clean off, right back to a blank blade!

    ns14.jpg

    Having taken the handle off (for the last time ever!) the blade was given a good clean down to remove the surface rust, going down through the grades of paper on a wood block, I got it back to a fairly resonable level, there was some light pitting however, but it cleaned up nice enough.


    saw2n.jpg

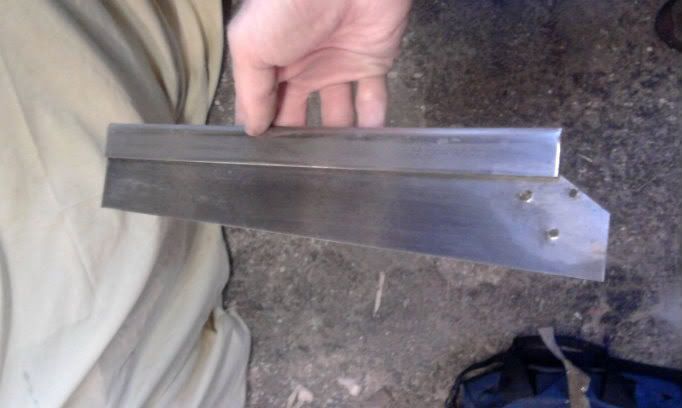
    Then, I had the brainwave of making the below contraption to grind the teeth down, but, as you can read in the below thread this caused a big problem! The solution, a stainless steel cutting disc and in a flast I'd taken a nice clean, straight cut off the blade removing the teeth and going beyond the small crack! Time to cut the teeth!
    http://www.ukworkshop.co.uk/forums/made-a-boo-boo-restoring-old-saw-t40051.html

    I decided to try make this one an 8TPI crosscut saw as I have a couple of rippers, so I had no use for another.

    teeth.jpg


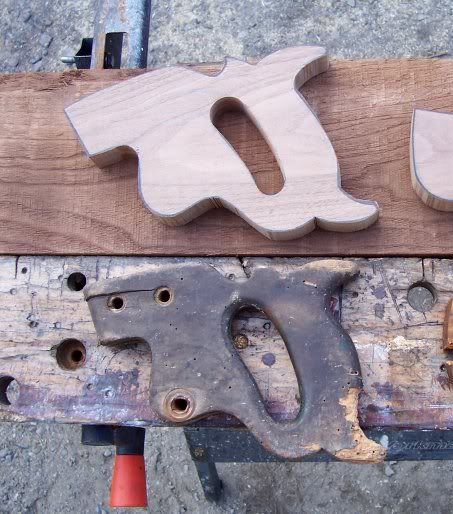
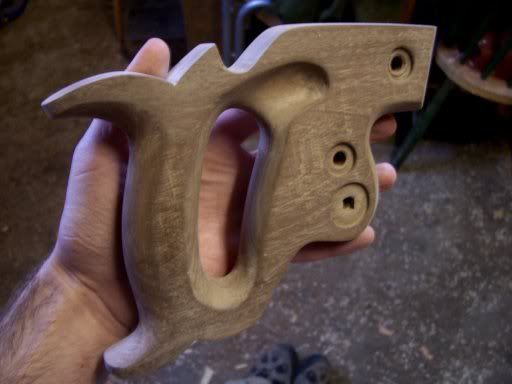
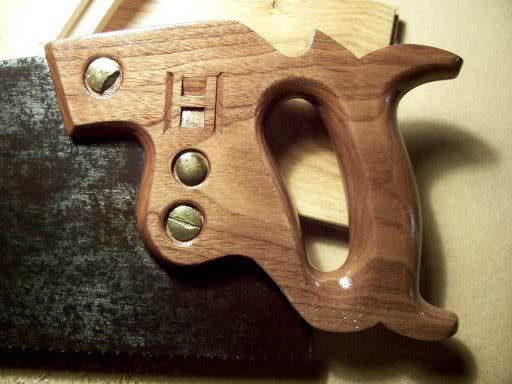
    With the teeth cut I then focused on cutting and shaping a new handle. I didnt go crazy with this step, just kept the same profile and curves basically as the original, just making the grip section a little smaller for my hand and adding a recessed area for my right index finger. The grip was made from a piece of walnut.

    ns10.jpg

    ns11.jpg

    ns3.jpg

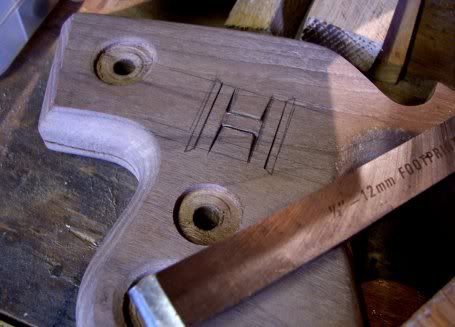
    The grip was shaped using only a set of rough shaping files and then sanded down, through the grades. Then, time to add my mark!

    ns12.jpg

    When she was fully sanded she recieved several coats of shellac and was matched up to the blade and securely fitted!


«1

Comments

  • Registered Users Posts: 4,504 ✭✭✭SpitfireIV


    Was it worth all the bother?! You decide!

    ns1.jpg

    ns2.jpg

    ns6.jpg

    ns7.jpg

    ns8.jpg

    ns9.jpg
    (The teeth need to be finished off, thus far they are only shaped and set)

    Me, personally, I think it was! I was smiling like a chesire cat when I fitted that handle and tried her out on a piece of wood!! I had brough this saw back into useable condition again! And back to such a state that hopefully it can be used in my lifetime and still be around long after I've kicked the bucket! :P. I know I could have picked one up for a few quid, a decent one and saved myself some bother, but wheres the satisfaction in that?! I'm damn happy with myself! :D


  • Registered Users Posts: 1,136 ✭✭✭del88


    I love it......now imagine what you can make with it .....don't let it finish now...that saw needs to make something beautiful...

    I have 2 old sandvik somewhere...must find them.....


  • Moderators, Home & Garden Moderators Posts: 5,057 Mod ✭✭✭✭kadman


    Labour of love, definitely worth it:)

    kadman


  • Registered Users Posts: 21,418 ✭✭✭✭Alun


    Very nice. It remonds me of an old saw like that that my dad had that had been sharpened a good few times and had become quite thin and flexible. He used to play the saw (with a violin bow) and that saw was his favourite, mainly because it was so flexible and had a much better tone than modern saws. So, maybe if it doesn't perform as a saw, you could turn your hand to a musical career with it instead :)


  • Registered Users Posts: 471 ✭✭aerosol


    Fair play Croppy,well worth it:D


  • Advertisement
  • Registered Users Posts: 2,361 ✭✭✭jack of all


    Great work, I thought your jig was a very clever idea. I'm hoping to pick up some old tools myself this weekend, if I find anything interesting I may start another thread of my own.


  • Registered Users Posts: 3,695 ✭✭✭galwaydude18


    Definetly a labour of love that has been well worth it! Congrats on getting to look so well! God I love that jig you made to grind the teeth off. Very impressive way of doing the job!


  • Registered Users Posts: 4,504 ✭✭✭SpitfireIV


    Cheers guys! :)

    This one is a cutter Alun, although she does give a nice 'ring' when you bend the tap and tap it :P

    JOA, you heading to a car boot by any chance? :P


    I have another handle thats almost finished for a tenon saw, I'll throw up a few pics of that when I have it done.


  • Moderators, Science, Health & Environment Moderators, Society & Culture Moderators Posts: 60,071 Mod ✭✭✭✭Wibbs


    Really lovely work that. Kudos

    Rejoice in the awareness of feeling stupid, for that’s how you end up learning new things. If you’re not aware you’re stupid, you probably are.


  • Registered Users Posts: 1,464 ✭✭✭Double Barrel


    I'm damn happy with myself! :D

    As you should be CB. ;)


  • Advertisement
  • Registered Users Posts: 4,504 ✭✭✭SpitfireIV


    Wibbs wrote: »
    Really lovely work that. Kudos
    As you should be CB. ;)

    Danke Wibbs and Double Barrell :)


  • Registered Users Posts: 4,504 ✭✭✭SpitfireIV


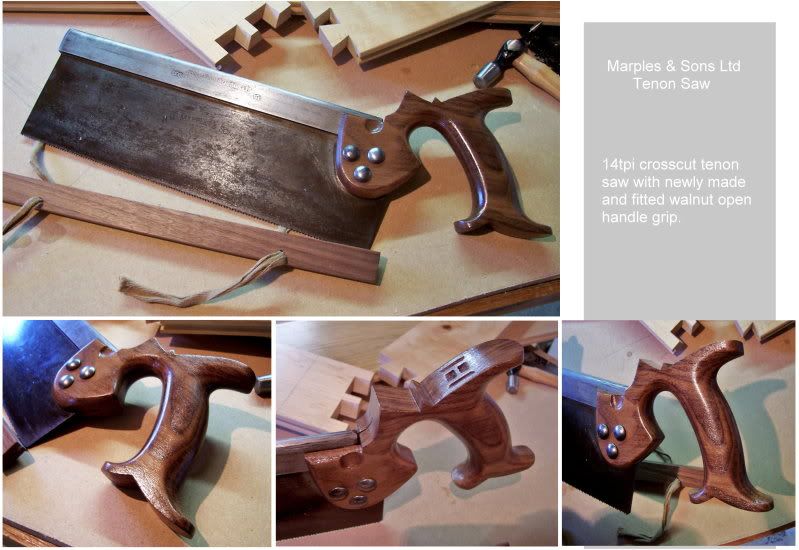
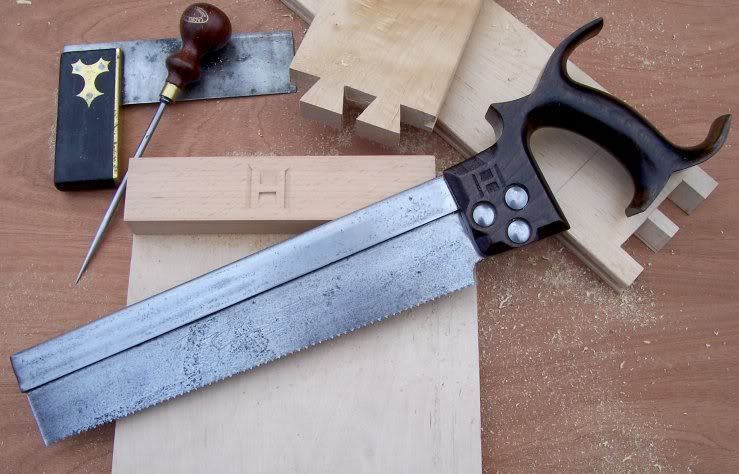
    Here's another handle I recently finished, again, made of walnut. This is a €1.50 Marples & Sons Ltd 14tpi tenon saw that I picked up at a car boot. Although the original handle was solid, it had a few woodworm holes and was looking a little tired, so, I watched to make something that was a little more personal! :)

    The blade has a fair bit of staining, but no rust! I'm reluctant to use sandpaper, wirewool etc as the blade has text printed on it that I'd like to try save.

    marplestenonsaw.jpg


  • Registered Users Posts: 4,504 ✭✭✭SpitfireIV


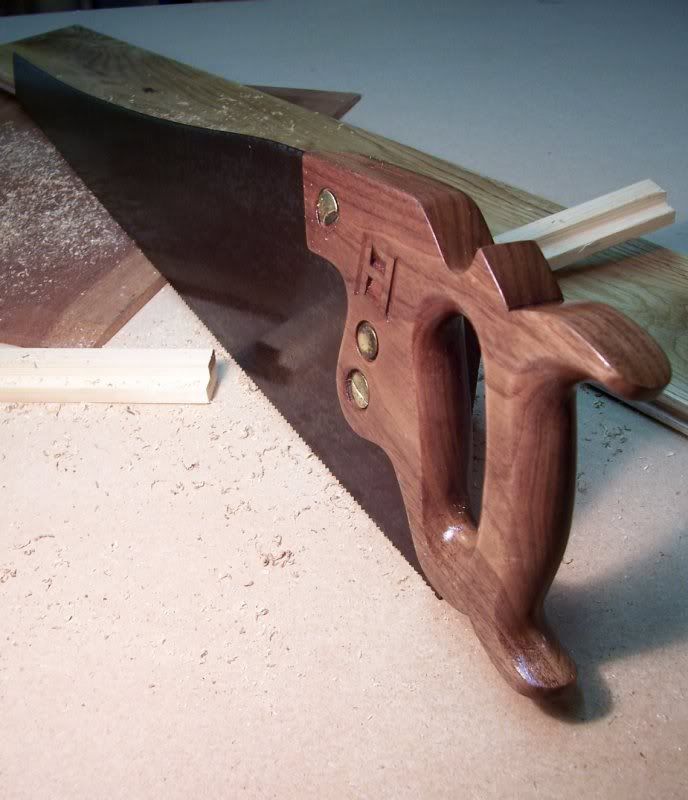
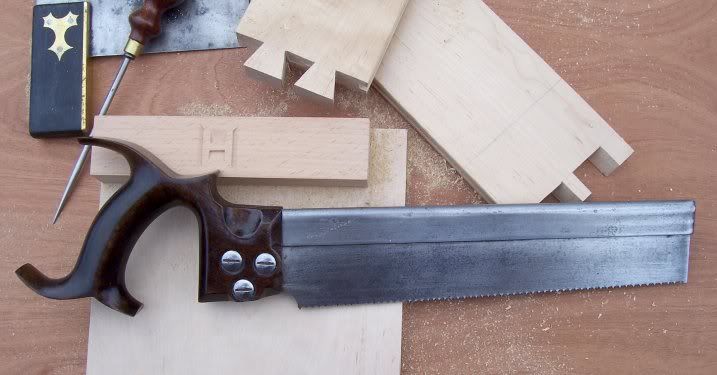
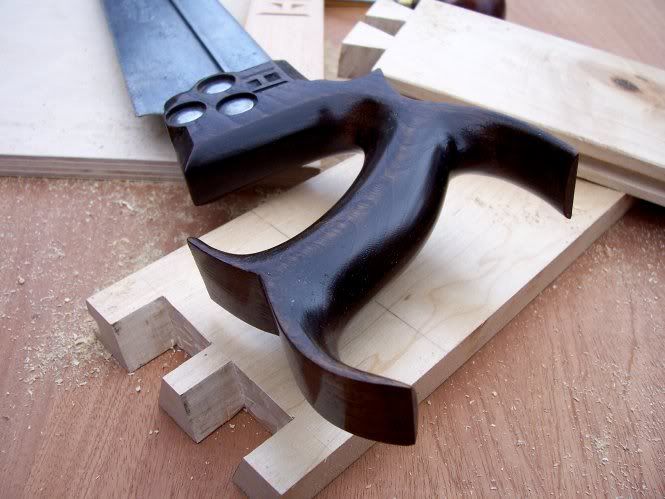
    Another saw given a new lease of life! :p I'll throw up a few more pics of this at a later date. Basically what I did was chop down an old tenon saw I got (similar to the one I posted above) made a new walnut handle (which was stained darker and polished) and yes, I know, those fancy little bits will go flying when I drop it! But they look nice and I couldnt resist! :D

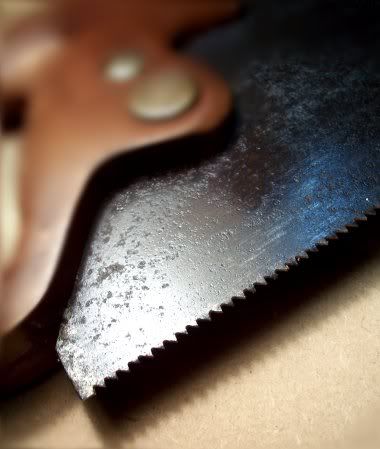
    It has 13 TPI and is configured as a cross cut, its just a small little saw for light/fine work, sawing the shoulders of tenons etc. I even gave engraving a go on this one, ie the blade.

    30082_392200522625_188150137625_3813234_4223375_n.jpg
    (oh and in the pic one of the bolts isnt pushed in fully, thats why it looks a little odd :P)


  • Moderators, Science, Health & Environment Moderators, Society & Culture Moderators Posts: 60,071 Mod ✭✭✭✭Wibbs


    Seriously nice work sir. Great theme and even better to see old tools brought back to life in a better way than they ever had when new.

    Rejoice in the awareness of feeling stupid, for that’s how you end up learning new things. If you’re not aware you’re stupid, you probably are.


  • Registered Users Posts: 3,695 ✭✭✭galwaydude18


    Nice work there croppyboy! You will be sharpening your TCT blades for your table saw next...


  • Registered Users Posts: 4,504 ✭✭✭SpitfireIV


    Cheers guys!

    Thought I'd update you on the last saw shown, been finished a while now so I figured I'd get a few pics up.

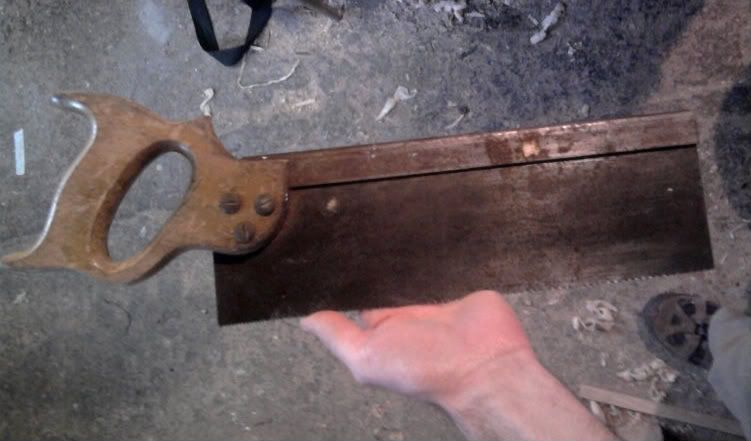
    She started out like as a €1.50 car boot sale buy, no makers name tenon saw. I'd reckon C.70's/80's. Faux screw riveted handle and a steel back.

    ssaw4.jpg

    ssaw6.jpg

    As you can see, nothing fancy about the handle, so, with the rivets popped that went and the blade was cut down and cleaned back.

    ssaw7.jpg


    A number of hours (perhaps even days :P) later I emerge from the workshop, covered in walnut dust, smelling of shellac and with grazes on my fingers from cutting, sharpening and setting each of the teeth (13 points per inch) but it was worth it! :D

    ssaw2.jpg

    ssaw1.jpg

    ssaw3.jpg

    A nice little hand saw for doing fine work, like chopping the shoulders on tenons etc. Yeah, I know, those fancy little horns will be the first thing to go when I drop it, but, what the heck!

    Now, must find myself another old saw to keep me busy! Oh, whats this.......

    32062_397930007625_188150137625_3930196_5734860_n.jpg

    :D:D


    Edit:

    I really need to get me one of these machines!!!! I feel ill watching this to think of the sheer amount of hours I've spent stooped over the saws marking out and filing each tooth!


  • Registered Users Posts: 226 ✭✭ennisa


    Croppy that's a lovely job. Where would you recommend somebody starts with sharpening and setting your own saws? I have your average impulse hardened saw but would like to get some old disstons or something of that era and file them for rip and crosscut and be able to keep them in good working order.


  • Registered Users Posts: 21,418 ✭✭✭✭Alun


    My late father who was a woodwork teacher all of his life, had a machine that would sharpen and set saw teeth more or less automatically. I can't for the life of me remember who made it, and I imagine it wasn't cheap but for him it was well worth having, given the rough time the saws were given in that environment.


  • Registered Users Posts: 2,361 ✭✭✭jack of all


    I picked up an old ripsaw recently and want to give it the "treatment". It's not a special saw- Tyzack & Co 1917, handle is rotten and the split nuts are steel. Anyone know where a set of brass split nuts could be found or bought?


  • Registered Users Posts: 378 ✭✭Fingalian


  • Advertisement
  • Registered Users Posts: 2,361 ✭✭✭jack of all


    Thanks Fingalian; I had seen those ones, but they are a bit pricey for my saw, I think.


  • Registered Users Posts: 4,504 ✭✭✭SpitfireIV


    Looking forward to see this one JOA :). Are you going to resharpen/set the teeth yourself? As regards the bolts, maybe you might be able to pick up a cheap saw on e-bay, one with a rusty blade or such that you might be able to salvage the bolts from.


  • Registered Users Posts: 2,361 ✭✭✭jack of all


    Thanks Croppyboy, I'll post a shot later this week of the before stage. I'll use the existing steel fixings for now, might pick up a better set again. I'm using a salvaged piece of brazilian mahogany (pub drinks table!) for the handle. This saw is pretty average so I don't want to spend any money on it. I'll try and do the teeth myself; I have had reasonable success with some tenon saws in the past and the crosscut pattern is the easiest I suppose.


  • Registered Users Posts: 226 ✭✭ennisa


    JOA,
    I would have thought that the rip pattern would be the easiest. not having any fleam etc...

    keep us posted.


  • Registered Users Posts: 2,361 ✭✭✭jack of all


    Sorry ennisa, I meant to write "rip cut" of course. I haven't been able to do a lot on this project since then, I've just cleaned up the blade and roughly cut out the handle shape with a coping saw- oh for a bandsaw! I'm trying to finish a simple piece of bedroom furniture for the house at the moment; I hope to get back to the saw very soon!


  • Registered Users Posts: 4,504 ✭✭✭SpitfireIV


    Looking good JAO!

    How are you planning on shaping the handle? I tried one with just a round over bit on the router but it didnt give me enough 'roundness', if you know what I mean, it still had flats on the grip area, I wanted something a bit softer looking. A set of rifflers, and a good thick glove did the trick nicely and let me play with the curves etc with more freedom than you'd get with a router, chisels, sandpaper etc.

    http://www.rutlands.co.uk/hand-tools/carving/files-&-rasps/DKRV16/coarse-pattern-riffler-set---8-piece

    Are you going to clean the blade or has it got text on it??


  • Registered Users Posts: 4,504 ✭✭✭SpitfireIV


    ennisa wrote: »
    Croppy that's a lovely job. Where would you recommend somebody starts with sharpening and setting your own saws? I have your average impulse hardened saw but would like to get some old disstons or something of that era and file them for rip and crosscut and be able to keep them in good working order.

    Feck, sorry Ennisa, just seen that post now! :(

    To be honest I just read a few quick 'how to' guides on the net, but as I'm sure you know yourself the best way is to try it, see how it goes and learn by doing. Things can seem simple on paper and prove far more difficult in reality.

    My kit comprises of:
    misc627.view01.jpg
    An eclipse No.77 saw set, can be got on e-bay for £5-£10

    A large, flat files and two triangular files 3 and 6mm

    A home made jig for holding the flat file as below for jointing the teeth if necessary prior to reshaping/sharpening.
    Fig-89-Jointing-a-Saw.jpg

    And a saw vice for holding the saw secure while sharpening, you can make one of these up easily enough with just a few pieces of boards and laths.

    And a bucket load of patience!! :P


  • Registered Users Posts: 2,361 ✭✭✭jack of all


    No writing as such on the blade only the makers name stamped: "Tyzack & Co 1917". That pic is after cleaning the blade (it was a lot worse believe me). I may give it more attention if the handle turns out well! I'm going to use some coarse files and rasps for shaping, plus lots of sandpaper. I've to make up a rough saw vice too.


  • Registered Users Posts: 4,504 ✭✭✭SpitfireIV


    Got me another nice handsaw here in wee 'norn iron' :p. £3 for a 26" skew back, 8tpi cross cut in little used, if a little rusty condition. Handle is tired, but sound and the blade has a lot of light surface rust, but an etching underneath! ;)

    Pics and clean up to follow!;)


  • Advertisement
  • Registered Users Posts: 4,504 ✭✭✭SpitfireIV


    Heres a pic of the latest acquisitions, a 'CAMDEN' 26" 7tpi (thought it was 8, woops) crosscut saw with 'Warrented Superior' medallion. Cant find much info on the saw maker/retailer. There is no evidence of a CAMDEN as a maker, although I've been told this could have been a retailers mark.

    saw.jpg
    Clean up pics to follow.


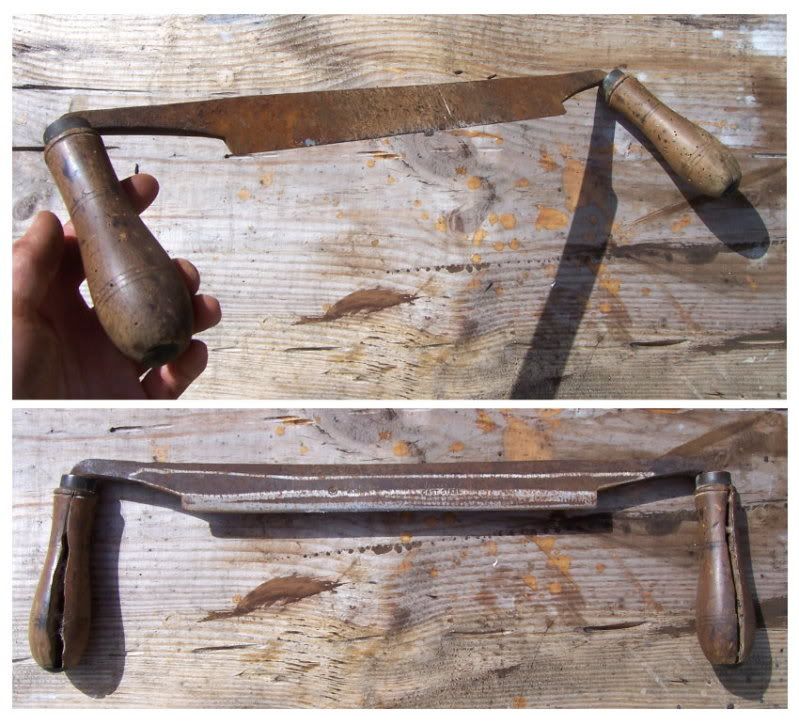
    Bought on same day the same day also, a 'Mathieson & Son' draw knife, yeah I know, I never heard of them either! ;). As you can see the handles are in rag order and are gonna need replacing. Stay tuned.

    drawknife.jpg


Advertisement